
Sometimes the export window is not showing up when you try to export a project in Premiere Pro. This isn’t very fun, especially if you have spent hours editing and just want to finish a project.
Fortunately, there are easy ways to fix the Premiere export window not showing. We have compiled a list of 7 methods to try below. They are ordered from the most common fixes requiring little hustle to the more time-consuming methods.
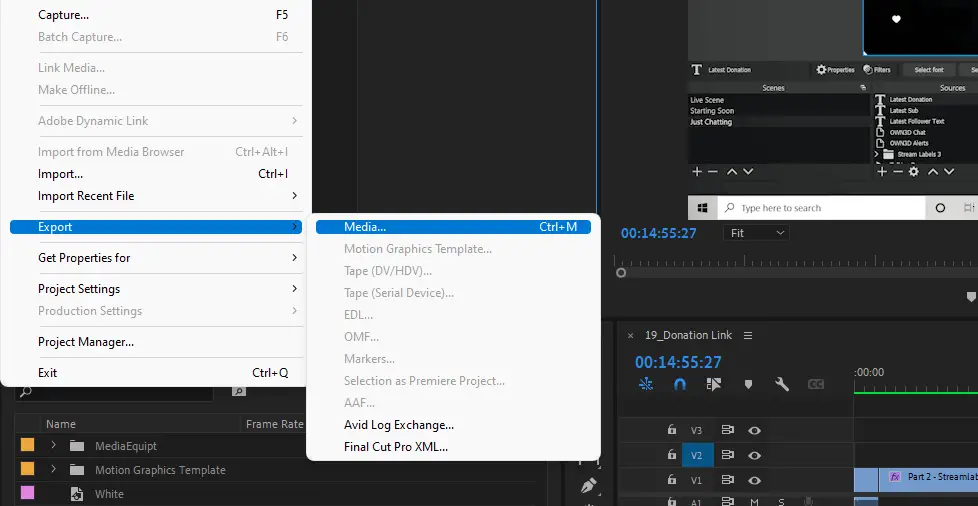
How to Make the Export Window Appear Again in Premiere
We will assume you have already rendered the project correctly (it shows a green bar throughout the project in the timeline) and that you have tried restarting the program. Now, without further a due, let’s jump into this tutorial.
Method 1: Make Sure Your Timeline Panel is Selected
This first fix is super easy and by far the most common solution.
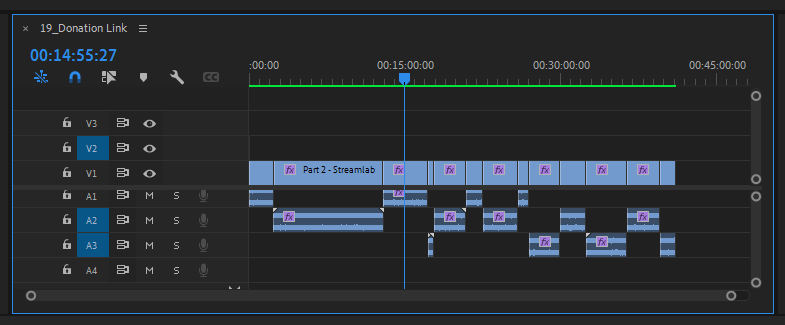
You have to ensure the sequence timeline panel is selected, so its border turns blue. Then try hitting export.
In the example above, the effects panel is selected, and when I press export, the window does not show up. You might not notice it initially, but the effects panel has a blue border, indicating it’s selected. Easy to miss, right?
The fix? Just click on the timeline panel, and a blue border will appear around it. It’s an easy miss as you usually don’t pay attention to these borders. Although, once you know this tip, it is an effortless fix.
Method 2: Select all Clips on Timeline
The second method is to select all clips on your timeline and then try exporting.
The shortcut key is ‘Ctrl + A’ on PC or ‘Command + A’ on macOS to select the whole timeline.
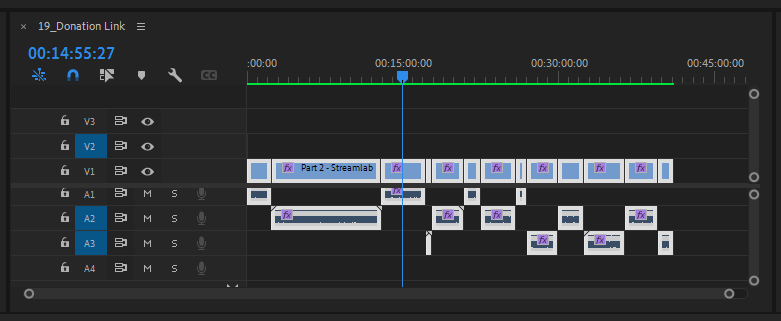
Once everything is selected, hit export, and hopefully, the export panel will appear.
Method 3: Resetting Your Workspace
If both of the above methods did not work, the problem might lie in any changes you made to your workspace or Premiere bugging out. In that case, you will want to reset your current workspace.
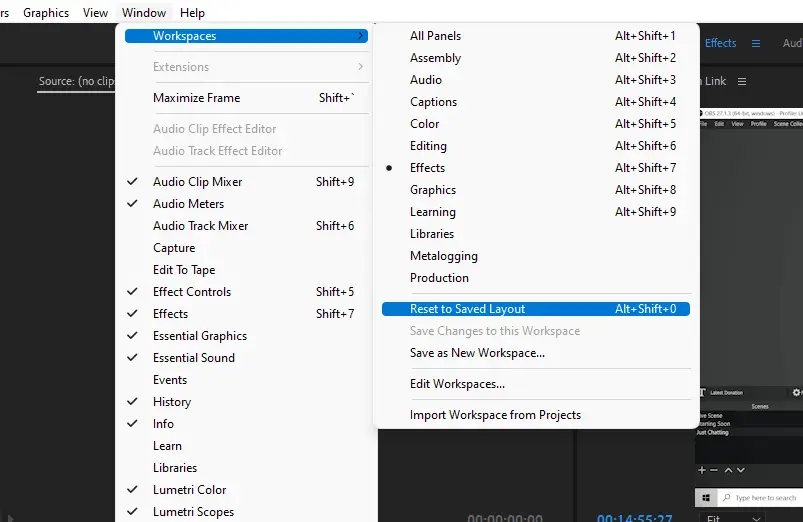
Go to ‘Window’ > ‘Workspaces‘ > ‘Reset to Saved Layout,’ and it should go back to the default editing workspace.
Then select your sequence timeline as in method one and hit export.
Method 4: Rerender Your Project
If the Premiere export window is still not showing, you might be having rendering problems. Even though the whole project might be rendered (all the clips are green in the timeline), you can re-render your project and try again.
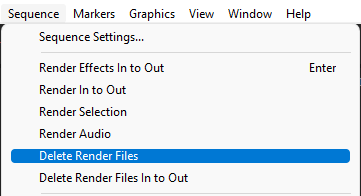
To re-render a project, first set an In and Out mark for the section in your sequence that you want to re-render. Then go to ‘Sequence’ > ‘Delete Render Files.’
Now the clips should have disconnected from the first render file. You will see a red or yellow bar above them in the timeline. To make a new render, go to ‘Sequence’ > ‘Render Files In to Out.’
Then, try exporting your project again. Hopefully, it did the trick!
Method 5: Copy and Paste to New Project File
If you still can’t export your video, we might be looking at a problem with that particular project file.
In that case, copy your whole timeline. ‘Ctrl + A’ or ‘Command + A’ on macOS to select the entire timeline. Then press Ctrl + C or ‘Command’ + C on macOS to copy the files.
Create a new project file and paste the whole timeline. Remember to render it again. It can be very annoying to have to do this, especially for a large project, but it might be the easiest solution. Then with any luck, you should be able to export your video correctly.
Method 6: Reset Preferences
Have you gotten to this point without success? It might be safe to say the issue is across all of your projects in Premiere or with the clips themselves, as copying to a new project did not work.
This fix involves resetting your Premiere Preferences. This does not affect your saved project files, so don’t worry. All it does is that it trashes all preferences settings made and resets the program to its factory defaults.
Resetting your preferences means that you will lose all customizations you have done to Premiere since you started using the program. You would lose the interface brightness, default length or transitions, label colors, audio hardware settings, etc.
While annoying, it might be worth trying to resolve the export issues.
To reset your preferences, press and hold ‘Alt’ (on Windows) or ‘Option’ (on Mac OS) while launching Premiere Pro. You can release the keys after the splash screen appears.
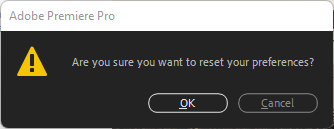
After a few seconds, a window will ask you, “Are you sure you want to reset your preferences?”. Click on ‘Ok.’
Next, launch Premiere Pro and check if you can see the list of recent projects on the welcome screen. If you can’t, that means the reset was successful!
The last step is, of course, to try exporting your project.
Method 7: Update Your Software
Finally, it might be good to update Premiere Pro if you are still experiencing issues.
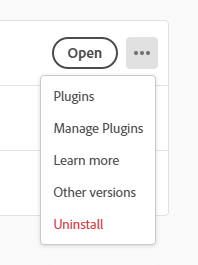
Open up creative cloud and make sure the latest version of Premiere Pro is installed. The easiest way is to click on the menu icon (3 dots) for Premiere and go to ‘Other Versions.’
Likewise, you should update your operating system as that can also be causing the issue.
Other Premiere Exporting Issues
You might also be experiencing other exporting issues, where the exporting panel appears but gets stuck, or you have a problem rendering your project.
In that case, these problems probably won’t get resolved with the methods above. Instead, we recommend you check out these articles to help you out:
In Conclusion
Hopefully, the export window in Premiere showed up again! If the problem persists, you can always contact Adobe support or scan through their FAQ forums.
We highly recommend you go through the list of fixes in order. We have ordered them in order of hustle, so you don’t have to spend a ton of work on an issue that could have been fixed in two seconds.
A summary: To fix the Premiere export window not showing, try the following:
- Make sure the timeline panel is selected when you press ‘Export.’
- Select all clips on the timeline before exporting.
- Reset your workspace.
- Re-render your project and then export.
- Copy and paste the timeline to a new project file.
- Reset Preferences in Premiere.
- Update Premiere Pro and your OS system.
Finally, check out our other Premiere Pro guides if you found this tutorial helpful. We really appreciate it!