

There is nothing more annoying than a slow playback and lousy performance in Resolve when editing. It hampers creativity and your workflow. So in this article, we will give our tips to stop DaVinci Resolve from lagging and create a smoother editing experience.
Why Resolve Playback Lags
Any professional video editor will require a lot of power and resources from your computer. This is even more true when working with larger video files in formats like 4k or RAW. Other compressed files like ‘H.264’ or ‘H.265’ are not designed for editing but rather for delivery and can also cause frame drops.
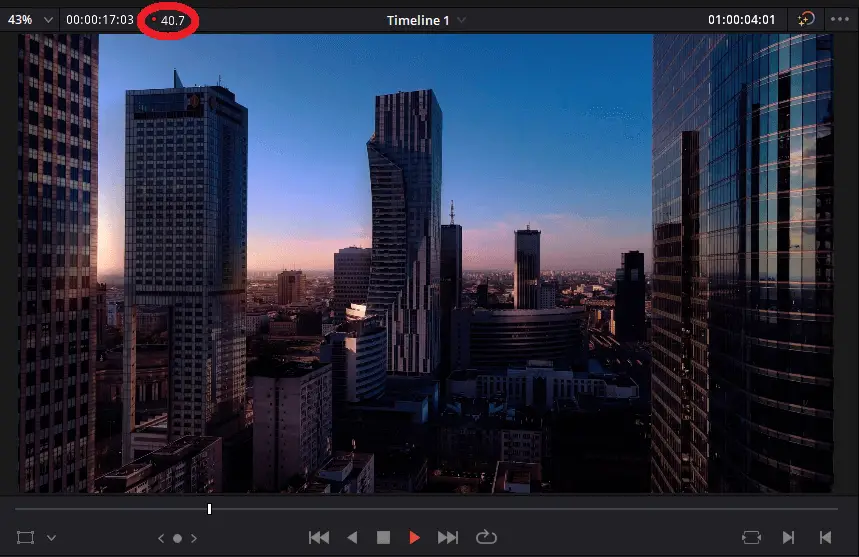
In the case of Resolve, every time you add a new effect or grade to a clip, it has to render that change in real-time while playing back the video to you. This is why you can experience a lot of lag by simply playing the timeline. You can see how much a clip is lagging in playback through the ‘Performance Indicator Light’ and ‘Frames Per Second (FPS).’
Those are the reasons why powerful computers are recommended for editing. But as a beginner filmmaker, you might not have the luxury of spending thousands on a new editing rig. Still, it is possible to achieve a smooth playback in DaVinci Resolve on a lower spec computer.
How to Get Smooth Playback in Resolve in 4 Steps
We will look at the best settings and workarounds to stop DaVinci Resolve from lagging without breaking the bank buying an expensive computer.
Step 1: Set Playback to Proxy Mode
The first method to achieve smoother playback performance is enabling ‘proxy mode.’ If you have experience in Resolve before, you probably already use this setting.
But for those who don’t, start by going to ‘Playback’ > ‘Proxy Mode’ and select either ‘Half Resolution’ or ‘Quarter Resolution,’ depending on your needs.
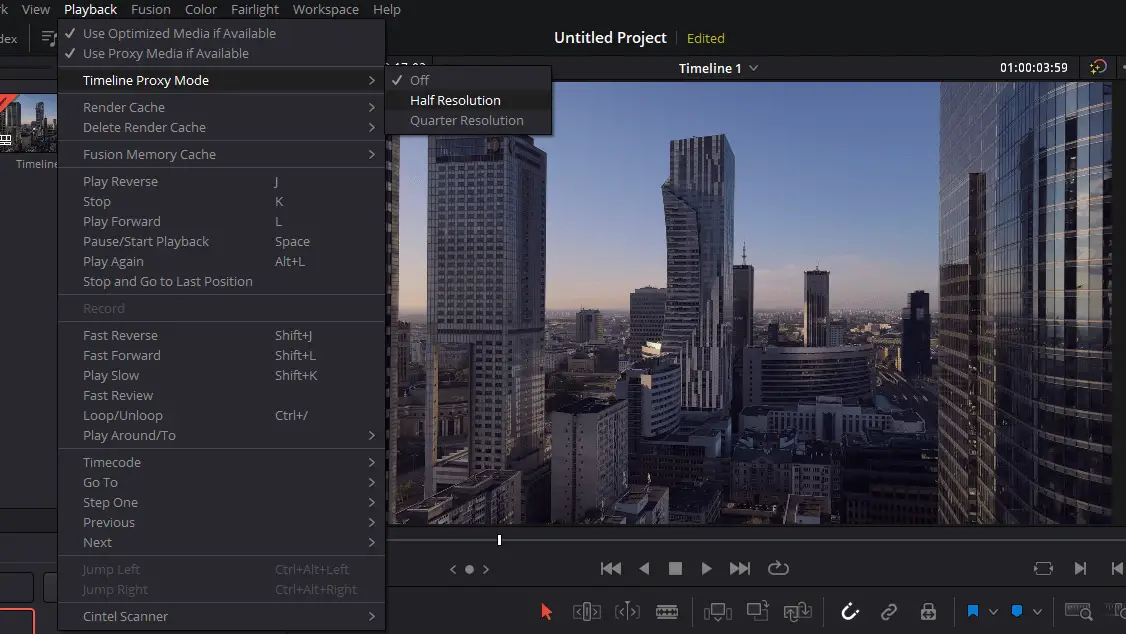
This will playback clips at a lower resolution, lessening the work Resolve has to do. The proxy mode only affects the playback for the timeline and not the final render.
It’s a quick and easy solution for those with a relatively powerful computer. You should see some performance increase, but that might not be enough. You will likely have to go further, and in step 2, the real magic will happen!
Step 2: Generate Optimized Media
If you are familiar with the video editor Premiere Pro, there is an option to render a clip for smooth playback. This is especially helpful if you have added a lot of effects and transitions, causing a laggy playback.
Something similar can be achieved in Resolve. However, it is disabled by default.
- You have added a grade and a few effects to some clips in the timeline, and playback is lagging. First, go to ‘Settings’ (The cog in the lower-left corner of the screen) and then to the ‘Master Settings’ tab.

- Scroll down to the section for ‘Optimized Media and Render Cache.’ The ‘Optimized media format’ tells Resolve what format to render the files. We want to make the format easy for the software to playback in.

- By default, Resolve has this option set to ‘Uncompressed 10-bit’, which is not an ideal format for playback. To stop DaVinci Resolve from lagging, we recommend changing the format to ‘DNxHR SQ’ on PC or ‘ProRes 422 LT’ on macOS. Both are much more editing-friendly formats while still maintaining some quality when you play them.
- You can leave the other options as they are. Then, press ‘Save.’ Now, we have not actually created any proxies yet. This is what we are going to do now.
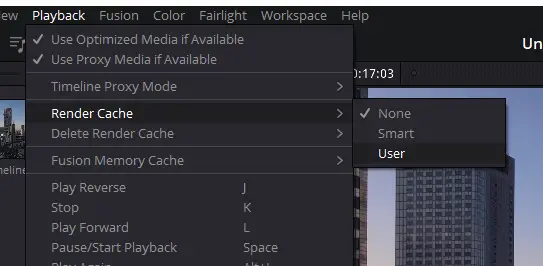
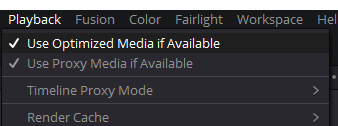
- To render the laggy clips go first to ‘Playback,’ then ‘Render‘ and select ‘User.’ Also, make sure that ‘Use optimized media if available’ is enabled under the same ‘Playback’ menu.
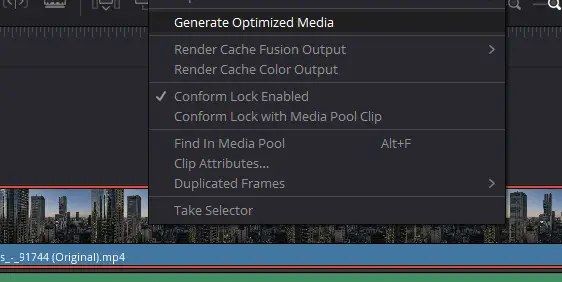
- Then right-click on the video clip you want to render in the timeline, and hit ‘Generate Optimized Media.’
- A window will appear indicating that your clip is being rendered. Once the loading screen is complete, your video will play much smoother.
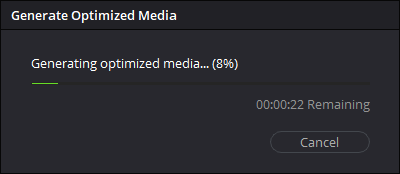
As soon as you make any new changes to the clip, it will start to be laggy again as Resolve will have to generate new proxy media files.
Smart Render Cache
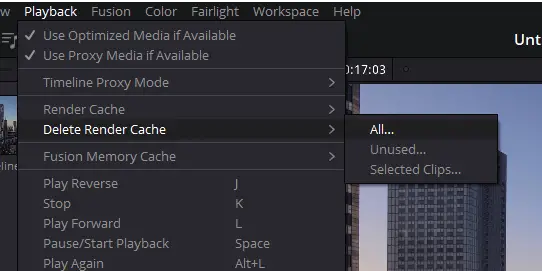
If you don’t want to have to manually select what clip to render every time, just turn on ‘Render Cache.’ It can be found if you go to ‘Playback,’ then ‘Render.’
This option allows Resolve to choose what clips it thinks to need rendering for smoother playback. The red line will appear over the clips it determined need rendering, just as when you selected that clip yourself.
Delete Optimized Media and Cache After Each Project
All the rendered versions of your project get stored in a cache drive, which can get full pretty quickly after a couple of projects.
After you are done with each project in DaVinci Resolve, go to ‘Delete Render Cache’ and select ‘All.’ This ensures that you keep your cache drive clean and optimized for your next project.
Step 3: Generate Proxy Media
If you are working on your projects alone, the ‘Generate Optimized Media’ method will work just fine. But what if you are collaborating with others on a project and you need to jump to different editing computers?
In that scenario, you will have to rerender all the clips again after each session. Still, there is a workaround, with a relatively new option in Resolve called ‘Generate Proxy Media.’ This option creates new proxy files in more edit-friendly formats and resolutions linked to the actual clips.
Even if you change the editing rig frequently, Resolve automatically uses the proxy media for those clips as long as you save them on the hard drive with the rest of your project.
Ok, that was a lot of technical stuff. Now, let us show you step-by-step how to create proxy media files for your clips;
- First, go to ‘Settings’ (The cog in the lower-left corner of the screen) > ‘Master Settings.’
- As you did in step 2, find the ‘Optimized Media and Render Cache’ section. Instead, change the ‘Proxy media format’ to either ‘DNxHR SQ’ on PC or ‘ProRes 422 LT’ on macOS.
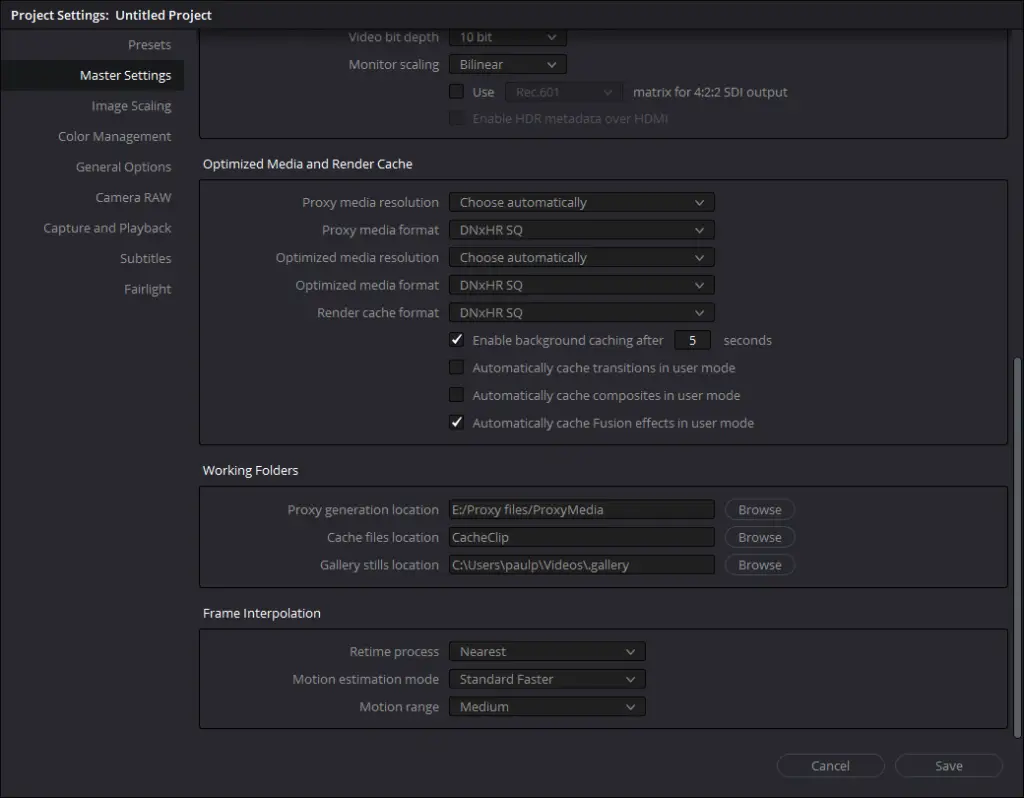
- Then you will also want to make sure to go to the section below called ‘Working Folders.’ In ‘Proxy generation location,’ choose a folder (ideally create one just for proxy files) on the same hard drive as the rest of your project.

- Once you are done with that, press ‘Save.’
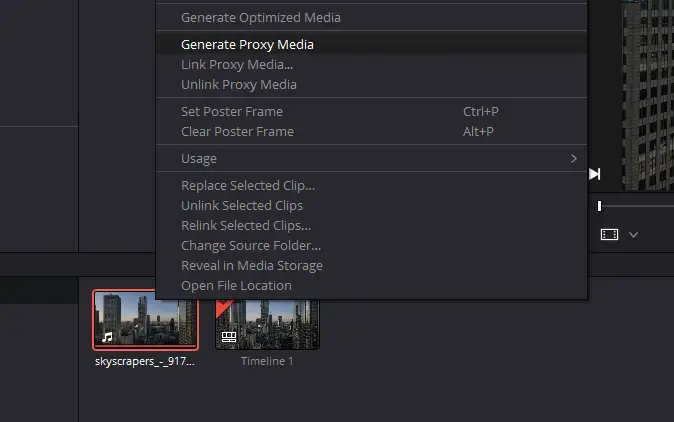
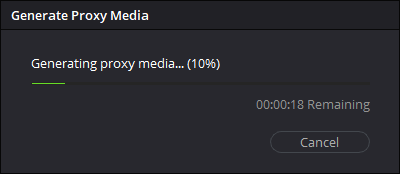
- Now, open the ‘Media’ tab and select all the clips you want to make proxy files for.
- Once all are selected, right-click on one of the files and choose ‘Generate Proxy Media.’
- Now, wait for the proxy files to be generated. This might take a while.
- Under the ‘Playback’ menu, make sure ‘User proxy media if available‘ is enabled.
- Once a proxy file is created for a clip, Resolve will automatically track it and link it to the actual clip. Now you can continue editing. Hopefully, with a much smoother experience!
Step 4: Render Cache Color Output
With the steps above, your playback will be much smoother, and there won’t be any skipping frames. But as you start to add effects and color nodes to your clips, possible lagging will occur. That’s when you should use ‘Render cache color output.’
- Select the clip/clips that are laggy in the timeline and right-click. In the menu, click on ‘Render Cache Color Output.’
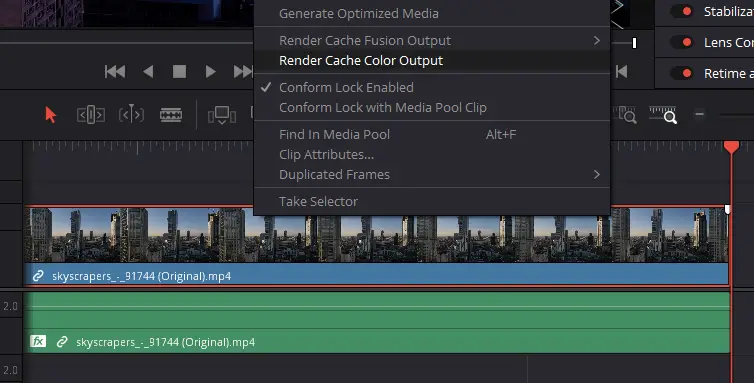
- A red line will appear above the clip. You will notice how it will start turning blue, which means the clip is rendering. Once the whole line has turned blue, it is done rendering.
- Even with effects and color grading added, you will get less lag in Resolve.
Still Laggy Playback in Resolve: Make Sure You are Using an SSD Harddrive
Suppose Resolve clips are still laggy even though you have followed all the steps above. It might mean you are working from a hard drive that is not so fast (internal or external). If you are working from a standard spinning disk rather than an SSD, it will likely cause Resolve lag.
It is way easier and cheaper to buy a new SSD hard drive with fast performance than a whole new rig for editing. There are great external SSDs with a USB 3 connection you can work from, like this one.
In Conclusion
Armed with these tips, you should now be able to stop DaVinci Resolve from lagging on playback. What advice you follow should largely depend on different situations, so it is essential to understand what each method does. Resolve has many tools for optimizing playback performance, and you should now be able to make the most of them.
But if you are still experiencing any issues, it might be time to look into buying a new computer. After all, it might be worth the investment if it disrupts your editing workflow.
Lastly, if you found these tips helpful and want more tutorials and advice on editing, check out all our articles on the topic here!