
Streaming: the freshest medium of live entertainment. It has grown and grown into an absolute monster of gaming shows, interactive chat rooms, and everyday activities throughout the years.
Its ability to immerse the viewer has propelled it to the top of the pack in media consumption, and financially, it’s doing better than ever. It’s no surprise then that individuals are constantly looking to get into streaming on a daily basis.
OBS is an incredibly valuable tool for both new and seasoned streamers. But what is it, and how exactly does it work? We’ll cover all of this and more below!
A Brief History of Streaming
The term ‘streaming’ originated in the ’90s and was applied to any media that was broadcast live via a TV or computer system. Although this definition still applies, streaming has evolved, and the word itself has taken on a whole new meaning.
As hardware and software matured, so did the possibilities of streaming content by individuals. In 2007 Twitch was born, but it wasn’t until 2010 that video game streaming really began to gain popularity.
Twitch was a platform designed for individuals by individuals, and it allowed the average gamer to broadcast their content to like-minded viewers. No longer was it necessary to have high-end servers and back-end tech support to air your streams; it was possible at just the click of a button.
As Twitch grew in popularity, other video hosting sites such as YouTube and social media sites like Facebook also integrated streaming capabilities. From there, streaming continued to grow exponentially.
So You Want To Stream?
If you think your content would be of interest to an audience of people, it’s time to get your streaming journey started.
Luckily, it’s relatively simple to get into streaming in 2021. There is a myriad of platforms available for budding streamers, including Twitch, YouTube, Facebook, and TikTok.
Once you’ve chosen your platform, you’ll need to download specific software to help you transmit your content to that site. This software is referred to as streaming software.
What Is Streaming Software?
In order to broadcast your content to a platform such as YouTube or Twitch, you’ll need to download streaming software.
Put simply; streaming software are applications that help you broadcast live video and audio to a specific online platform. They capture multiple sources on your system and send those images/sounds to your chosen external host site.
Some software goes above and beyond just streaming and help you in collecting donation payments, setting up interactive chat, and many more immersive features.
OBS Studio – The Arrival
Enter OBS Studio, one of the original and most reliable streaming software to date. Released in 2012, OBS continues to pave the way for other software in terms of capabilities, functionality, and plug-in support.
You can arrange and design your stream to your liking from inside the software by simply clicking and dragging. There are visual monitors to keep an eye on all of your audio and hotkeys to mute your sources at just the click of a button. Log in with your platform account, and you are ready to stream with just the click of a button.
Although other software has come and gone over the years for streamers, OBS continues to be the ‘top dog’ of streaming software for most large, successful creators.
How Does OBS Work?
OBS Studio acts as a stream ‘design’ software with the added capability of broadcasting that design to your viewers. Let us explain…
In layman’s terms, OBS is a combination of scenes and sources, scenes being ‘slides’ that you can transition between and sources being individual features of each scene.
Scenes
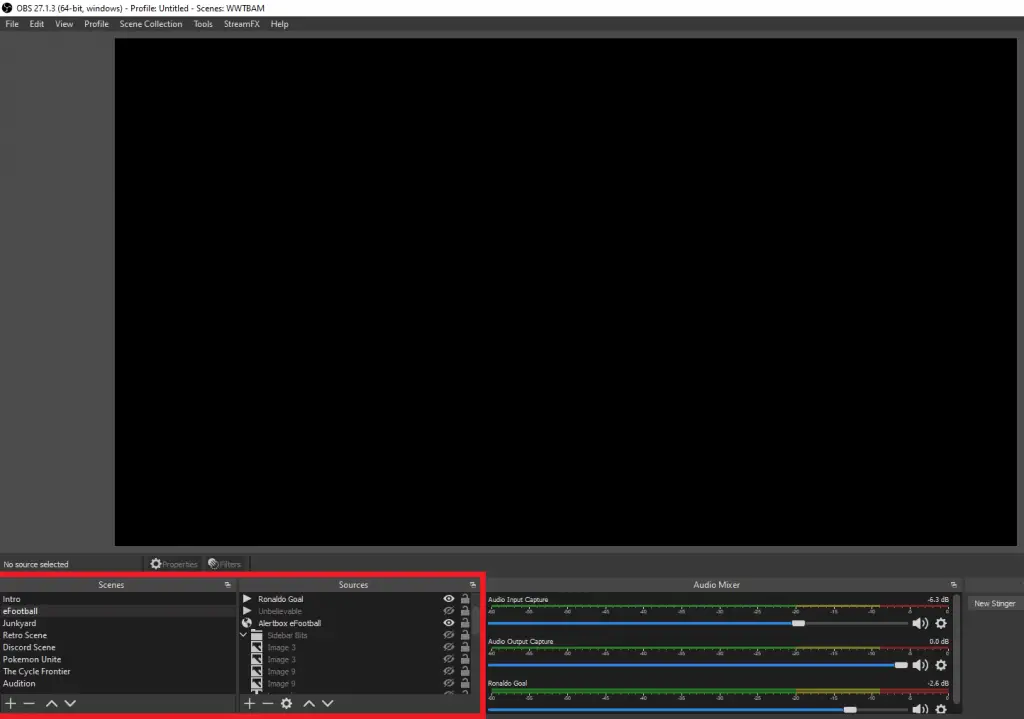
When you first open OBS Studio, you’ll see two docks in the bottom left-hand corner of the application; Scenes and Sources.
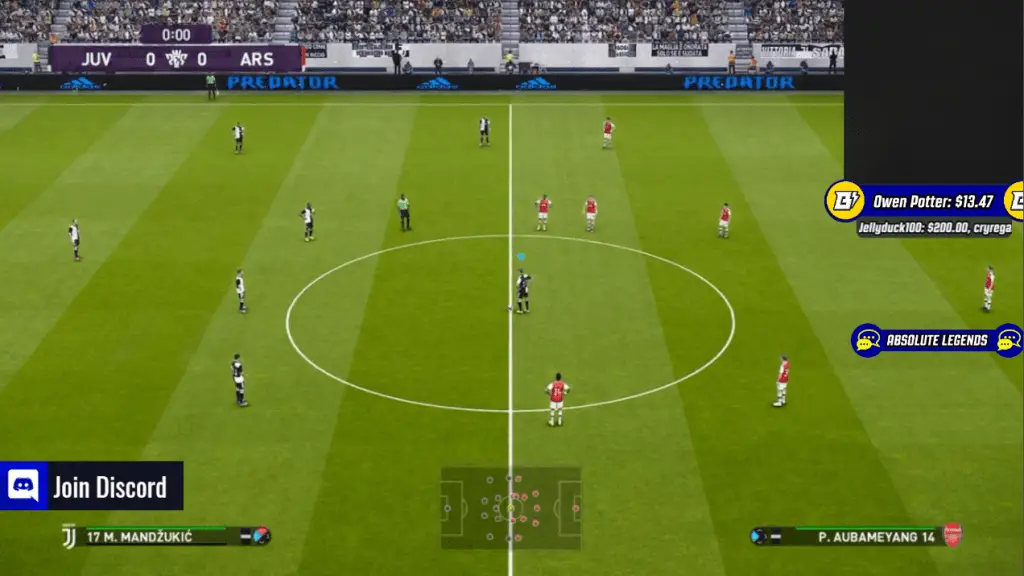
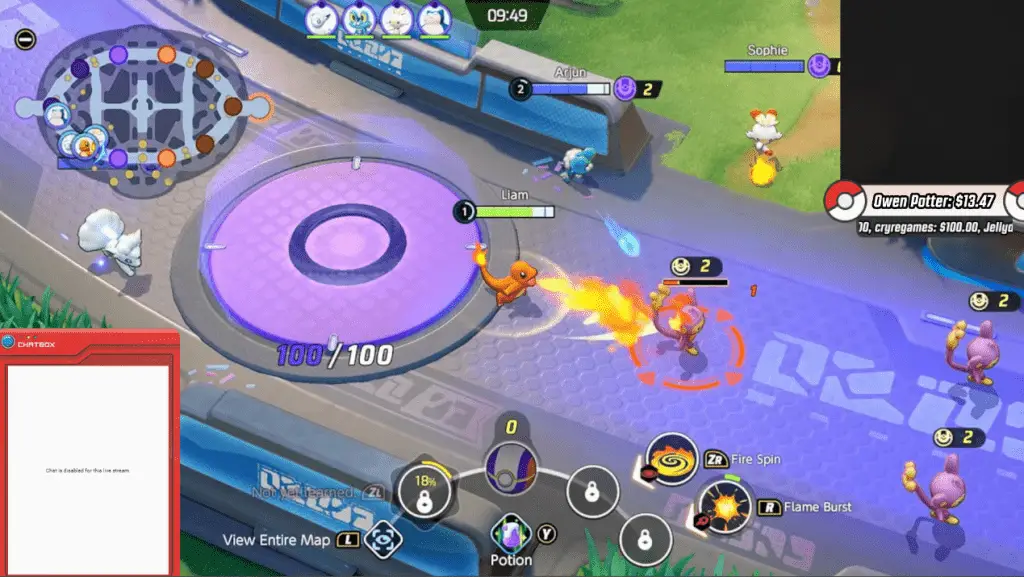
Your scenes are a group of sources that are related to each other and that you want to appear on-screen at the same time. For example, in the above screenshot, you see that the scene ‘eFootball’ is selected. All of the eFootball related sources are gathered in this scene and will appear on the screen when selected. However, should you select ‘Pokemon Unite,’ all of the items on screen will change to your Unite overlays and game capture.
Essentially what is happening is you are changing the individual sources that you and your viewers can see on screen.
Sources
Sources are features that appear on-screen during your stream. You can add them by clicking the + button in the bottom left corner of the sources dock. The list of current selectable sources includes:
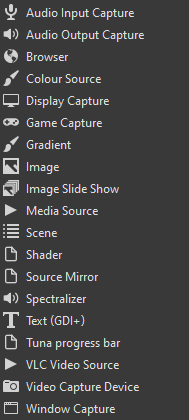
Using plug-ins can expand this list exponentially depending on which ones you choose to install.
Once a source is added, it will appear on-screen and can be moved around the preview area by simply clicking and dragging. You can also change the source’s layer by dragging it up and down in the sources list.
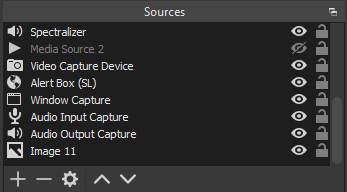
Clicking the eye will hide or unhide your source, and the lock will lock the source in position.
Stream
Once you are happy with your source and scene setup, you are ready to stream. Remember that everything in your OBS preview area will be viewable to your viewers as it is to you. Make sure it’s looking well organized, sleek and that any private information is hidden before you go live!
Before you set off for a stream, make sure to connect your account to the settings menu. You can connect your stream via a stream key (found in your platform stream settings), or you can connect your account automatically by logging into YouTube, Facebook, or Twitch from inside OBS Studio.

Once you click ‘Start Streaming,’ OBS then uses your CPU or GPU encoder to upload the stream data to your chosen platform. Your internet quality will determine how fast this will happen and how much data you can upload at any given time. Simply put, speedier internet equals better stream quality!
We have a complete beginner tutorial on OBS here.
Streamlabs OBS – The Sidekick
One of the biggest complaints of OBS Studio is its user interface. Over the years, the essential coding of OBS has evolved, but the aesthetics haven’t changed all that much. They’re a little dated and, to some, can be hard to navigate. On top of that, users who add plug-ins and manipulate the application’s front-end run the risk of crashing the application and making it unusable.
Founded in 2014 as TwitchAlerts, Streamlabs OBS was designed with the start-up streamer in mind. Its user-friendly interface and simple features make it a great starting point for basic streaming.
SLOBS has all of the OBS Studio features and more on a cleaner platform … So why is OBS still the software of choice for many? It mostly comes down to the fact that OBS is open source, meaning that you can install independently made plug-ins for essentially unlimited effects and features. In contrast, SLOBS is closed source, and you cannot add any additional features by yourself.
OBS or Streamlabs?
| OBS STUDIO | STREAMLABS OBS |
| Positives | Positives |
| Open-End Software | Overlay and Alerts Library |
| Low CPU Usage | Clean Design |
| Regular Updates | Integrated Chatbox |
| Easy To Move Docking Feature | Negatives |
| Negatives | High CPU Usage |
| Visually Bland | No Plug-in Support |
| No In-Built Design Library | Regular Crashes |
OBS Studio rules the roost here. If you can get around the fact that the app isn’t as pretty to look at as SLOBS, then it will most certainly become your application of choice for streaming. The plug-in directory for OBS Studio is updated almost daily, and picking up one for your stream could help you stand out from streamers using only the Streamlabs features!
If you want a more in-depth comparison of OBS Studio vs. Streamlabs OBS, check out this article.
Recording With OBS Studio
OBS isn’t only known for streaming. It’s also a competent recording software. Whether you want to record gameplay or a tutorial on how to use specific software, OBS Studio can capture these scenes for you.
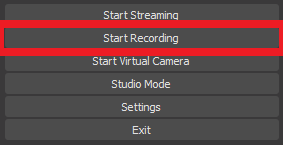
Just like you would with streaming, set up all of your scenes and sources how you want them to appear to your viewer, and instead of clicking ‘Start Streaming,’ click ‘Start Recording.’
Instead of uploading your content to an online platform, OBS will instead save the content to a local folder, usually your default ‘My Videos’ folder. You can change the quality and format of these recordings all from inside the OBS Studio settings.
In Conclusion
It’s true that there is alternative software on the market for streaming. Some might look to Twitch Studio or Xsplit for a change of scene, but realistically OBS Studio offers the most bang for your buck. It may look simple and outdated, but its functionality really sets it apart from the competition. To find out if OBS Studio is the streaming software for you, head over to their official download page here.