
Twitch Streamers are forever looking for ways to make their community stand head and shoulders above their competition’s. With the sheer amount of streamers on the platform these days, it is essential to have a unique selling point to help your content appear original and exciting. Setting up Discord for twitch streaming can help you and your channel grow in more than one way.
What is Discord?
Discord is a free-to-download chat application that could be best described as a voice-chat and text forum hybrid. Think Reddit and Skype if their features were smashed together to make a brand new app!
Each forum is classed as a ‘server’ and usually is invite-only. Creators use these servers to broadcast news posts and make announcements. At the same time, individual members join these servers to chat with the broader community and gather more information on their favorite streamer.
Discord is loosely classed as a social media platform, but it’s most definitely not your classic ‘one-way’ social media account. It’s highly interactive and encourages regular creator-viewer communication.
Discord Communities and Streaming
A Discord server provides a place for a community to grow and develop while a streamer is offline on Twitch. It allows the creator to connect with their audience in ‘real-time’ and be readily available for a chat or to answer burning viewers’ questions.
Having a busy and popular Discord server can be a game-changer for creators. It gives viewers a place to discuss your content with other members who have similar interests. This can be done while the creator is offline and is essentially free promotion and hype in anticipation of the next stream.
Viewers are usually encouraged to join a server by clicking a direct link in a video or stream description. This link is a private invitation, so anyone trying to join a server by searching it in the Discord directory usually won’t have much joy!
You’d be hard stretched to find a streamer without a ‘happening’ Discord community these days; definitely take the time out of your day to get a server set up for your channel!
How to set up Discord for Twitch Streaming
Before setting up additional features on your server, you’ll first want to fully integrate your Twitch account with your user and server settings.
How to Integrate Twitch With Your Personal Discord Account
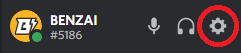
- Click on your account settings in the bottom left hand corner of the screen.
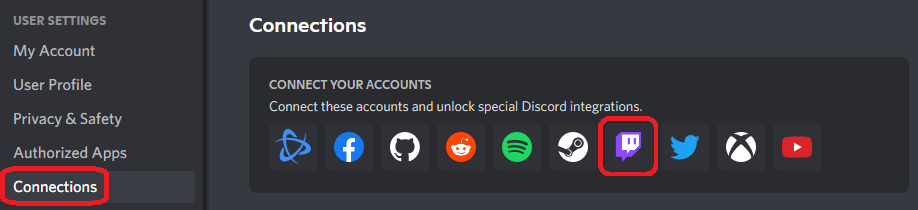
- Click on the ‘connections’ tab on the left side of the settings screen.
- Click on the Twitch logo and accept all of the permissions in the popup window.
How to Integrate Twitch With Your Discord Server
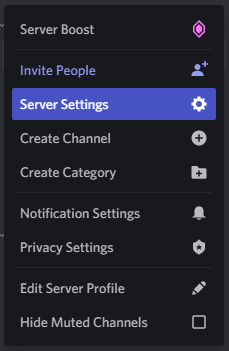
- Click on your server name in the top left hand corner and click on ‘server settings’ in the drop down menu.
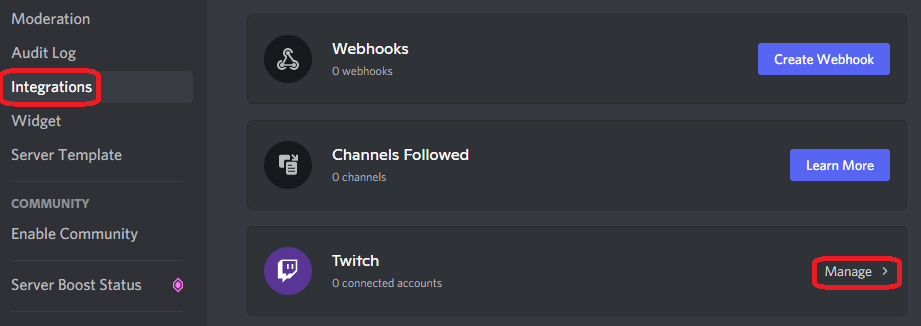
- Select the ‘integrations’ tab and click ‘manage’ in the Twitch sub menu.
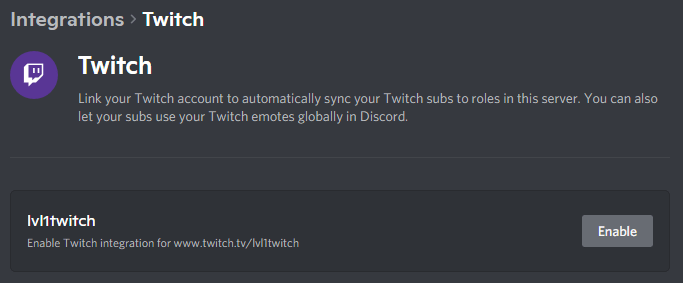
- Select ‘enable’ in the Twitch integrations menu and accept all of the permissions.
Once Twitch is integrated into your server, you can manage specific roles for subscribers which will automatically be added to a member’s account once they subscribe.
Top Discord Features For Twitch Streamers
1. Announcement Channels
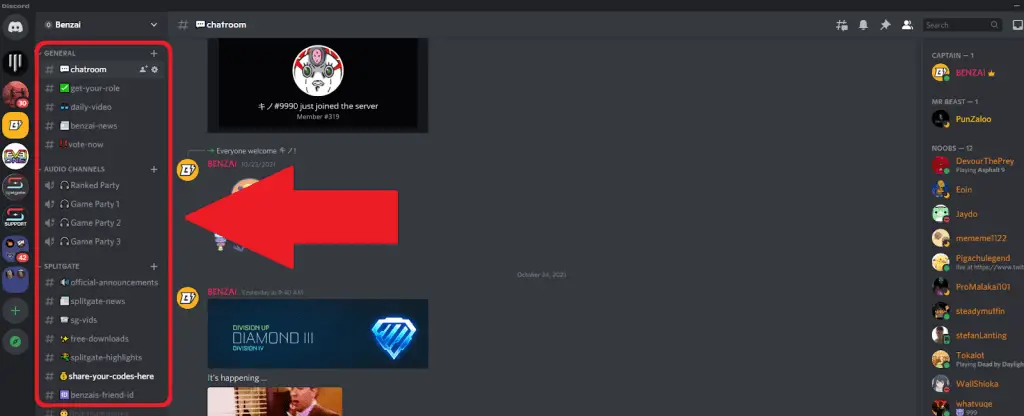
Discord servers are broken up into multiple different channels. These are seen in the form of tabs on the left-hand side of the application.
Each channel is set up as a text channel unless otherwise specified.
Announcement channels are text channels where only the creator can post. They can tag all of their members by using @everyone and instantly notify every member’s system. They are often used to post important updates and news regarding the creator’s channel.
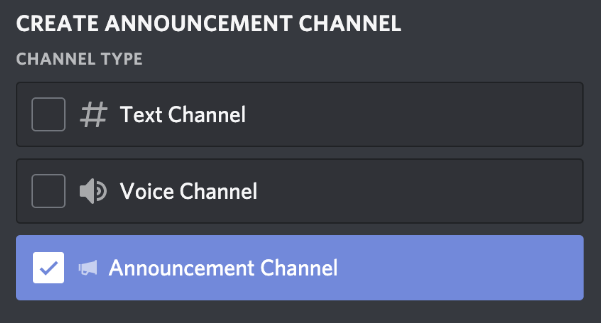
In a recent 2021 update, Discord has created the ‘Announcement Channel’ template. This template is similar to what was described above; however, members can now ‘follow’ this channel and send updates directly to their own servers. It works similar to an RSS feed and helps creators branch out into other servers to spread awareness of their content.
2. Community Chat
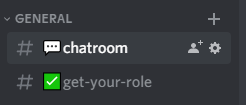
Other than the Twitch chat box when a creator is live, there is no other way for viewers to communicate with each other outside of live streams. A basic text channel can be set up in Discord and act as a 24/7 chat room for all viewers and fans.
Having the ability to message each other and the creator regarding stream content gives viewers an incredible sense of value and ‘belonging’ when it comes to a stream community—chat rooms in Discord help nurture this and are also extremely easy to use.
Unfortunately, the internet is the internet, and some users may abuse this freedom. Thankfully Discord has an in-built bad language filter that can be turned on, and regular users can be assigned a ‘moderator’ role to be able to ban or kick abusive members. When set up correctly, the chat room can and will be a fantastic place for viewers to interact safely with each other.
You can also integrate the Discord chat with OBS to make it show up live on your stream. To learn how to do just that, check out our tutorial here.
3. Role Assignment

As mentioned above briefly, every member of a Discord server can be assigned a role by the server creator. Different color names can identify these roles.
Most servers will have a default role for all new members, which allows them to message in chat rooms and interact with others. They might also have a moderator role which gives the user permission to delete messages and ban abusive users. This can be incredibly useful for creators who don’t have much time to moderate their own servers.
On top of these two standard roles, Discord can integrate with programs such as Twitch and Patreon to give paying members their own stand-out role. Once they’ve got the role, they usually get access to ‘members only’ channels and voice chat. This gives members a further incentive to continue being a channel member and paying their monthly subscription.
The server owner can edit permissions for every role, and eventually (if enough trust is gained), they can hand out those moderation responsibilities to other trustworthy moderators!
How to Create Roles in Discord
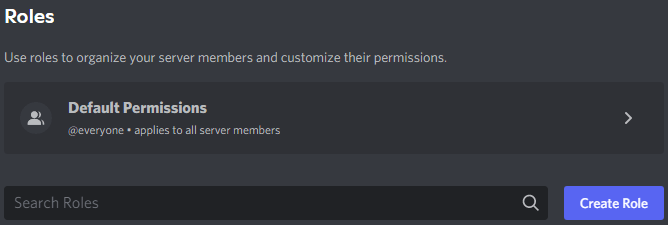
To create a new role, open up your server settings and click the ‘Roles’ tab on the left-hand side of the screen. Locate the ‘Create Role’ button and click it.
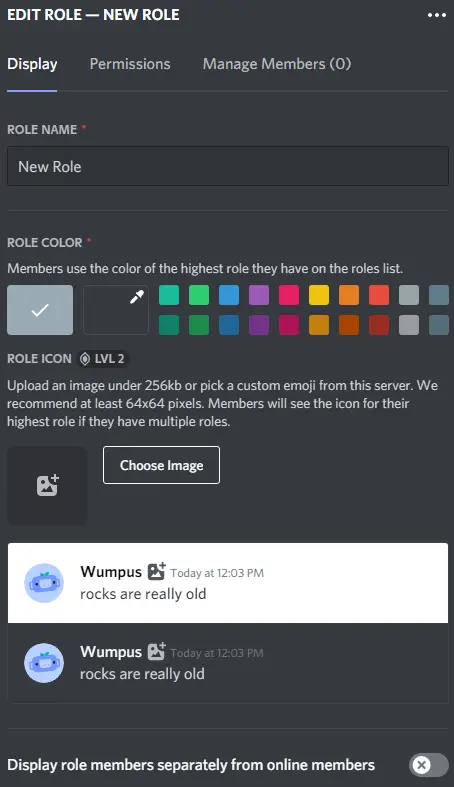
The ‘display‘ tab determines how the role looks to your server members, including its name, color, and icon. If a member has multiple roles with different icons, only the icon of the highest role will appear for them.
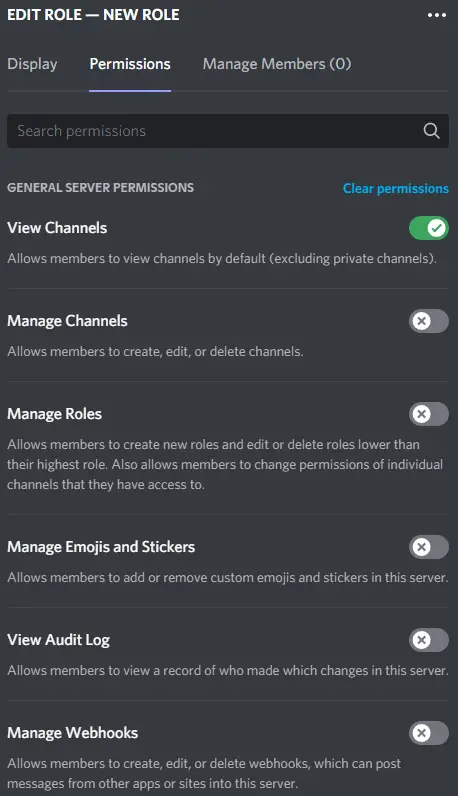
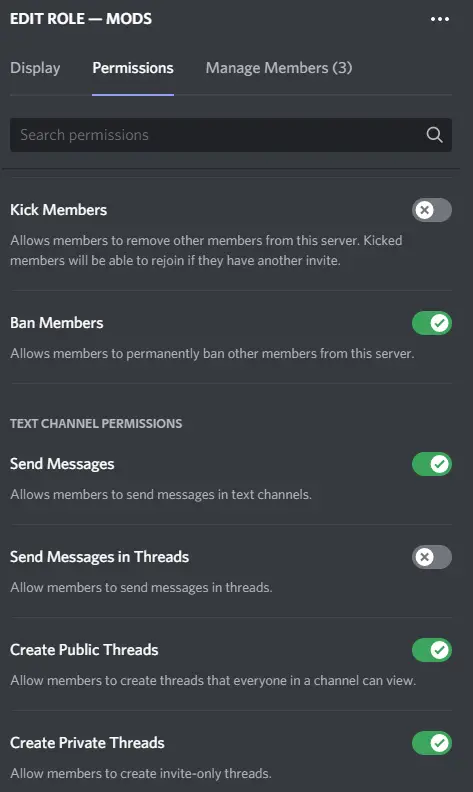
The ‘permissions’ tab lets you pick and choose the abilities of specific roles in your server—these range from viewing certain channels and reacting with emojis to webhook management and banning privileges. Your lowest roles in the server will usually normally only be allowed to view channels and send messages. In contrast, your highest moderation roles will be able to kick other members and delete certain messages.
Be VERY careful when choosing which permissions to give to specific roles. Only ever give moderation privileges to members who you trust 100%! An incorrectly chosen permission for the wrong person could result in your server being permanently deleted.
The order in which the roles appear on the left-hand side of the ‘Roles’ tab in your settings is the order they will appear within your server. You can change the order of your roles by simply clicking and dragging the role group within this list. It is usually the case that higher-ranked roles such as moderators or paying members appear above regular members in your server.
4. Community Voting
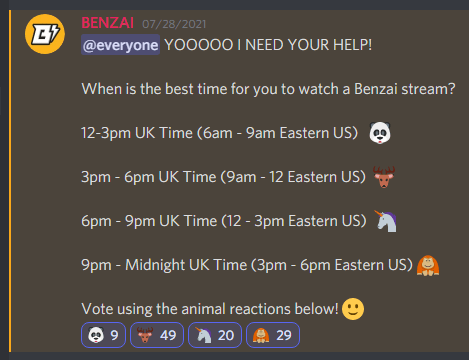
Discord servers are an excellent place to do some viewer research and conduct some fan voting. You can simply post a question in your announcement channel (or another dedicated voting channel), tag your members with @everyone, and wait for everybody to react to the post.
By adding multiple reactions and associating them with a selection in the vote, members can just choose the post-reaction that relates to their choice or opinion. For example, in the above post, 49 members voted for the 3 pm-6 pm time slot with the deer emoji, just by clicking the small image below the post.
5. Party Chat
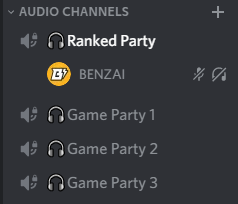
One of Discord’s most enticing features is its voice chat. Just like setting up a text channel, server owners can set up audio channels. Once an audio channel is selected, a member is added to an open voice chat party and can then interact with others in the group.
The feature has been applauded for its latency and audio clarity and is a favorite amongst gamers who need to chat in real-time with their squad. In some circumstances, gamers choose Discord party chats over in-game chat because it is far better and more reliable.
Like text channels, audio channels can be ‘role limited,’ meaning that only members with certain roles can join specific channels. This is great for if you have different clans or squads and want them only to enter their specific team’s party chat. Each member also has the ability to mute themselves or deafen the entire party for themselves should things get too heated or too loud!
How To Hotkey Mute And Deafen
Setting both mute and deafen to hotkeys can help you manage your stream audio more effectively if you use party chat during your streams. Instead of opening Discord and switching application focus, you can do this with just the press of a button.
- Go to your user settings and select the ‘Keybinds’ tab.

- Click ‘Add a Keybind’ on the right hand side of the menu.
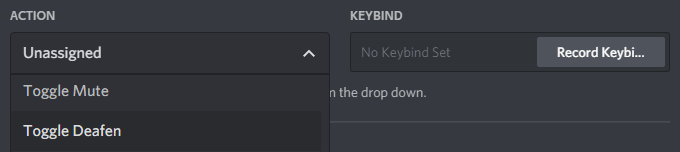
- After the new row is added, click the ‘Action’ drop down menu and select either Toggle Mute or Toggle Deafen depending on which one you want to register.
- Click ‘Record Keybind’ and press the button on your keyboard you want to use as a hotkey for your chosen action. Be careful not to use a pre-programmed windows hotkey that could clash with your system processes.
6. Instant Messaging
Not only is Discord a great forum-based chat center, but you can also add individuals and message them personally once accepted. This means that any private conversations that you don’t want to have in a public forum can be redirected to one-to-one instant messaging.
This, again, is very secure as you can only receive instant messages from another user once you have accepted their friend request.
With Discord Nitro, you can also send and receive files larger than 8MB in instant messages, making it a great alternative to sites like Google Drive or Dropbox for file sharing.
How To Add A New Friend And Instant Message Them
When opening Discord for the first time, it’s not immediately obvious how to add a new friend or have them add you; it’s a feature that people have been requesting an update for quite some time.
To begin with, you’re going to need your friend’s username and ID. You can get your own username and ID by clicking it in the bottom left-hand corner of your screen. It will automatically copy to your clipboard and be available to paste when needed.

Once you’ve got the ID of the person, you want to add, click the Discord logo in the top left-hand corner of the application. Click the ‘Friends’ tab and then click the green ‘Add Friend’ button. They’ll then need to accept your request and, once they do, will appear in your friend’s list on the left-hand side of the screen.
Note: You cannot instant-message members that you do not have a server in common with. Similarly, many users turn off the ability to message members who are not direct friends.
7. Chatbot Integration

Chatbots are standard installations in stream chat these days, providing creators with instant moderation and poll capabilities during their streams. They also offer a loyalty points system for viewers to earn points into a personal account for interaction and contributions. Until not long ago, chatbots were irrelevant outside of streams, but nowadays, they can be integrated into Discord too!

By connecting your chatbot to Discord and giving it a moderation role, it can act as an automated moderator and perform all features as it would on stream. Messaging in Discord chat can get viewers points towards their loyalty account. Using !commands will give viewers a list of executable commands, and the bot will also ban people for abusive actions.
This is yet another feature that expands stream interaction beyond just your stream times.
How to Add a Chatbot to Discord
Before you integrate a chatbot with Discord, you’ll need to create a Bot role for your server. Bot roles have moderation, and administration privileges are enabled and are higher ranked than regular members. You can find out how to create a role here.
The most essential privileges to enable in your Bot role are:
- Embed Links
- Manage Messages
- Manage Channels
- Manage Roles
- Manage Webhooks
- Send Messages
- Add Reactions
- Attach Files
Once you’ve created your Bot role, you’ll need to invite the chatbot to your server. Depending on the chatbot you use, you’ll need to navigate to their website and click the ‘Invite To Server’ button. Once the chatbot is in your server, assign it the Bot role, and it will have all permissions and privileges needed to manage itself in your server.
8. Games and Music
A Discord server doesn’t need to focus entirely on the creator’s content. In fact, it’s beneficial to have some channels for alternative entertainment. Some popular options for these channels include game bots where viewers can compete against each other in various popular games or card collection tasks or music bots in an audio channel where viewers can listen to popular radio and queue their own selections.
For an extensive list of bots that you can add to your server, head to Top.gg.
Top Game Bots For Discord
PokeTwo is a text-based pokemon collection game. Inviting it to a channel will start the game in which the bot ‘spawns’ a Pokemon at random intervals, and members can use text-based commands to catch them.
OWO is a similar bot to PokeTwo but without licensing issues. Members can catch animals, build zoos, hunt, and battle other members with their items and collected animals. Gathering certain resources gifts specific roles and teams, helping to develop your community into a bustling Discord metropolis.
Have you ever wanted to run a text-based Taco production stall and brag about it to other members? Taco Shack is the perfect solution and allows you to create, produce, employ chefs and advertise your wares to your server members. Put together enticing menus and bring in the millions to make your entire server jealous of your taco greatness!
With the success of Minecraft and the sudden popularity of Idle games, it was inevitable we’d get a bot that combines both. Enter Idle Miner, the Discord bot where every member idly mines resources. Spend time using text commands to increase your income and sit atop the server leaderboard. More interaction gives you more chances to get unique items, weapons, and valuables that you can use or sell to other members!
In Conclusion
Over the years, Discord has evolved from a simple audio chat application to a social media conglomeration of streaming necessities. Having an active and valuable Discord server brings a certain depth-of-care to your creation that viewers will truly value and will have them coming back stream after stream!
Discord is available for both PC, Mac, and handheld devices and can be downloaded for free at the Discord website or via your mobile app store.