
There can be nothing worse than sitting down, being ready to stream to an audience who are waiting for you, and seeing the dreaded message, ‘stream connection failed.’ It can ruin the scheduled streams of both new and seasoned streamers on YouTube.
There are many reasons why your YouTube live stream is not working, ranging from things that are easily fixed to some things that might be out of your control. Nevertheless, we’re going to break down the most common solutions to why you can’t go live on YouTube.
1. Connect Your Account
The first thing you should do to ensure a solid connection to YouTube is to connect your YouTube account to your streaming software. This is usually done by going into your streaming software settings and logging in with your YouTube credentials.

In OBS Studio, go to the settings menu and select the stream tab. You will see a button that says Connect Account. Click this button, and you will be redirected to your internet browser to log in to your YouTube account.
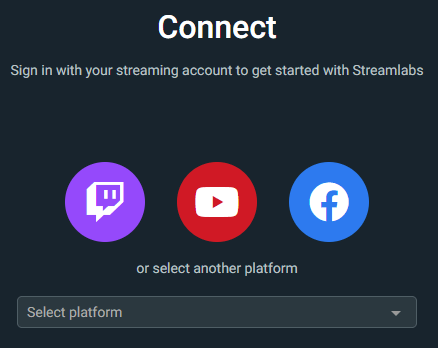
The process is very similar on Streamlabs OBS. Open your settings menu and click login in the bottom left-hand corner of the settings window. You will now see the connect screen, as above. Click on the YouTube logo, and you will be redirected to your internet browser to log in to your YouTube account.
This is the preferred method of transferring data as it removes the potential risks of using a stream key and the unreliability of a custom ingest server.
2. Check Your Stream Key
If for whatever reason, you cannot directly connect your account to your stream software, you will need to set up and check your stream key.
Your stream key is a passcode unique to you and your stream. It is needed to identify you as the true account holder and make sure nobody else manages to stream on your YouTube page.
Never allow anybody you don’t trust to access your stream key. With it, they can control all live content on your channel.
Find Your Stream Key
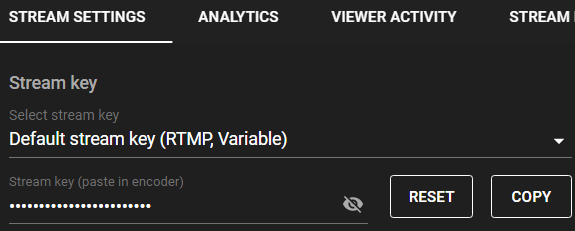
Your stream key is located in your YouTube Live Dashboard. It will appear as a number of hidden dots to make sure nobody can copy it. To copy it to your dashboard, click ‘copy’ on the right-hand side. Alternatively, you can unhide the key. Just make sure nobody is watching you or your screen as you do it!
Put Your Stream Key In Your Software
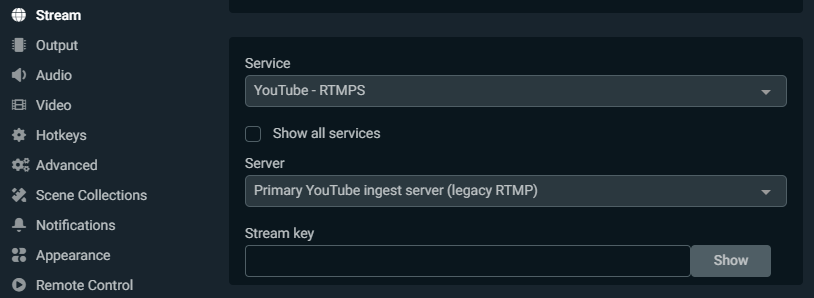
In OBS Studio, go into your settings and click the stream tab. You will see an empty line underneath the server drop-down menu. Paste your stream key into this empty line and click apply at the bottom of the window.

On Streamlabs OBS, it is just as simple a process. Go to the stream tab in your settings menu, and you should see an empty input box entitled ‘Stream key.’ Paste your key into this line and click done. Your stream software is now connected to YouTube via a custom ingest key.
Your stream key may or may not change every time you stream. It’s best practice to make sure you double-check the key in your software matches the key on your YouTube dashboard before each time you plan to go live. If your stream keys don’t match, the stream will not work.
3. Turn Auto-Start On
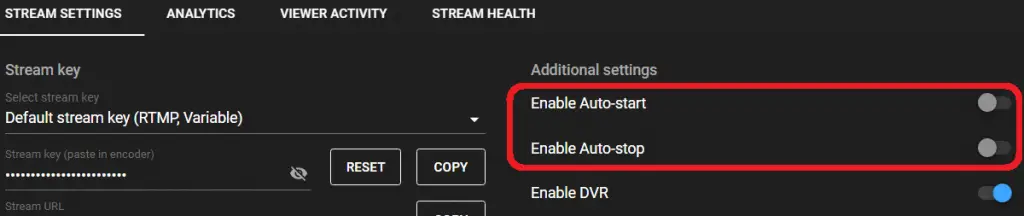
Inside your YouTube Live Dashboard, there is a setting to turn auto-start on or off. Auto-start means that your stream will either go live or not go live as soon as YouTube receives a signal from your stream software.
If auto-start is turned on, you will be live as soon as you click ‘go live’ in your streaming software.
If auto-start is off, your stream will be streaming to YouTube Live Dashboard, but it will not be going out to your main page. You will need to click ‘Go Live’ in YouTube Live Dashboard for your stream to be visible on your page. Essentially, you have to confirm you want to go live twice before it actually happens. This seems like a weird setting to have turned on, but it does help those people who have a habit of accidentally going live!
Tip: The same applies to auto-stop. If you want to completely control the end of your stream from your streaming software, make sure auto-stop is switched on.
4. Ensure Your Internet Is Fast Enough
If YouTube is not receiving a strong enough signal, likely, it will not begin to host your live stream, or your stream will appear as a blank screen. This can be why your Youtube Live stream is not working properly.
When streaming, you essentially upload data to the internet in live time. The speed and quality of this upload depend entirely on your PC specification and internet speed.
YouTube recommends an absolute minimum upload speed of between 1,500 and 4,000 KBps. This needs to be transmitted constantly, so it is obviously necessary to have a slightly higher speed than this. Realistically you will want a minimum upload speed of around 6,000KBps or 6MBps to stream consistently and reliably. Once your upload speed is high enough, YouTube will receive a consistent enough signal to host your live video without lag, frame drops, or crashing.
To check your internet upload speed, head over to Ookla and click go.
Tip: Where streaming is concerned, only your upload speed is relevant. Your download speed represents the speed at which you can receive data from the internet to your system. Your upload speed is essentially recording how much data you can send. Be sure to check both speeds when taking out new internet contracts.
5. Stay In One Place
In these days of IRL streaming, many creators want to stream on the go and move from one geographical area to another. This can be a recipe for interesting content and streams and connectivity disaster.
As you move around, the strength of your internet connection waivers, meaning a varied quality and reliability on your stream. Streaming is all about attaining a reliable and consistent transfer of data to your chosen platform and so moving your streaming device dramatically during a stream can and will affect its quality.
If possible, try to plan your stream well ahead of time so you can be in one place throughout and use the same internet access point.
6. Change The Video Privacy Setting To Public
It can happen that your scheduled stream’s privacy setting defaults to private. This would obviously mean nobody can see it except you.

To check whether or not your stream is visible to everybody, go to your YouTube Live Dashboard. You will see the video’s privacy settings under the stream title. If it says anything other than Public, you will need to change the privacy setting.

Click on edit in the top right-hand corner and change the privacy setting to public. Your stream will now be viewable to everybody on YouTube once you go live.
7. Close Background Applications
Streaming to YouTube, especially when gaming, can be extremely CPU and GPU-intensive, using a lot of your system’s resources and memory. When these resources are maxed out, it can lead to communication errors between your streaming software and the online platform.
It’s always best to close any unnecessary applications while streaming to clear up plenty of CPU space. Remember to check background applications and software that might have been minimized to your taskbar. If you’re not using it for streaming, close it!
8. Change Your Stream Encoder
If you are putting too much stress on your CPU, changing your stream encoder to your GPU (or vice versa) could be worthwhile. To check how to change your default encoder or switch between the two, check out our article on ‘How To Fix Obs Encoding’ right here.

9. Check YouTube’s Status
Sometimes, when your Youtube Live stream is not working, the problem might not be with you at all. YouTube is not untouchable. It also has periods of downtime and serious crashes. It could well be that your stream is not going live due to the YouTube services being offline.
To check whether or not YouTube is down, click here. If there is a large trend of reports and complaints about the previous few hours, likely, the service is down, and you will need to wait a short time for everything to resolve itself.
In Conclusion
By now, you should have identified why your Youtube Live stream is not working and hopefully resolved it. Streaming can throw up quite a few issues at times, but they are always resolvable in one way or another. Using the above tips and tricks, you should now be well on your way to reliable and consistent streams.
Have any questions about your stream issues? Feel free to leave a comment in the comments section below, and we will get back to you as soon as possible!