
After 2020, many churches had to find new solutions to reach out to their congregations. This was when live streaming church services started taking off, and by the looks of it, it will be a continuing trend in the future.
Worship-service live streaming is an excellent alternative for people who can’t attend because of sickness, travel, or other reasons. So it might be smart for clergy and church workers to learn how to live stream a church service.
This step-by-step tutorial will help you get started with church live streaming at a low cost!
Budget
Let’s first start with your budget; How you live stream, your church service will really depend on who is reading this. You might be looking for a more temporary solution and don’t want to invest as much, or you want to grow your church streaming capabilities. Each has a different level of difficulty and cost.
So, we have divided this guide into two sections with two different budgets:
- Smartphone live streaming – quick, easy and more affordable
- Camera live streaming – more advanced and costly
The camera setups can vary greatly in price but can easily reach a couple of thousand dollars. But hopefully, your church already has some of the equipment needed like a computer, audio gear, and lighting. More on that later.
Live Stream a Church Service With a Smartphone
A complete broadcasting setup does not come cheap. And if you are looking for a more temporary, less complicated, and more budget-friendly solution, a smartphone setup might be an excellent option for you.
Of course, smartphones are not free, but most clergy and church workers already have one at hand. This is what you will need for this one:
- Smartphone with camera
- Tripod with a smartphone adapter
- A person responsible for broadcasting
- (Optional) Live streaming app
- (Optional) Laptop
Step 1: Set Up a Tripod
To set up a smartphone live stream, you will need a tripod with a smartphone adapter; Like this one:
Set the tripod somewhere safe where it can capture good video. It’s always a good idea to appoint someone responsible for starting and stopping the stream.
The tripod we recommended above has a remote Bluetooth control you can use instead of the touch screen on the phone. This is great as it won’t shake each time someone hits the streaming button.
Step 2: Appoint Someone to Watch the Camera
You can do it yourself before a worship service, but it will look much more professional if you just appoint someone from the congregation to take care of the streaming for you. It is as simple as pressing the streaming button and making sure everything runs smoothly.
The person should avoid panning the camera with the tripod as it can be very distracting during a stream and makes the video harder to follow. You don’t want your congregation to get motion sickness! Instead, place the tripod in such a way that it can remain as stationary as possible.
Step 3: Use a Mobile Church Streaming Application (Optional)
Without an app or software solution, you will be limited to streaming only on one platform, like Facebook Live or Zoom. This shouldn’t be a problem since most congregations widely use Facebook, for example.
But if you would want a more professional solution, you can use a dedicated streaming app like “TVU Anywhere,” which is a smartphone app along with the TVU Producer software application.
TVU Anywhere turns your smartphone or even several smartphones to cameras. They are then connected to a computer with TVU Producer software installed, and you have yourself a multi-cam streaming setup.
Live Stream a Church Service with a Camera
To Live stream a church service through a camera, you will need to both capture video of the person preaching and proper audio. You might also want to use presentation software to display lyrics for songs at this level.
These aspects need to be combined to create a final live stream to a content delivery network like Youtube, Facebook, etc.
To help you out, here is what you need in bullet points:
- Camera
- Capture card
- Microphone
- Audio Interface
- Mixer (optional)
- Broadcasting software
- Presentation software (optional)
- Streaming platform
- Internet connection
Step 1: Get a Camera
Video cameras come in many varieties; All with different price points and features. Generally, there are two types of cameras you will be using for this setup—either a camcorder or DSLR.
Prices on both of these camera types vary greatly. This is why we list a few examples at different budgets for you to consider.
Camcorder
Your first choice of camera will be a camcorder. This is because they are specifically made to capture video. Just make sure to get one with an HDMI port to connect it to your broadcasting software.

DSLR
Your second option is to go with a DSLR. These cameras are built primarily for photography but can also capture great video. They are bulkier but usually have larger sensors to capture better video. Again, get one with an HDMI port.

AVKANS NDI Camera
There is a third and pricer option; this one is for those looking to create a more advanced setup. The AVKANS NDI camera is specifically built for live streaming events like church services. Its base allows you to remotely control its movement to capture everything that happens. It also has a noise reduction filter built into it, making it great for low light conditions.

Other camera types on the market would work for church live-streaming, like compact or action cameras and even webcams. But we found these options above to be the most ideal.
Step 2: Get a Capture Card
Secondly, you will also need to get a capture card that reads your camera’s video feed so you can add it as a capture source in your streaming software. Without one, you won’t be able to use these cameras to stream.

The connection is pretty simple; you connect your camera to the capture card using an HDMI cable and then plug the capture card into the computer. Here are some capture cards for you to consider:
Step 3: Setup Your Lighting
Now, let’s look at how to set up your lighting to live stream a church service. We will look at what is called a three-point lighting setup.
This lighting setup can be done with the lamps you have at hand, or if you want to go more advanced, you could get some LED equipment.
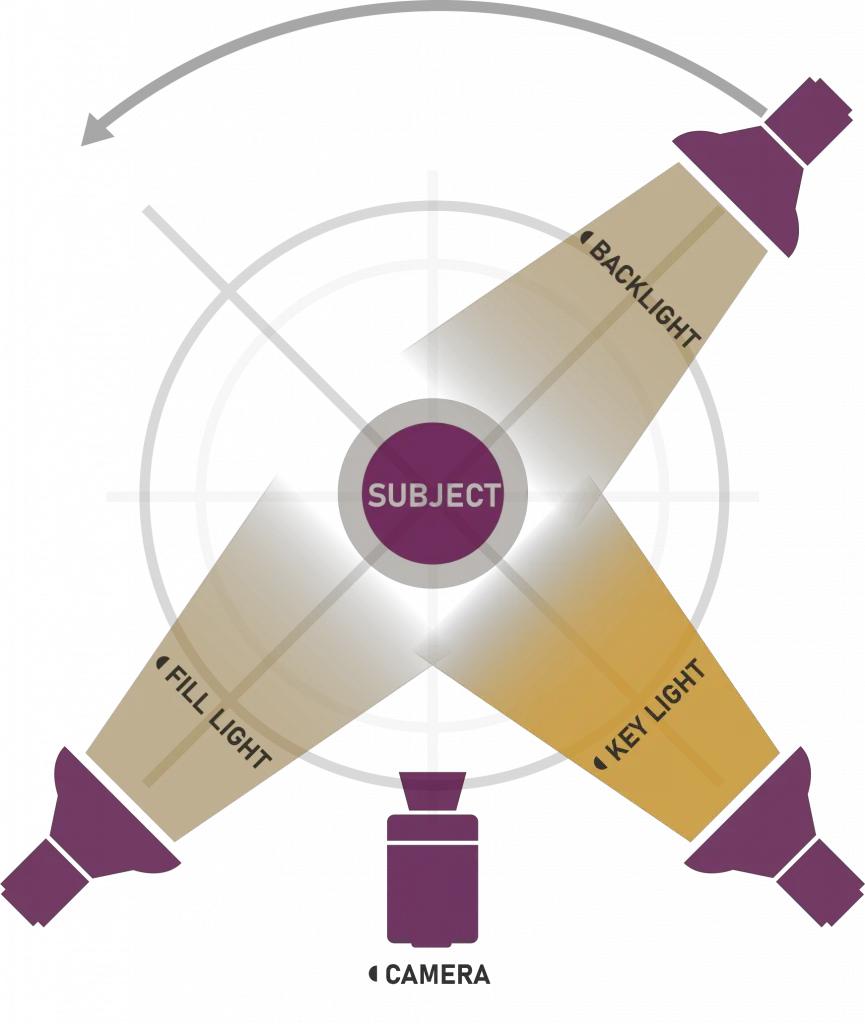
As you can see from the graphic above, this setup requires three lights; A key light, a fill light, and a backlight.
Key light: Your key light is your main light source and the strongest. Its purpose is to light up half of your subject, creating a slight contrast. Be careful, though, not to use harsh light, as it will create strong shadows that won’t look so pleasing. Instead, try to find soft light sources.
Fill light: The purpose of the fill light is to fill the now dark half of the subject with some dimmer light. Doing this ensures the subject does not feel too unevenly lit. We, of course, want that contrast between the two halves of the subject, but nothing too dramatic. Often, the fill light is even softer than the key light.
Backlight: Finally, we have the backlight. Unlike the key and fill light, it can be a bit harder if you wish. Because it lights up your subject from behind, creating a rim on the shoulders, it makes the person “pop” from the background and creates a more pleasing image.
This was a very simple explanation of the lighting setup. If you want to go more in-depth, check out our tutorial on it here.
Step 4: Set up Your Audio
Arguably more important than the video is audio when live streaming church services. It can make or break your stream. This is why audio from your camera just won’t do. Usually, cameras capture terrible audio that will make your stream unwatchable. So let’s look at some microphones:
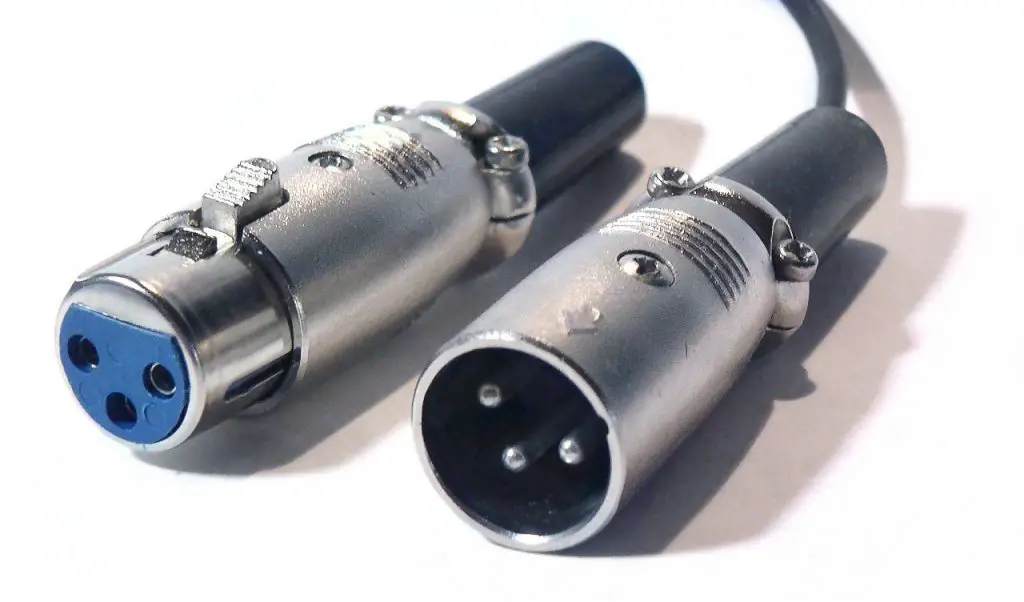
XLR Microphone
As stated above, you probably already have a microphone lying around somewhere in your house of worship. If that is the case, it is most likely an XLR microphone, and the cable for it looks like this:
Audio Interface
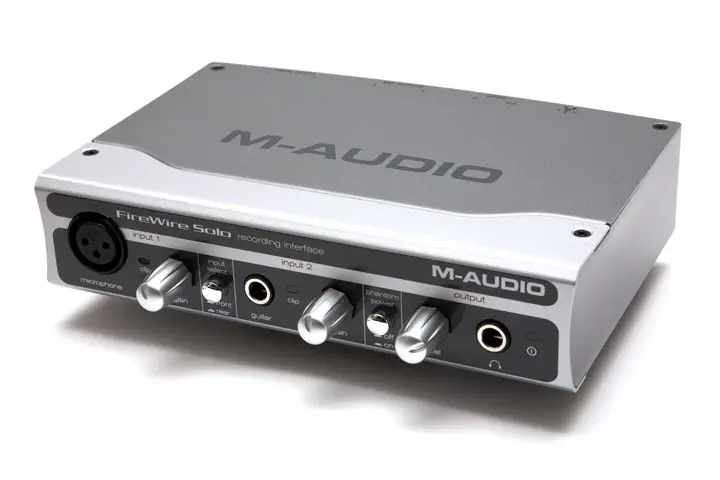
So how do you connect that to your computer? You will need yet another piece of gear called an “audio interface” and one with a USB connection.
An audio interface usually looks like a little box with XLR inputs and a USB output, allowing for analog to digital conversion.
Mixer (Optional)
Mixers are the more advanced alternative to audio interfaces. They are also more pricey.
A mixer does everything an audio interface does, allowing you to mix several audio channels simultaneously. You also control things like gain, audio filters, and EQ. This is why mixes look like big boxes with many knobs and switches on them. This is what they use in professional recording and broadcasting studios.
We have a list of smaller mixers ideal for live streaming here.
Now, keep in mind that mixing can be done directly on your computer without the need for a mixer. Of course, it won’t allow for the same level of customization, but for church live-streaming, it will work just fine.
USB Microphone
Lastly, if you don’t have a spare mic lying around, you could choose to get either a new XLR mic with an audio interface or a USB microphone.
With a USB mic, you don’t need an audio interface as it directly connects to your computer through a USB port. These are great alternatives for live-streaming, and they are often not as pricey as XLR mics.
Suggestions:
- TONOR Computer Cardioid Condenser PC Gaming Mic
- Audio-Technica AT2005USB Cardioid Dynamic USB/XLR Microphone
Tip: Since most USB mics have relatively short cables, you might want to get an extension cable to your computer.
Audio Tips
Audio can quickly get complicated, so these are some tips on how to capture the best audio when your live stream your church service:
1. Better Audio Gear is More Important
What we mean by this is that it is more important to get a good mic than it is to have a great camera. Video quality is vital, but when faced with where to put more money at a limited budget, prioritize the audio.
2. Keep the Gain as Low as Possible
Many microphones will have gain controls on them. Always record with as low a gain as possible because the higher the gain, the more noise you will get in your recording. Noise in audio is like static that you will constantly hear. Depending on the quality of the mic, it can be less prominent, but it is always there. So yeah, keep the gain down.
This means placing the subject as close to the mic as possible so that you can lower the gain without affecting the volume too much.
3. Use filters
Whatever noise does make it through into your audio recording can be eliminated using filters. In fact, do make use of the audio filters in your streaming software or through a hardware mixer to make your audio sound better. You can remove noise, fix EQ issues and make your voice sound crisp and clear.
Copyright & Music Licensing
Churches use hymns and Christian music all the time within the house of worship. Many congregations might already have copyright licenses for offline use. But as soon as you live to stream a service, you will need an online license.
This is why we recommend you use a church music license provider for live streaming:
- CCLI – With a huge catalog of songs and music you can use, CCLI is a popular solution for many churches. The pricing plan is divided into ‘Streaming’ and ‘Streaming Plus’ licenses. Price will vary depending on attendance.
- CCS – An alternative to CCLI is Christian Copyright Solutions. It has a cataluge of 28 million songs for your to use. Their livestreaming license starts at $265 / year and go all the way up to $3000 based on attendance.
You can read more about church music licensing here.
Step 5: Set Up Presentation Software (Optional)
Now, as we mentioned above, you might want to display presentation slides during a worship service with lyrics, chords, and lead sheets. To do this, you’ll need presentation software. There are both free and paid alternatives out there that are great for church live streaming.
- Opensong (free, open source)
- FreeWorship (free & paid)
- ProPresenter (free & paid)
You can later add the slides of your presentation software as a source in your broadcasting software to incorporate it into your live stream.
Step 6: Connect Everyhting to a Broadcasting Software
So now we have taken care of video and audio. But how do we put everything together into a watchable broadcast?
You will need broadcasting software installed on your computer. Below are the ones that we recommend for church live-streaming:
1. vMix (Windows)
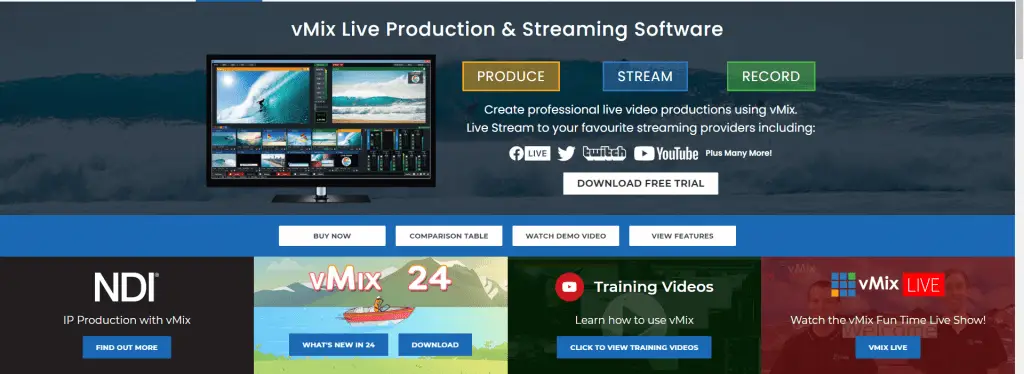
vMix is a professional broadcasting software that allows you to build a layout with your camera video, audio, and slide presentation.
We recommend you get the basic version, right now at around 60dollars. It allows for up to a total of 4 inputs and two camera/NDI inputs. Probably more than enough for what you need.
While vMix is built for Windows, it can be used on macOS with the help of Boot Camp. If you do not know what that is or how to use it, don’t worry, we have a macOS option for you below.
Here is an in-depth tutorial on how to use vMix if you are interested.
2. OBS Studio (Windows, macOS, Linux)
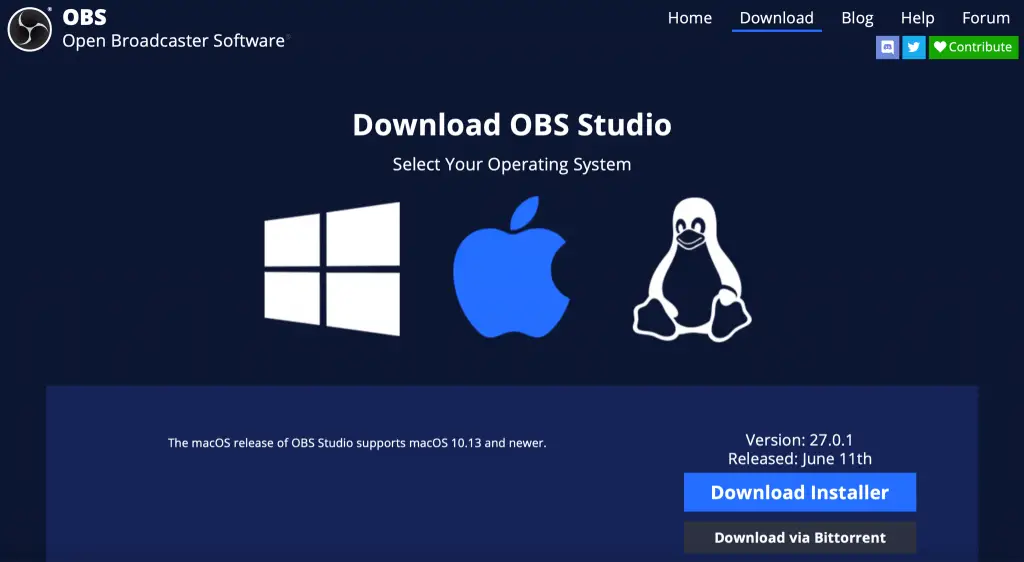
Now, there is a free professional streaming software called OBS Studio. It is excellent for streaming, but we would be hesitant to recommend it since it comes with a very steep learning curve.
Overall, vMix is a lot easier to understand and use as a beginner. But if you are tech-savvy and have the time yourself or know someone who has, definitely save the money and go with OBS.
Step 7: Broadcast to a Streaming Platform
Now that you have encoded your stream using broadcasting software, it is time to “live-stream” it to a platform.
Youtube:
Requirements to live stream on YouTube:
- Confirm that your channel is verified and has no live stream restrictions for the last 90 days.
- For mobile live streaming, you’ll need at least 1000 subscribers in addition to these requirements; there are none if streaming from a computer.
Enable live streaming:
If you enable a live stream for the first time, it may take up to 24 hours. Once enabled, you can live stream instantly.
- In your Youtube account go to ‘Creator Studio tools.’ Once there, find the Live Streaming tab.
- Mobile, just press create a live stream inside the YouTube app.
To schedule a live video:
- Click on the the ‘camera upload icon’ in the upper right-hand corner of your screen.
- Click on ‘Go Live’
- At the top, select Webcam
- Enter a title and description. Write clear, descriptive titles and descriptions to encourage more viewers
- Schedule your live stream for a later date
- Click More options > Advanced Settings for more settings
- Click Save. Your camera will then take a thumbnail
- Click Share to copy the link to share on social media, in an email or to embed on your website.
To start the scheduled live video:
- Just before the scheduled time, click the camera upload icon in the upper right-hand corner
- Click Go Live, then Manage to find your scheduled Live video
- Click Go Live on your scheduled video
- When you’ve finished, click End Stream at the bottom. All streams under 12 hours will be automatically archived. You can access previous, current and upcoming streams in the Live tab.
Facebook:
Go live on your computer:
- In the home page, and at the News Feed, click What’s on your mind?
- Then click the three dots icon and another menu will appear.
- Click on Live Video and you will be sent to Live Producer.
- Write a description for your live video.
- When you are done click on Go Live.
Schedule a Facebook live stream:
- In the home page, and at the News Feed, click What’s on your mind?
- Then click the three dots icon and another menu will appear.
- Now click on Schedule Live Video Event.
- Then select where you’d like to broadcast your live video; You can choose between your timeline, a page that you manage, or in a group.
- Name your event.
- Now set the date and time of your live stream.
- Then choose what privacy setting you want for your live stream.
- When you are done click on Next.
- Now you can also click on Upload Cover Photo or Choose Illustration to add a photo to your live video announcement. If you choose to not add a photo, your cover photo will appear as a default.
- Lastly, click on Create Event in the bottom left.
There are more platforms to cover. But these are usually the most common ones, and the process is very similar to the others as well. This is why we won’t go through them in this tutorial.
Livestreaming to Your Webiste
Some churches choose to live stream directly to their website in addition to other platforms. This takes some extra work but can be worth it.
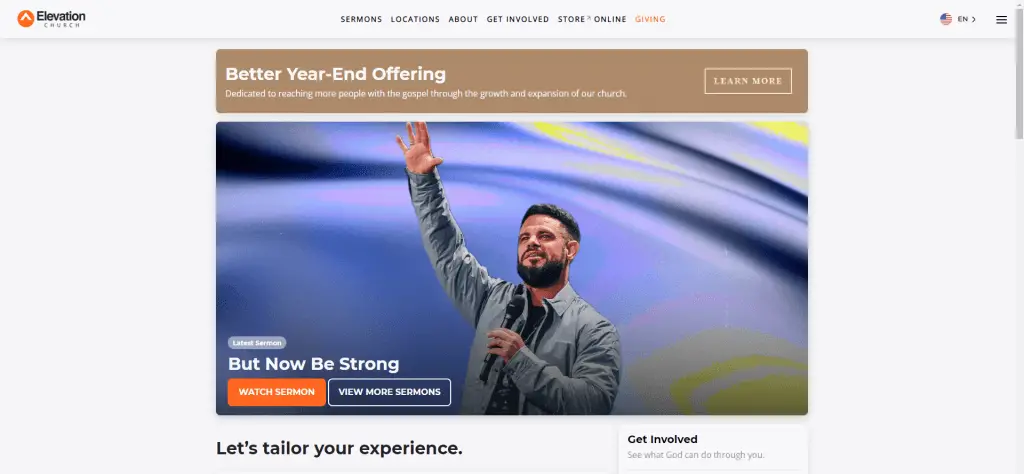
Some examples of church live streaming websites are:
- Elevationchurch – www.elevationchurch.org
- Preston Wood Baptist Church – wwwprestonwood.org
This is actually quite easy to do as you will only embed the video player from Youtube, Facebook, or the platform you are already using on your website.
- To do this on Youtube for example you go to your video page on Youtube where you will live stream and press the ‘share’ button.
- Then click on the ’embed’ option. A menu will open up with code that you can copy and a few checkboxes.
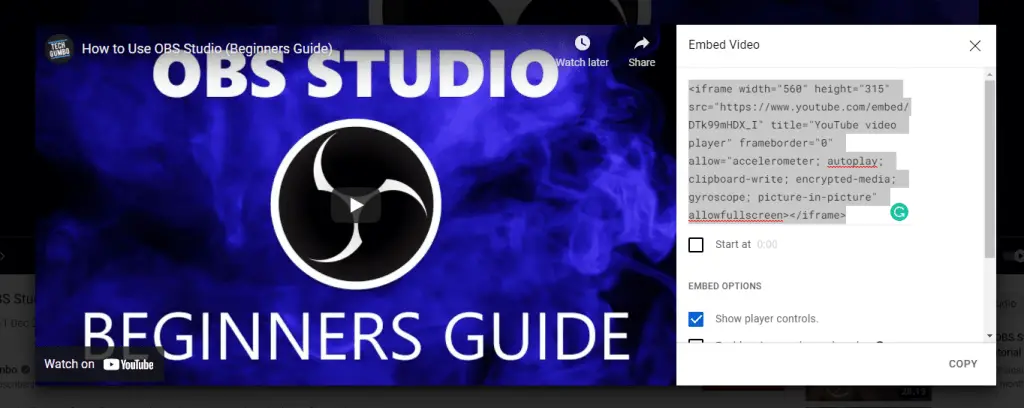
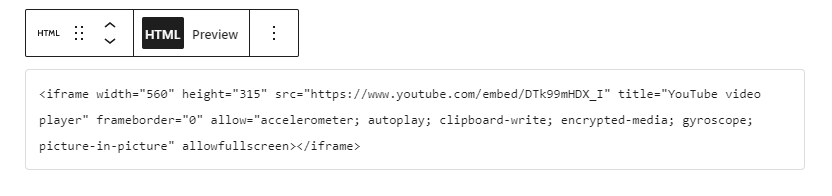
- Copy the code and paste it as an HTML element in your site where you want your video to be displayed. This process might be different depending on how your website is run. Below is an example form the gutenberg editor in wordpress.
There are other solutions to live streaming on your website as well that are a bit more advanced, like paid video hosting services. But for the purpose of this article, we will not go into those options any further.
Step 8: Appoint Someone Responsible for Live Streaming
And lastly, you need to have someone who can watch and manage everything we talked about above. As you might have gathered, there are many moving parts to this, and this someone needs to have some technical expertise to manage, unlike the smartphone setup.
Find the most tech-savvy person in your congregation and ask them to read this tutorial on how to live stream a church service and encourage them to do some further research as well.
In Conclusion
So there you have, our ultimate step-by-step on how to live stream church service. MediaEquipt is not specialized in church live streaming, though. There are much better resources out there that we recommend for that. If you want to go more in-depth, we recommend these websites:
- ReachRight – Tutorials, guides and resources for churches to reach more people.
- Churchfront – A YouTube channel with guides and tutorials for church broadcasting.
- Churchproduction – Gear reviews and tutorials for church video and broadcasting.
In the face of new circumstances and a new trend, we would like to quote the talk show personality Dave Ramsey when he was meeting up with several pastors, “Now we’re all televangelists whether we like it or not.”