
Editing is arguably one of the most significant video-making aspects. The techniques and editing formats can shape the story, amend the pacing, and provide an unforgettable viewing experience. As a video editor, you need to pay close attention to the editing techniques and styles while watching different videos or films.
In this article, we are going to dissect the top 7 video-editing techniques. Each one of them provides a particular effect on your viewer. Therefore it is essential to find a way to dive into each one of them separately. Assuming that you are using Adobe Premiere, all the examples and step-by-step methods of achieving those techniques will be provided.
General Video Editing Tips
Before getting into the best video editing techniques, it feels appropriate to provide general editing tips and suggestions. These tips suggest how to make your videos look more professional, regardless of which kind of editing technique is chosen.
Timing
Timing is everything when it comes to a well-crafted edit. It is vital to comprehend that the length of every shot, the temporal distance between the frames, and precise pacing can affect the audience. Therefore, understanding the ins and outs of timing is essential.
SFX and musical elements also play an essential part in timing. For instance, if you have an upbeat song that drives an editing sequence, you need to try and time your cuts around the tempo and style of the music to reinforce the sequence’s atmosphere.
Pay Attention to Continuity
Continuity editing is a system of cutting used to maintain continuous and clear narrative action by following the set of rules. These rules are:
- Matching the eye line: Eye line match is a film editing technique that indicates to the audience what the character is seeing. It is vital to keep the eye line amongst the characters in the scene persistent so it matches the overall continuity and does not slow the flow of the scene.
- Shot/Reverse editing: Shot-reverse-shot is a film technique where one character is shown looking at another character (often off-screen), and then the other character is shown looking
- 180 & 30 degrees rule: The 180 rule is a filmmaking technique that helps the audience keep track of where your characters are in a scene. When you have two people or two groups facing each other in the same shot, you have to establish a 180-degree angle, or a straight line, between them. The 30-degree rule is a technique that states that the camera positions between two shots should be separated by at least 30 degrees with respect to the subject.
Effectively dealing with continuity is what distinguishes a professional editor from an amateur. Ensuring that there is consistency in all the shots is the key to working with it.
Cutting on Action
Cutting on action is an editing technique that masks the cut by jumping from one camera angle to another simultaneously without breaking the flow of the previous shot. It helps to engage the viewer with the narrative as it does not destroy the illusion of the video.
This effect is used commonly to trick and confuse the viewer, so a complicated sequence is edited more smoothly. One of the most common ways that the cutting on action works is
Best Video Editing Techiques
1. Standard Cut
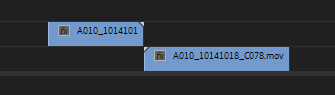
When we talk about film editing techniques, we need to start with the basics. Standard-cut refers to the most basic editing type; Shot A is cut at a particular moment and is immediately followed by Shot B; these two clips are put together, connecting the last frame and the beginning of the next one.
In most cases, the basic cut constitutes a shot-reverse shot. It is the continuation of the previous clip from a different angle.
This effect can be achieved by simply importing the video clips into the project and trimming the appropriate segment. You can achieve trimming the video clip, either through the ripple, which will shorten the entire clip, or by moving a cut by shortening one clip while you extend the clip next to it, trimming two clips at once. This is called a rolling edit. It keeps your whole project the same length.
2. Cross Dissolve

Cross-dissolve is one of the essential transitions for every editor to know. It provides an impression of the passage of time and makes the transition look seamless.
The principle of this transition works on increasing the opacity of the new shot and decreasing the opacity of the previous one.
One of the biggest mistakes that beginning filmmakers make when working with the cross-dissolve is putting this transition everywhere. Don’t overdo it. Know that this effect can only work in the appropriate moments and that it should always serve your narration purpose.
3. Montage
A montage is an editing sequence that represents a passage of time through (usually) fast-paced moving motion pictures. It helps to give an overall context of the story without going into too much detail through quick cuts.
Finding and organizing your footage is the first and principal aspect of creating a compelling montage video. Watch it a couple of times before you trim it, and start placing it on the timeline.
Another important element to consider is the music and the sound effects that will accompany the montage. If you are using a musical composition, try to find it earlier on, and make sure you drag it on a timeline so the visual elements coincide well with the audio.
4. Match Cut
In film, a match cut is a cut from one shot to another, where the composition of the two shots is matched by the action or subject and subject. An editor often uses match cuts in an attempt to demonstrate giant leaps in time or geography.
Shots connected by the match cut are another type of shots that need to be thoroughly planned out in advance so that videographers can create a similar composition for the match cut edit during the production. Factors like composition, color, geometric alignment, lighting, camera, and movement sequence are the factors that must be taken into consideration for the match cut. As an editor, you need to have all of these in your mind.
When working in Premiere, the first step would be finding two similar shots in your imported media. While sorting it out, pay attention to the composition, color, and geometric placement of the objects in the frame. There are two ways you can go about technically achieving this effect.
The first option would be to put two shots together and then just cut abruptly in between them. The second option is to use Morph Cut as a transition preset between the shots, adding more smoothness and flow to the tradition. It largely depends on your stylistic approach and the kind of aesthetic that your video possesses.
Overall, the Match Cut is an incredibly widely used video editing technique, and therefore every aspiring editor must have a basic introduction of how to approach working with it.
5. Cross-Cutting
Cross-cutting is an editing technique based on switching back and forth between the scenes, often giving the impression that the action unfolds simultaneously at two different locations.
Cross-cutting can help create intricate narrative structures in your video or film, emphasize the contrast, and show the storyline unfolding across multiple locations. In most cases, cross-cutting is also utilized to build up anticipation and suspense.
Like other video editing techniques, effective cross-cutting has to do a lot with selecting the right footage. Therefore, when you start working on your cross-cutting sequence, make sure you consider the following elements of your footage:
- Framing
- Composition
- Lighting
- Point of view
6. L and J Cutting
L and J cuts take their names from the shape of how the media looks on the timeline. An L-Cut is when the audio from the preceding scene continues to play over the footage from the following scene. L cuts are often used for dialogue or to cut to the reactions of people who are listening.
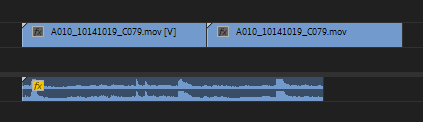
A J-Cut is, in turn, the opposite. It is when the audio from the following scene plays over the video from the preceding footage. J-Cuts create a sense of anticipation and suspense on what is going to come next.
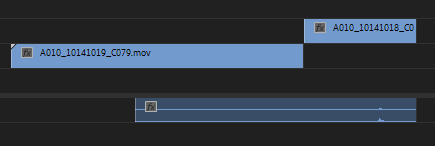
These two types of cuts elevate the feeling of the flow and make the transition seem smoother by further immersing the viewer into the film’s verisimilitude.
To achieve this effect on the Premiere, you need to do the following:
- Find the appropriate video clips that would create an effective sequence. If you are going to use a third video in between (as a b-roll) make sure it thematically fits the sequence.
- Drag your audio and video clips on the timeline and start assembling them in an editing sequence one after another. Start adjusting the shots by either trimming down the audio files or video files in L-cut or J-cut formations.
7. Invisible Editing
Invisible editing is one of the most unique types of video editing techniques, as achieving it effectively requires a lot of effort both on set and in post-production. This type of editing is also known as seamless editing. The purpose of the invisible editing is further to immerse the viewer into the world of the film.
First and foremost, you need to make sure that you find two clips with similar characteristics or themes. For instance, try to find shots with similar composition, color palette, symmetry, camera movement, and setting. Once again, for this transition to be achieved properly, there is a lot of planning and search involved.
When working with invisible editing in Adobe Premiere, there are two tools worth considering: adjustment layers and keyframes. By adding an adjustment layer and then dragging and dropping an appropriate transition (e.g., dissolve, fade-in, etc.), you can fine-tune the cut to make it more seamless. Furthermore, with the use of keyframes, you can adjust the quality and intensity of the transition preset. Try to manipulate, change, add and adapt different keyframes, as there is no universal way to approach them, and it largely depends on a specific effect.
In Conclusion
No matter what style or video editing techniques you prefer, it is important to know others as well. In most cases, each approach discussed above will change based on the type of content you are editing.
The best way to learn these techniques is through observation and practice. Notice how other editors cut in between the shots and what editing transition they use for each purpose. Try to pay close attention when watching different kinds of content. See what works and which effect it has on you.
Similarly, try to apply the same video editing techniques to your own project. Just open your video editing software and experiment with different transitions, keyframes, and footage cutting to change the overall pacing.
The more you practice and know-how to spot these techniques in the work of others, the better and more effective your work.
We also recommend you explore different editing styles in other films and understand where you should use each technique. We have an article on film editing history you can check out.