
Reversing a clip in DaVinci Resolve is quite easy and allows you to create cool effects such as a rewind. We will show you two methods to achieve the reverse effect and some tips for best results.
For a simple reverse effect in Resolve, go to the ‘Speed change’ section under the ‘Inspector tab’ and click on the reverse icon (the arrows going left). You can also set a custom speed if you want to slow down or speed up a clip.
The second way to apply a rewind to a clip is by right-clicking on the video in the timeline and opening the ‘Retime controls.’ This gives you some more refined controls over the effect and allows you to rewind only sections of the clip.
But let us now show how to reverse a clip in DaVinci Resolve in detail with our step-by-step tutorial below:
Method #1: How to Reverse a Whole Clip in DaVinci Resolve
This method works best when you reverse the whole clip. Resolve recently added a clip reverse tool in the inspector tab, so you don’t have to do any right-clicking. Just follow the steps below:
- Click on the clip in your timeline you want to reverse.
- Go to the ‘Inspector tab’ (the tab to the left of the playback area. If you don’t see it, reset your workspace).
- In the Inspector tab, scroll down until you find the ‘Speed change’ window and click on it.
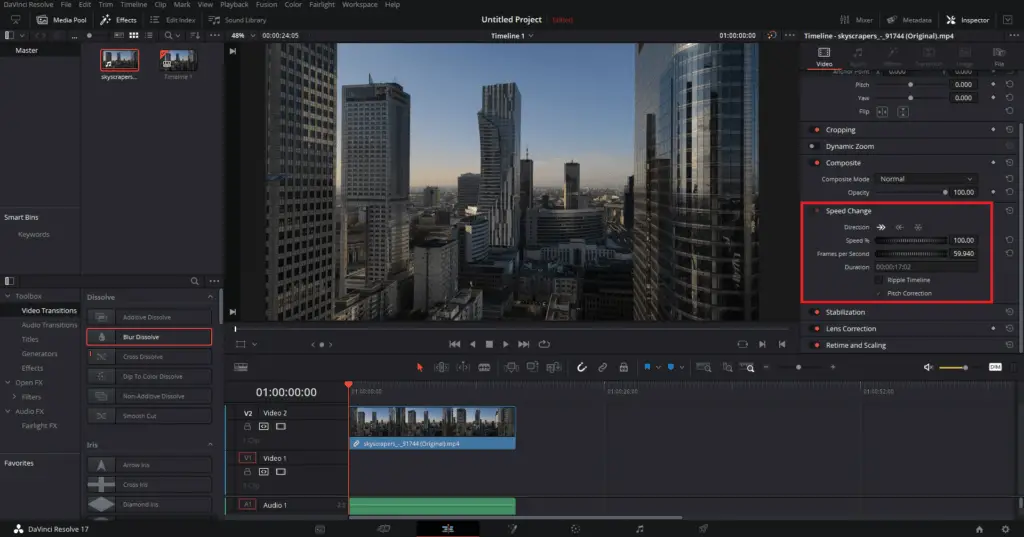
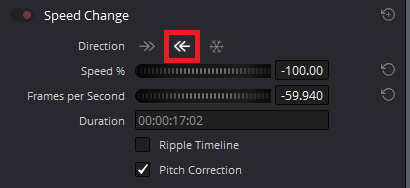
- In the ‘Direction’ section, just hit the arrows going to the left.
It’s as easy as that. You will also find controls for changing the clip’s speed and frame rate in the same menu.
Older Menu Method
You can also access the same controls by right-clicking on a clip and accessing the speed change menu.
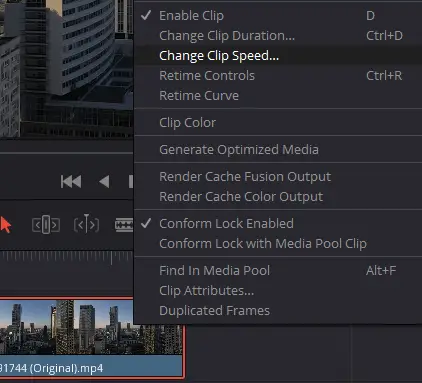
- Right-click on your clip in the edit tab, and a menu will appear.
- Select ‘Change Clip Speed.’
- In the panel, click on the ‘Reverse Speed’ checkbox.
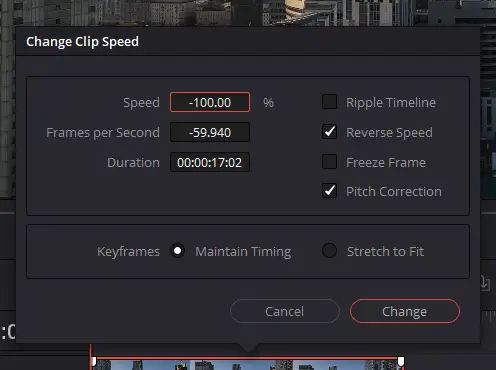
- Once you are done, click on ‘Change.’
If you want to reverse only part of a clip, there is a slightly more complex method we will show you below.
Method #2: How to Reverse Part of Clip in DaVinci Resolve
This method uses ‘Retime Contorls’ and ‘Retime Curve’ to reverse part of a clip and create smooth speed accelerations and deceleration. This is perfect for achieving a rewind or boomerang effect, but more on that below. Now, let’s jump into the steps:
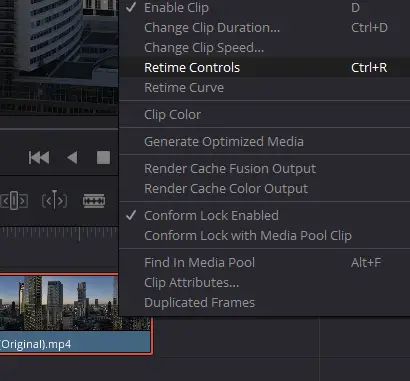
- Right-click on your clip in the edit tab, but this time select ‘Retime controls.’
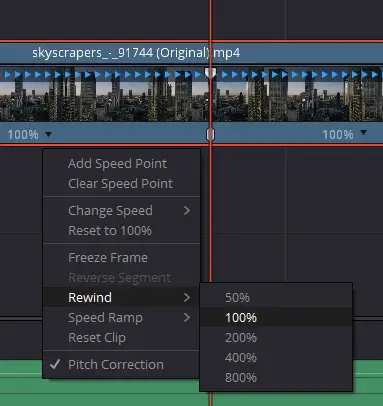
- Some new controls will appear in your timeline. Click on the inverted triangle at the bottom of the clip, and a menu will open.
- You will notice that each segment now has that inverted triangle at the bottom. Click on one of those inverted triagles in the segment you want reversed and select ‘Rewind.’ You will be able to select a speed for the effect. You can choose between ’50,’ ‘100,’ ‘200,’ ‘400’ and ‘800’ percent speed change.
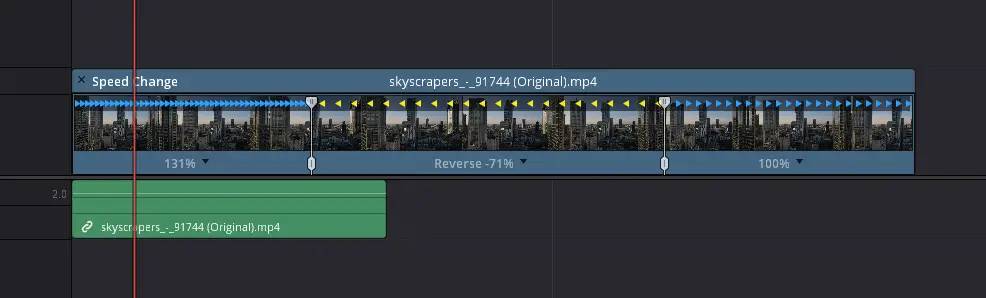
- Two markers will appear indicating where the reversed segment starts and ends. You can adjust them to get the exact part of the clip you want reversed.
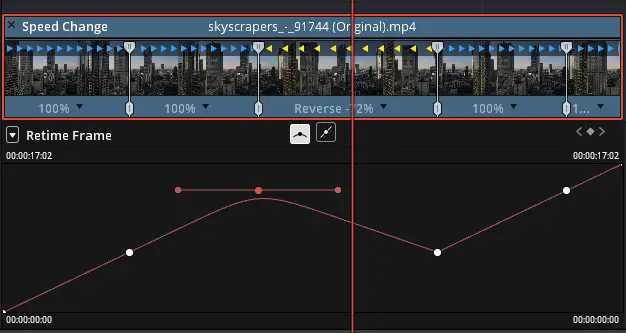
- For even more delicate speed controls, right-click on the clip and select ‘Retime Curve.’
- Under the clip, you will get a curvature graph. There, you can adjust the speed change of the reversed clip and even create smooth accelerations. Hover your mouse over the curve where you want a keyframe and press ‘Alt’ + ‘Click.‘
- Create at least two keyframes, and you will be able to create cool speed transitions. By clicking on the ‘Curved keyframe icon,‘ you can access curvature handles to create smoother transitions between keyframes.
How to Reverse Transitions in DaVinci Resolve
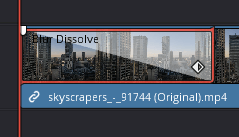
If you have reversed a clip in Resolve, you might also want to reverse your clip transitions. This can be done in the ‘Inspector Tab.’
- First, click on the clip with the transition you want to be reversed applied.
- Then, go to the ‘Inspector Tab’ and click on the transition section.
- In the timeline, drag the marker to the start of the clip.
- Under ‘Transition Curve,’ set a keyframe with the value of 1.0.
- Then, drag the marker in the timeline to the end and set a keyframe with a value of 0.0. You now have a perfectly reversed transition in DaVinci Resolve.
If the transition does not have a ‘Transition Curve,’ it is not possible to reverse it.
When To Use the Reverse Tool
How and when you use the reverse tool in Resolve depends on what you want to achieve. Below, we will show you some cool effects you can achieve with the tool within Resolve.
Rewind Effect
You see it often in movies, music videos, and on YouTube. For best results, it’s good to use a rewind sound effect, maybe even a rewind button icon, depending on the situation.
Resolve has a ‘Rewind’ option in the ‘Retime controls’ menu. Pressing that will automatically reverse the clip and change the speed to 200%. Check out method #2 above, where we go more into detail.
Boomerang Effect
You can also use the reverse tool to achieve a boomerang effect for a clip. What we mean by that is that the clip is looped by reversing it at the end. This can make for a unique and creative effect for your clip.
You can also slow down the speed as it transitions to the reversed part of the clip for an even smoother boomerang effect.
Make a Clip Longer
The reverse tool in DaVinci Resolve can also be used to reverse part of a clip at the end to make it appear longer than it is. This can sometimes work, depending on the situation.
A famous example is from ‘Star Wars: A New Hope,’ where they reversed part of a clip of the Tusken Raider to make it appear longer. We can assume they cut the take too early when they shot that scene.
In Conclusion
Reversing a clip in Resolve is pretty basic, but it’s great to know. The easiest method is by going to the ‘Speed change’ section in your ‘Inspector tab’ for a simple reverse effect.
But you can also do a lot more with the Retime controls, so it’s worth investing some time to try all the settings out for some cool effects.