Keyframes within Premiere Pro allow you to change the value of an effect or property over time. This means you can create motion, zoom in or out, change the opacity, tint, or other properties of an image. It applies to every audio effect as well.
This function is one of the fundamental editing features in Premiere, and knowing how to use it is a must. Thankfully, working with keyframes is not hard once you understand how they work.
This is a tutorial on how to use keyframes in Premiere Pro and what amazing things you can do with them.
What is a Keyframe In Premiere Pro
In simple terms, keyframes allow you to change a property’s value over a period of time within a clip. This means that any change requires a minimum of two keyframes; The value at the start and the value it has changed to at the end.
This is known as a ‘keyframe transition.’
So what are keyframes used for? They are typically used for zooming in on a clip, moving text or graphics, and adjusting audio volumes. But there is a lot more you can do with them.
Keyframes can be added through the effects panel (the most common method) and the timeline. This tutorial will look at adding and modifying keyframes in Premiere Pro using the effects panel.
How to Enable Keyframes for an Effect
To enable keyframes, click on a clip and open the ‘effects panel’ for it.
Once there, you will see different controls for the effects of your clip. Among the default, image controls are motion, scale, rotation, and opacity. But once you add more effects to a clip, they will show up here.
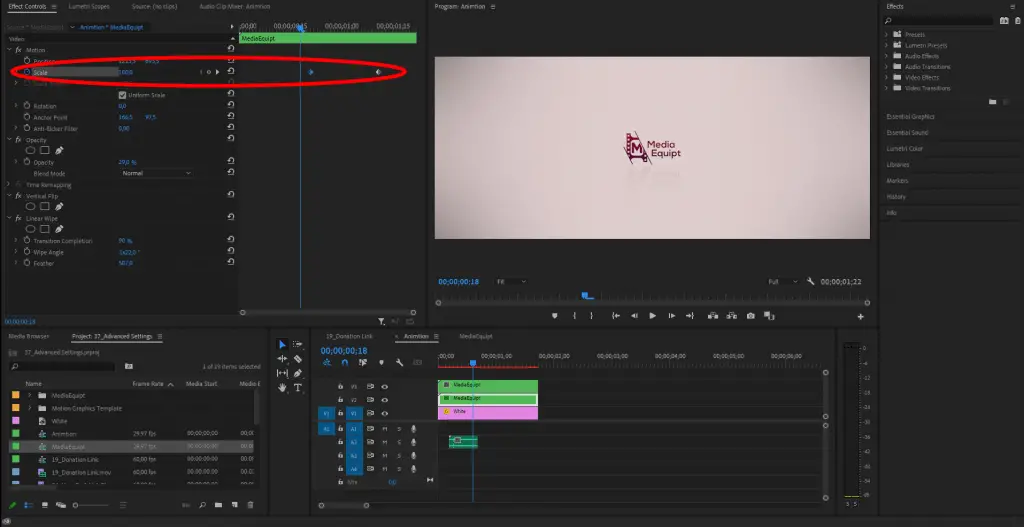
To add keyframes to a particular effect, press the ‘stopwatch icon’ next to it.
A keyframe will appear in the timeline of the effects panel. And here, you can change the value for that particular keyframe.
When keyframes are active, the ‘stop watch’ will turn blue.
Two keyframes with different values will create a linear change over time. For example; If we want a circle to move horizontally over the screen, we create keyframes with different x-axis values. It would look something like this:

Deleting Keyframes
To delete one particular keyframe, you just need to right-click on it and press ‘clear.’ If you want to delete all keyframes for a parameter, you click on the now blue ‘stopwatch’ icon, and they will disappear.
Velocity Graph
Effect properties have a drop-down arrow on their left side. Pressing the arrow opens a slider that allows you to change the velocity of a keyframe, aka how fast the change in value is. These adjustments can simulate something closer to ‘real-world’ motion.

Doing this lets you set a custom curve for how the velocity changes. With this tool, you could, for example, create a curve where the clip moves horizontally; First slows down and then accelerates the closer it gets to the next keyframe. It would look something like this:

Ease in & Out With Keyframes
Now that you know the basics, let us look at another keyframe feature in Premiere.
You might notice that the sudden stop in the movement of a clip can feel choppy. We can add an ‘ease in’ or ‘ease out’ effect to the movement to make it feel more natural.
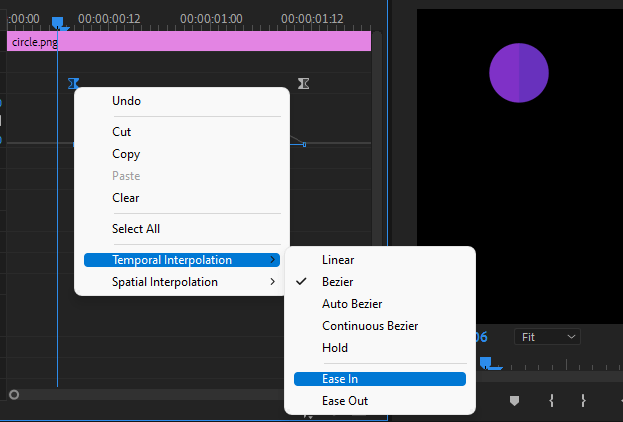
To do this, you right-click on the desired keyframe and select ‘temporal interpolation.’
In the submenu that appears, you will now find the ‘Ease in’ and ‘Ease out’ options. Once added, it will look something like this:

These are probably the most common features you will use when working with keyframes in Premiere Pro. But as you noticed when you right-clicked on the keyframe, more options are available. These are keyframe properties. Let’s take a look at them below!
Premiere Pro Keyframe Properties Tutorial
By default, the keyframe is set to ‘linear,’ but cool things can happen as we play around with other keyframe properties. We will do a quick rundown of each:
Temporal Interpolation & Spatial Interpolation
First things first, when you right-click on a keyframe, a menu will appear, letting you select either ‘temporal interpolation’ or ‘spatial interpolation.’ Each of their drop-down menus looks virtually the same, so it’s easy to get confused.
The difference between these two is that Temporal interpolation deals with changes in an object’s time, while Spatial interpolation deals with changes in a layer’s path shape.
Temporal interpolation can be used to determine whether an object moves evenly or accelerates across a motion path. On the other hand, spatial interpolation is mainly used to determine whether the corners of the velocity graph should be rounded or angular.
If this sounds confusing to you, it’s understandable. The most important thing you need to know about these two is that Spatial interpolation creates the most realistic and natural movement. Sharp path points become more rounded, creating a smoother effect.
Both of these options will have a submenu where you can change the keyframes properties. You will have the following options; Linear, Beizer, Auto Beizer, Continous Beizer, and Hold.
Let’s take a look at each of these to understand them better.
Linear
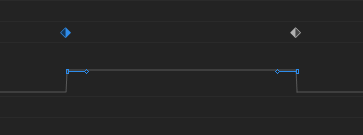
This is the default setting for a keyframe; The ‘linear’ value means that the movement is continuous and is not accelerating or slowing down between keyframes.
Bezier

Bezier lets you adjust the shape of the graph manually on either side of the keyframe. You can achieve very smooth changes with this method.
Auto Bezier
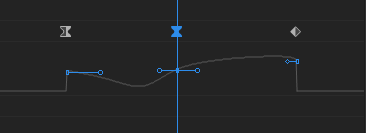
As the name suggests, this property automatically creates a smooth rate of change through a keyframe. It can be used to create smooth transitions between keyframes.
Continuous Bezier
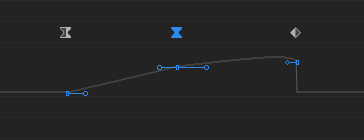
Similar to ‘Auto Bezier’ but with a critical difference, ‘Continous Beizer’ lets you adjust the direction handles manually.
Hold

The ‘hold’ property is the opposite of the ‘ease out’ effect. In simple terms; This keyframe holds the current value until the next keyframe. The value will remain the same until it snaps to the next keyframe.
Working With Audio Keyframes
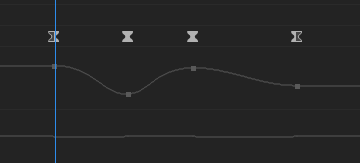
A common use of keyframes in Premiere Pro is for adjusting audio levels.
When working with audio keyframes, you will mostly want to work with ‘Spatial interpolation’> ‘Continuous bezier.’ This property creates smooth transitions in the audio between the volume levels.
In Conclusion
Hopefully, you found this Premiere Pro keyframes tutorial helpful! For further reading, we recommend Adobe’s instruction page on keyframes.
If you want to learn more about video editing, and working with Premiere Pro, check out more of our editing articles.
To summarize, keyframes allow you to create transitions and changes in values over time to a clip. They are a fundamental building block when editing in premiere pro, and because they can be applied to any effect or adjustment in Premiere, the possibilities are endless.
