
OBS Virtual Camera is a feature built into the latest OBS Studio versions that let you use OBS as a virtual webcam. In this article, we will teach you how to use an OBS scene in zoom meetings, Discord, and more with OBS Virtual Camera.
What is OBS Virtual Camera
OBS virtual camera is a tool that allows video call software like Zoom or Discord to recognize OBS as a video source. It was first introduced as a 3rd-party plugin but is now available in all the latest OBS Studio versions.
The feature enables you to set up a custom scene inside of OBS Studio with overlays, effects, and other media that are displayed in the video call. This makes OBS Virtual Cam is great for things like webinars, conferences, and company presentations.
OBS Virtual Camera can be connected with almost any video-call software like:
- Discord
- Skype
- Zoom
- Teams
- Slack
- Hangouts
Setting up OBS Virtual Camera
If you install OBS version 26.0 or higher, the OBS virtual camera is already in the installation. If you for some reason want to use an older version of OBS Studio, you can download the tool as a plugin here: OBS Virtualcam.
The newest version of OBS (26.0+) will have a “Start Virtual Camera” option on the right side in the controls menu.
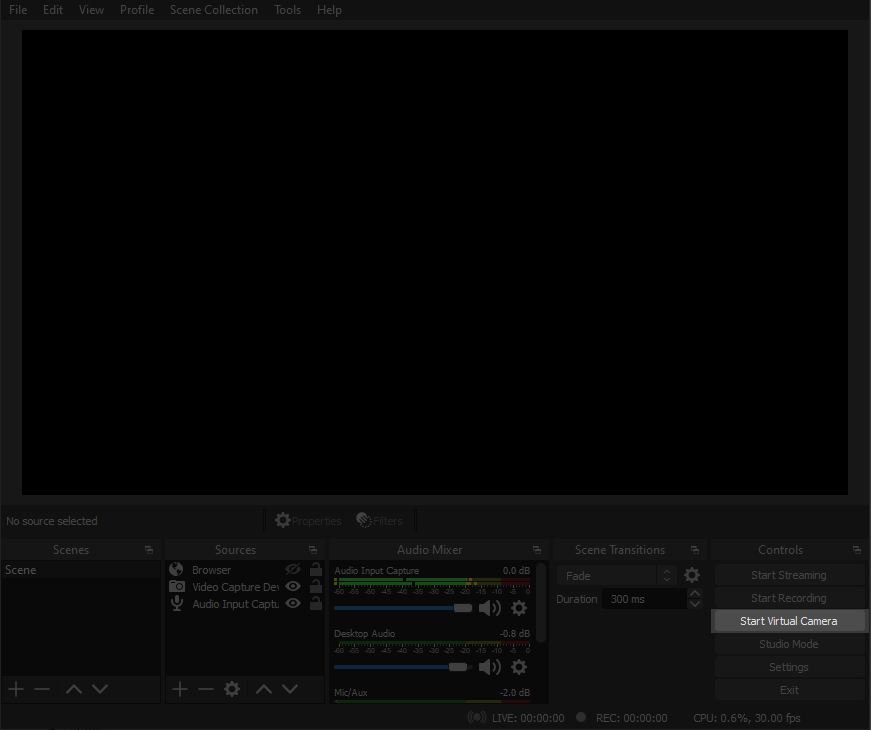
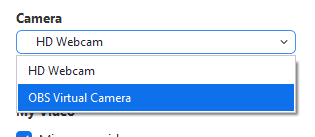
Click that button when you are ready to send the video feed from OBS to your video call software. Then go to the camera settings of whatever video-call software you are using and you will see “OBS Virtual Camera” as an option.
OBS virtual camera will show whatever media or text you have added into the scene you create in OBS.
Setting up OBS Virtual Camera In Streamlabs OBS
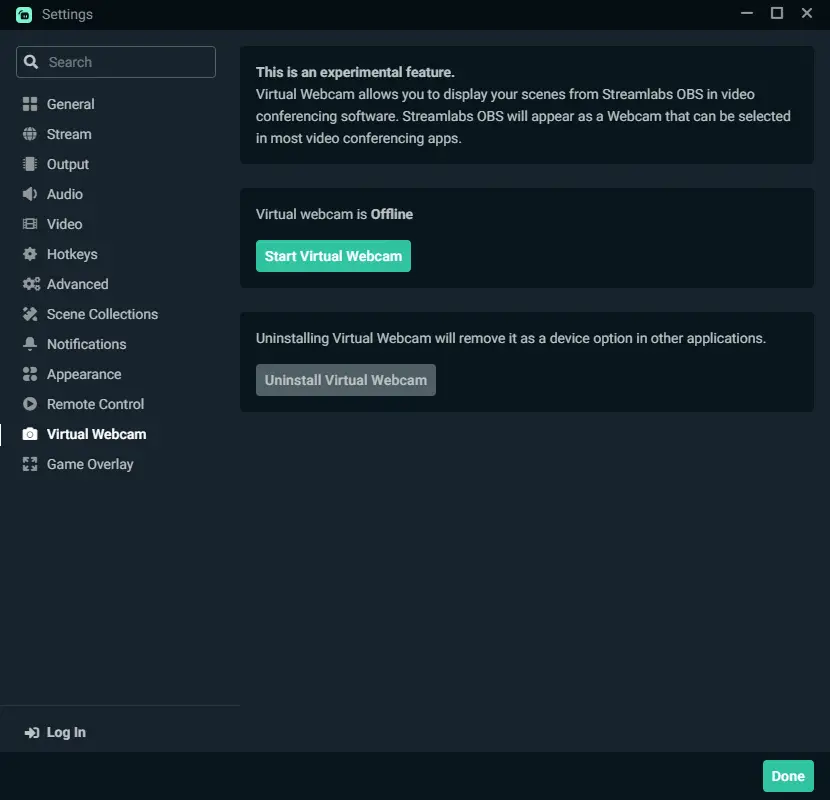
If you are running on Streamlabs OBS, the process is very similar. You simply go to the settings in SLOBS and select Virtual Webcam. The first time, you have to install this feature, it only takes a few seconds.
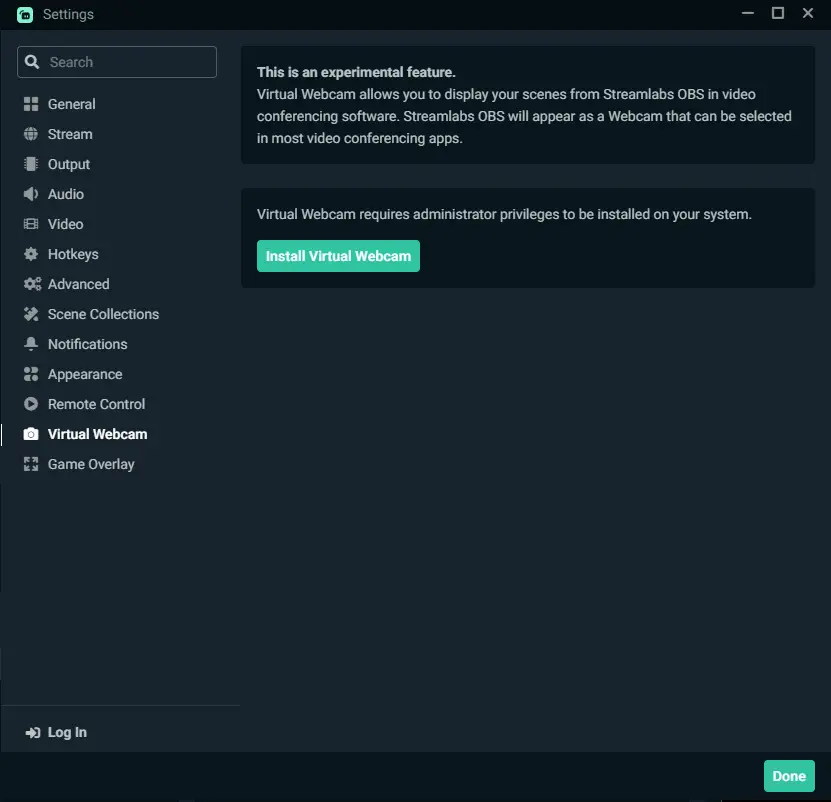
After it is installed, you simply press on “Start Virtual Webcam” when you are ready.
Setting up a Scene with OBS Virtual Camera
Whether you are using OBS Studio or SLOBS, setting up a scene lets you create and layer overlays into your live video; You can add a green screen to your background or other types of media into the webcam feed like images, graphics, alerts, and more. For example, you can add animated falling snow, presentations, a graph, or emoji pop-ups.
The source box in OBS uses the layer system, as we mentioned before. So as you add different options to your scene, layer them accordingly. For example, if you want to add an effect like snow going over the screen. Make sure the snow media source is above your camera source in the layer list.
Add whatever device you are using for a webcam from the source menu using the + option. The + option gives you choices from the menu of additional sources available to add to a scene. For the webcam installation, you will use the video capture device option. You will see the video pop up on the preview screen. Here is where you can adjust the size of the video to your liking.
Adding additional scenes will allow you to click through the scenes changing what the viewer will see from your end without constantly adjusting one scene. For example, if you want to add text, you can create another scene, then in the sources box, add a text layer. Any layer that you add into a scene can be adjusted to fit whichever size you need.
All of this is explained in greater detail in our OBS Studio tutorial here.
Using a Virtual Green Screen as Background
Employing a background for Teams, Zoom, or any other program with the correct color sequence to mimic a green screen will allow you to place that as your background behind your video to help block out everything in the room except you. This is usually superior to Zooms own background removal feature.
You can add an image for the green screen in the sources menu inside OBS. Otherwise, you can add the image to the virtual background option inside of zoom, and then add windows capture source inside the OBS source menu and select zoom.
The green screen and video of you will appear in the OBS preview window. Then add a chroma key filter to your video source and adjust the values needed for your video. Check out a more in-depth tutorial here.
In Conclusion
Learning how to use an OBS Virtual Camera allows you to do some really cool stuff in your next video call and is a great way to connect OBS Studio with Zoom, Discord, and other software.
// If you install OBS version 26.0 or higher, the OBS virtual camera is already in the installation. //
This applied for “installer” version. For zip version (i.e. portable version), need to run “virtualcam-install.bat” under “data\obs-plugins\win-dshow” manually. Otherwise the “Start Virtual Camera” button will not be shown.
The OBS virtual camera DOES NOT show up in the camera dropdown on Discord. I even tried an OBS recommended workaround for Discord by entering some terminal code, but nothing works. Wish someone would find a solution to this. I’ve watched several videos and read several articles, and none of them mention this issue, although it seems to occur often, since many people talk about it. But I can’t find a working solution.
The only solution I can find is adding a code snippet to the Terminal.app as you mentioned. Like here:
https://github.com/johnboiles/obs-mac-virtualcam/wiki/Compatibility
https://obsproject.com/forum/threads/obs-virtual-cam-to-discord.133437/
What OS are you currently running?