
To capture great audio, it is often necessary to record the sound separately from your video. Inbuilt camera mics usually have terrible quality.
That means that you have to synchronize audio and video later in post-production. We will show you how to do precisely that in the most popular video editor, Premiere Pro.
There are three methods to sync audio and video in Premiere Pro. These are:
- Syncing audio and video in the timeline.
- Merge clips
- Manual synchronization
For most situations, you will either want to use method 1 or 2. But there are cases you have to do manual sync as well. We will cover each option in-depth below:
Before you Open Premiere
The work starts long before you open Premiere. When recording several scenes/takes, it is vital that you have a system to organize and match audio and video clips later in the edit.
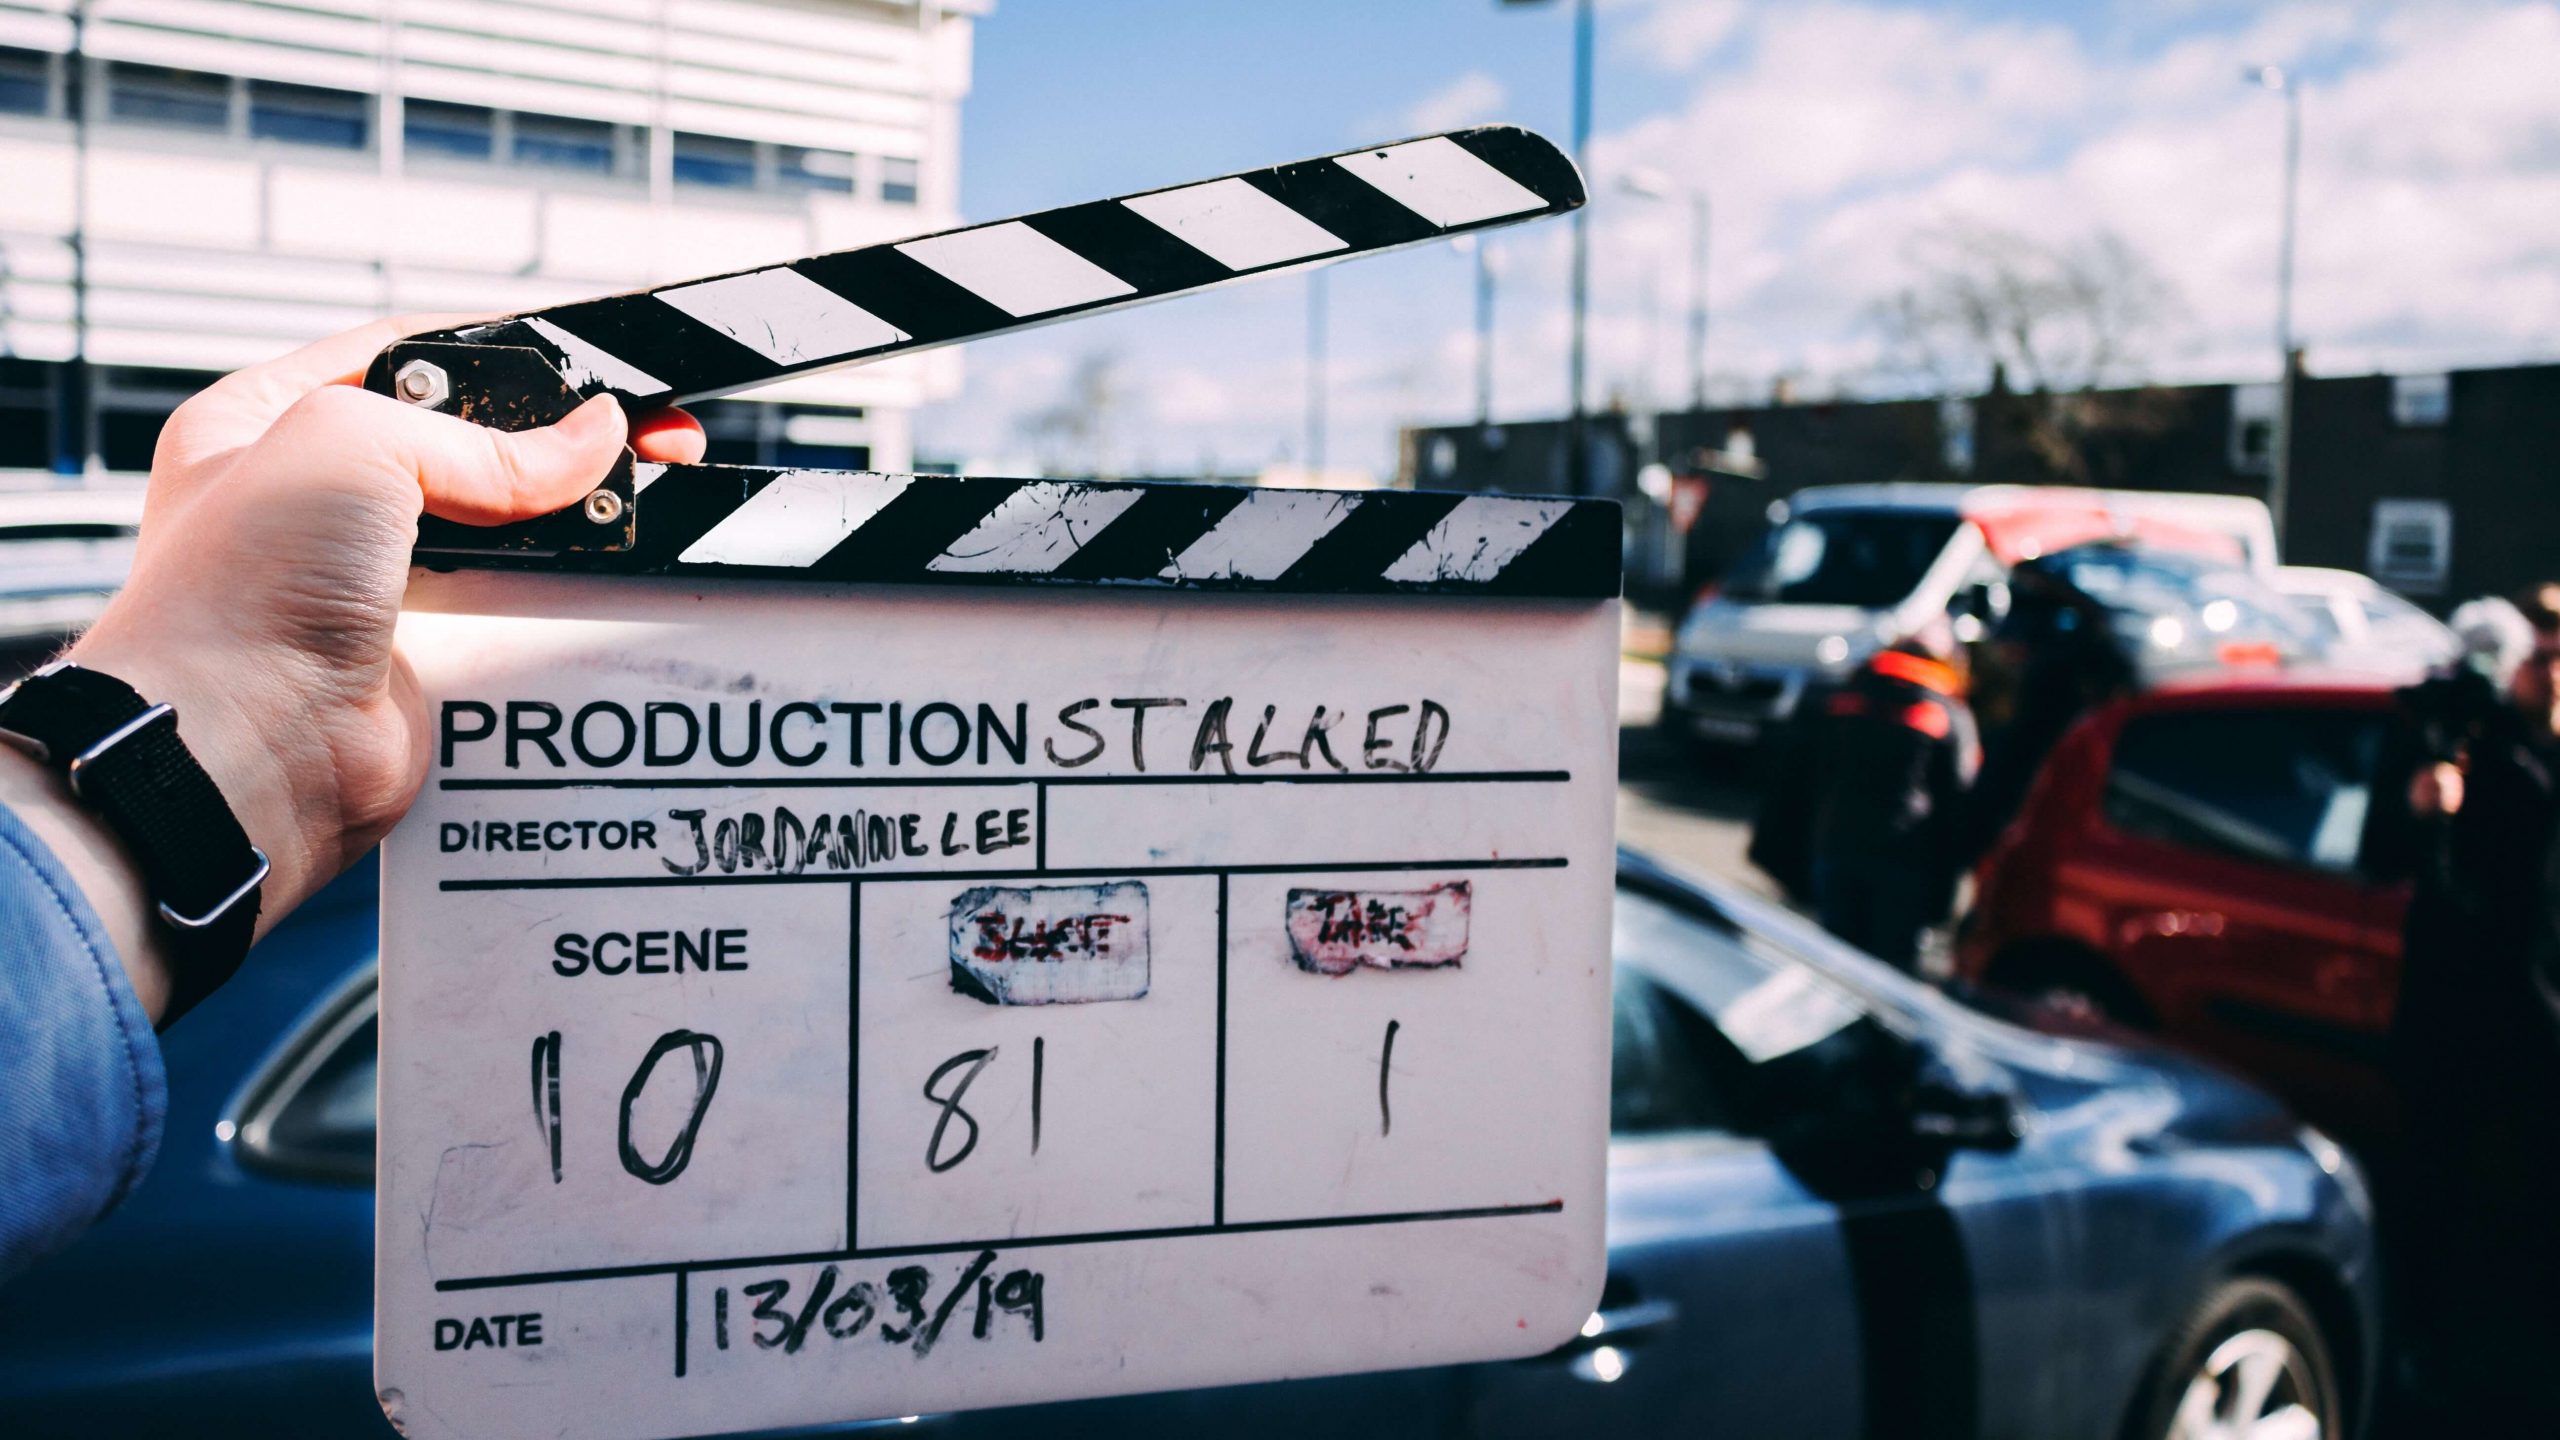
Simplified, you essentially need two elements for this to work; A “clap sync” and a “take number.”
The Clap Sync
Using a clapper creates a distinct spike in the waveform that allows you or Premiere to match that clap with the clap from the camera audio (also known as scratch audio) or the video frame.
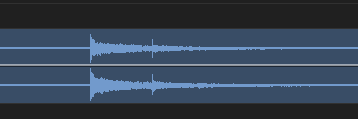
Even without camera audio, you can sync the sound by matching the video frame of the clap with the clap in the audio clip. Provided you can see the clap in the frame, be it a clapboard or using your hands.
Take Number
You should also include the take number in the first frame in each video file. Then, by reading aloud the take number before each take, you also have that info in the first seconds of the audio.
To achieve this, always make sure you hold up the take number, either with a clapboard or a piece of paper, BEFORE you begin rolling the camera. Then read it out loud AFTER rolling the mic.
Now when editing, you can quickly find what video and audio files correspond to each other
Putting it All Together
To do all of this we mentioned above, you can either get a clapboard or use your hands and a piece of paper.
Film clapboards are generally not that expensive, but going DIY works just as well. Now, let’s jump into the different methods of syncing audio in Premiere.
Method 1: Synchronize in Timeline
You can sync audio and video in Premiere right in the timeline. Just do the following:
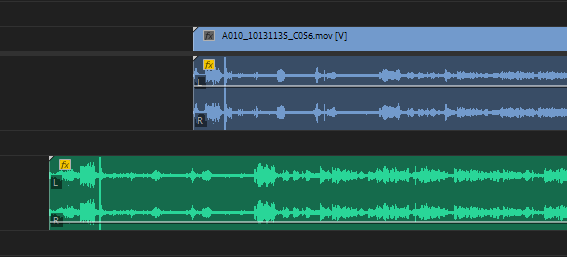
1. First, drag both the video file (with the camera audio) and the separate audio recording into the timeline like this:
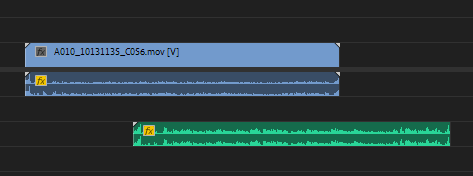
2. Select both files.
3. Right-click and select synchronize.
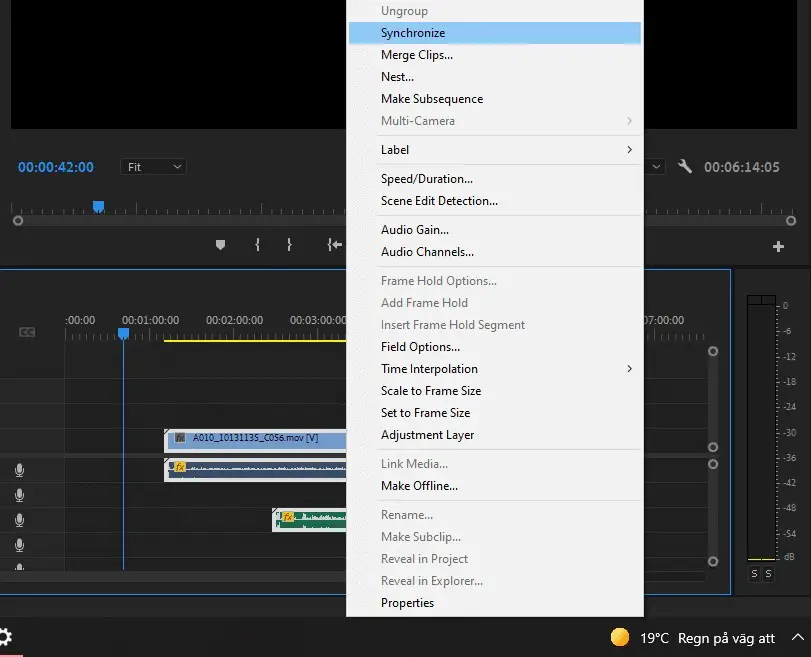
4. A Synchronize settings panel will appear. Make sure audio is selected.
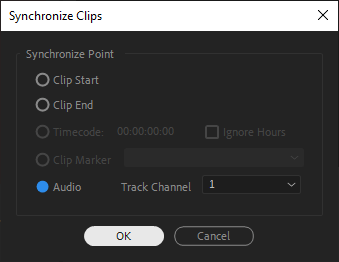
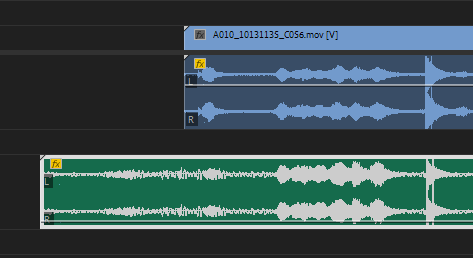
Premiere will now look for similarities between the camera audio and the sound file you want to sync and do the work for you.
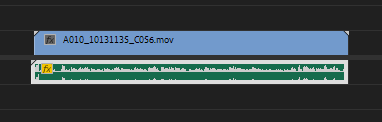
You can now remove the camera audio from the timeline, and there you have it!
Method 2: Merge Clips
Syncing files in the timeline is pretty straightforward, but it can quickly get messy and labor-intensive if many clips need synchronizing. Then you might use the Merge Clips method.
To sync audio and video in premiere pro using the merge clips methods, do the following:
1. In the Media Browser, select the video and audio file you want to sync (only two at a time) – hold in ctrl to select only the files you want to merge and not everything in between.
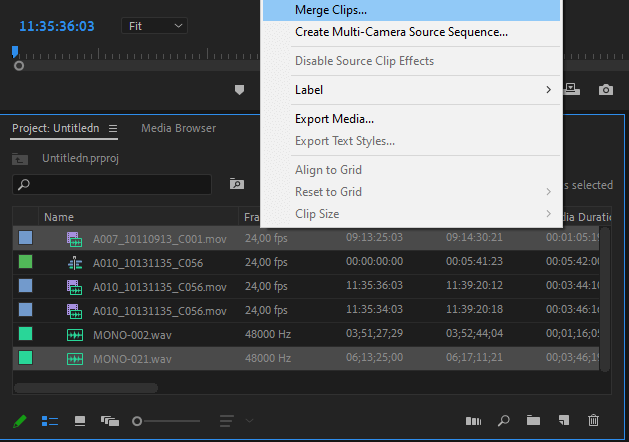
2. right-click on one of the files and select “Merge clips.”
3. Now, in the merge clips menu, select “Audio” and press “OK.”
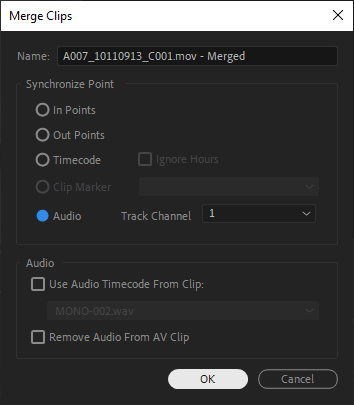
The result is a new file called “NAME OF THE FILE – Merged.” You can now drag the new file into the timeline.
When you do this with many clips, we recommend creating a new folder called “merged clips,” where you can save all your synced material.
Method 3: Syncing Audio Manually
Lastly, the most labor-intensive method is to sync the audio manually. You might have to do this if you don’t have any camera audio to work with.
Technically, it is pretty simple; you do the following:
1. Bring the video and audio clips into the timeline.
2. Match the sound of the clap with the exact frame in the video.
Common Issues When Syncing Audio and Video in Premiere
All in all, it is relatively simple syncing audio and video in Premiere Pro, but there are some common issues you might run into. Here is what they are and how to fix them:
The Clap Does not Match Exactly
This is a common issue you might have when syncing audio and video in Premiere. It is like the audio file “snaps” in-between frames.
To solve this issue, go to the three-bar menu in the timeline and select “Show audio time units.”
When selected, you have now changed the units of measurement in the timeline from frames per second to the audio time units.
Now you can zoom in a lot more within the timeline and move the audio clip to the precise point you like.
Don’t forget to deselect “Audio time units” when you are done.
It is Difficult to see the Waveforms
Suppose you find it hard to see the waveforms in the audio file, just double-click on the negative space in the track to expand it. Then make sure “Logarithmic waveform scaling” is selected in the timeline settings (the three-bar menu).
Further, if you want the waveforms to appear in the middle of the track instead of the bottom, uncheck “Rectified Audio Waveforms” in the same menu.
Accidentally Moved the Synced Audio File? How to Get It Back in Sync?
You accidentally bumped the synced audio when editing without noticing. Don’t worry, it happens. And unfortunately, there is no warning when it does.
You will need the audio from the video clip to get that audio synced up again, but you have probably removed it by now.
What you have to do is to select the clip you need the camera audio for in the timeline and then go to the Sequence menu in the toolbar and hit Match Frame.
It will now find the corresponding video file from the media bin, where you can drag its audio tack back into the timeline. Then, you can go ahead and get it back in sync.
In Conclusion
So this is how you sync video and audio in Premiere Pro, using each of these methods. We hope you enjoyed this article and recommend you also check out top tips for beginners in Premiere.