
The first time you open Premiere Pro, you will notice just how many unique features it has. You can do almost anything your creativity allows for, but this comes with a downside.
Premiere has a steep learning curve, and for beginners just starting, it is easy to get overwhelmed. So we have compiled 9 Premiere Pro tips and tricks any beginner should know. Each point on this list is a hands-on thing you can apply right now to avoid getting off track.
Beginner Tips & Tricks in Premiere Pro
1. Organize Your Files in Folders
Organizing your files in folders is essential when editing, especially for larger projects with tons of material. This should be done before uploading it to any editing software.
Create a clear system where you separate audio, video, and project files. Going even further, you can create a new folder for each day of filming and each card.
Here is a quick file system you can use:
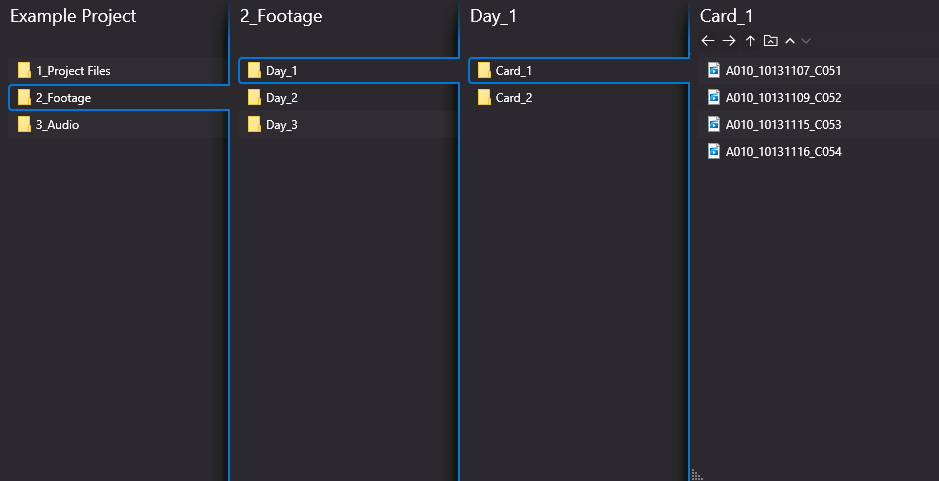
Project files – Here you save the project files from Premiere, After Effects, and any other software you may use.
Footage folder – In this folder goes all of your video files. Create Additional subfolders, further dividing your footage into “Days” and “Card number.”
Audio folder – This is pretty straightforward, but your audio files should be categorized and divided the same way as your footage, so you can easily find the corresponding audio files to each video.
Above are the three basic folders that should be in any project. But you might quickly find that you might need a folder for music, VFX, graphics, and other media files. In that case, keep building on this folder structure.
IMPORTANT: Once you have a file system created on your computer and uploaded to Premiere, do not make any changes to it.
If the name or location of the file is changed, Premiere will not be able to find it, and you will have to search for it manually. This can quickly become a nightmare if you work on an extensive sequence where several or all of the clips are missing.
2. Select the Correct Sequence Settings
This is where many starting out in Premiere make mistakes. In the sequence settings, you choose the aspect ratio, resolution, and framerate of your video.
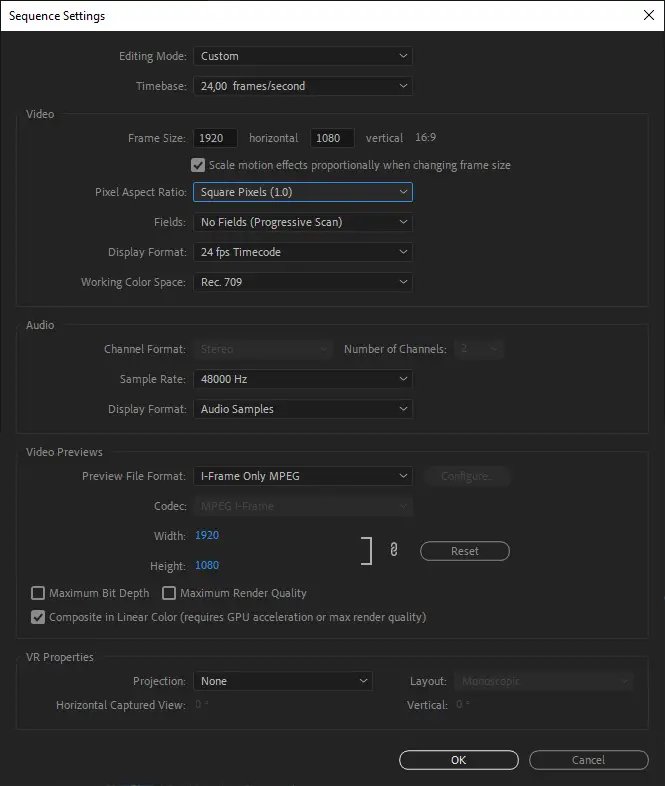
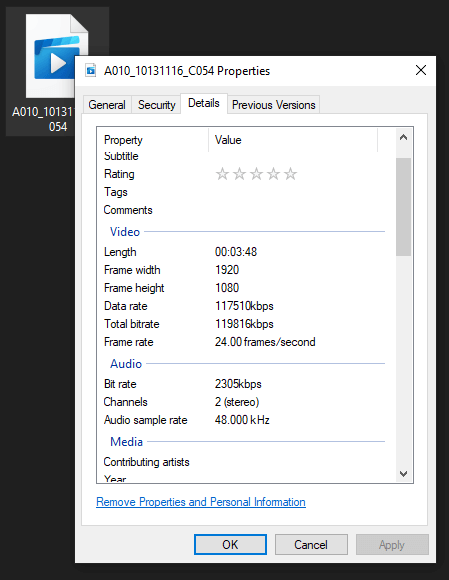
If your footage-file properties do not match with your sequence, you will run into trouble.
For example, if the sequence settings frame rate is set to 25fps, but your clips are in 24fps, the video will appear laggy. On the other hand, if the aspect ratio is off, important picture elements might get cropped out.
Therefore, check your footage properties before you set the sequence settings to make sure everything matches.
You might want to change the aspect ratio for your footage, and in that case, you can just be aware that the setting is different from your files.
3. Limit Yourself to 2-3 Lines on the Timeline
For beginners using Premiere Pro, it is easy to start stacking clips in the timeline. Before you know it, you might have five or more video and audio lines, and everything suddenly becomes overwhelming.
We recommend limiting yourself to just 2-3 lines when editing.
hen you are going to export the finished project, trim it down to just one.
Of course, you may use several timelines if you have several potential clips for that cut you want to use when doing the assembly. But as a general rule, try to work towards so few lines as possible.
4. Make New Sequences Often
It is easy to forget to make use of the sequence system in Premiere. Making new sequences for every scene or section of your project keeps your timeline cleaner and makes everything more manageable.
You can also make a sequence for each version of the cut you are making. For example, it is a good idea to make a backup sequence of your rough cut before going into fine-tuning, so you can always go back to the draft if you see something is not working. This way, you don’t have to start over each time.
5. Don’t Apply Effects Before You Are Happy With the Cut
A good Premiere Pro tip when working on projects is to always wait with color correcting and effects after you have done the cutting.
Putting effects on videos while editing will take more resources from your computer when you preview. It is also easy to forget the bigger picture when you are getting stuck with more minor details.
Typically, a good workflow when editing in Premiere is:
Assembly -> Rough cut -> Audio cleanup -> Color correction -> Color grading (entire video) -> Effects & overlays
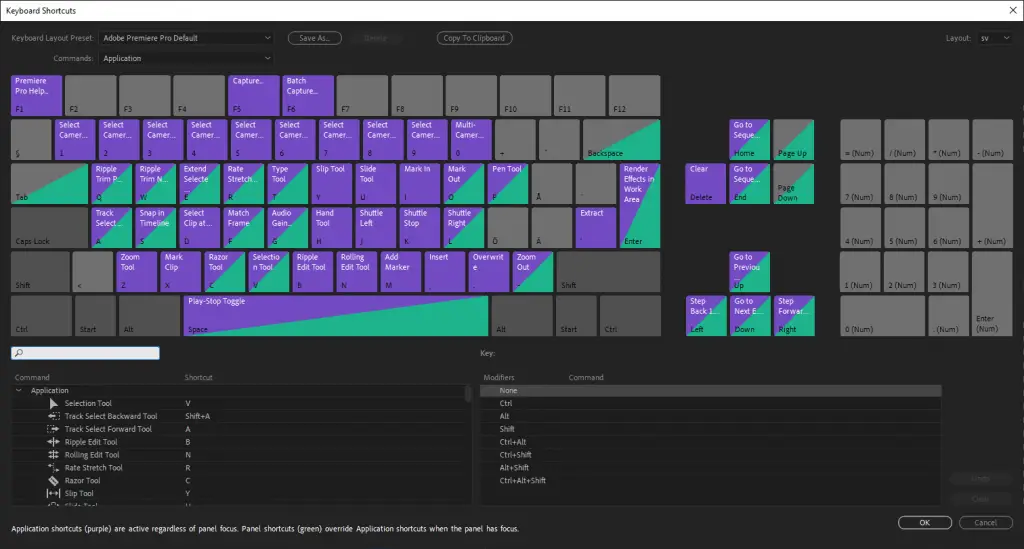
6. Use Keyboard Shortcuts
While not a requirement, keyboard shortcuts make your life so much easier when editing in Premiere Pro. There are, of course, tons of shortcuts you can learn, but only knowing the basic ones can really help!
We recommend that you write a not with these shortcuts:
| Action | Windows | macOS |
|---|---|---|
| Undo | Ctrl + Z | Cmd + Z |
| Redo | Ctrl + Shift + Z | Shift + Cmd + Z |
| Razor Tool / Cut | Ctrl + X | Cmd + X |
| Selection Tool | V | V |
| Select All | Ctrl + A | Cmd + A |
| Mark In | I | I |
| Mark Out | O | O |
For more keyboard shortcuts you can visit Adobes keyboard shortcut page.
You can also change the keyboard shortcuts to custom ones if you so like. This can be done by going to Edit -> Keyboard Shortcuts
7. Don’t Bother With Features You Don’t Understand
This is one of the most important tips and tricks in Premiere for a beginner; Ignore the features and settings you don’t understand. Premiere is a software with a ton of advanced features that you will probably never use. It is excellent that they are there, but it can be overwhelming for people new to video editing.
99% of the time, you will use the more basic video editing tools, so we recommend that you simply don’t bother with the settings and tools you don’t understand when working on a project.
As you might have gathered already, the reoccurring theme of this article is to keep things simple. So next time you see a bunch of settings and features in Premiere that you have no idea what they are or what they do, keep your cool and focus on what you understand.
This does not mean that you shouldn’t explore the software (we will go more into that later), just that you might not want to do so when working on a project you have to get done by a certain time.
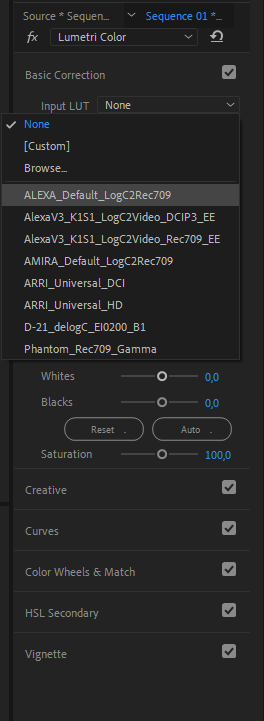
8. Make Use of LUTs
LUT is an acronym for “LookUp Table” and is a set of color grading presets you can use to grade your film.
Whether you are grading in Premiere or software like Davinci Resolve, using LUTs can make your life much easier than grading from scratch.
Premiere has its own built in LUTs thorugh Lumetri Colors. You can find it under Effects -> Color Correction -> Lumetru Color
There are also many free and paid LUTs out there you can download to get the exact look you want. Here are some we recommend:
9. Experiment
Lastly, we recommend experimenting. Just opening up Premiere and testing all of the features and tools and trying different things is the best way to learn.
Youtube has so many tutorials on Premiere that you will find the answer to almost anything you might be looking for. If you would like tutorials in blog format, you can check ours out. It will only really be by trial and error that you will learn.
In Conclusion
So there you have nine very practical Premiere Pro beginner tips and tricks. The big lesson for beginners is to keep things simple and organized, as video editing is chaotic, and you can quickly get overwhelmed.
Beyond the software, editing also requires a great deal of patience if you want to get any good at it. Take frequent breaks and split the workload among several days. Seeing your cut with a fresh pair of eyes as often as you can is key.