

Smooth audio transitions are essential in editing. This tutorial will show you how to fade in and out audio in DaVinci Resolve.
Your videos will appear much more professional and cinematic by fading your audio tracks. People can forgive bad video quality, but never lousy audio. Keep that in mind as your edit your videos and put in the care needed when editing audio.
Tip: We recommend using headphones when mixing audio in Resolve, as you will hear little details you would otherwise miss. But you should always check on different speakers too. You will be surprised how different your video sound can be on headphones vs. smartphone speakers, for example.
Method 1: Fade Markers (The Easiest and Fastest Method)
This first method is super easy.
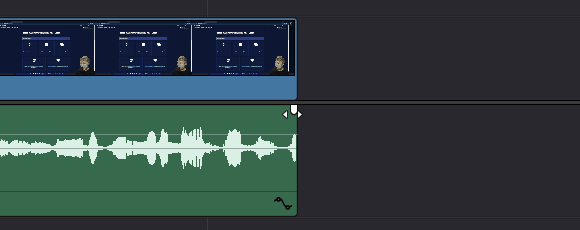
- Start by dragging your audio track onto one of your audio channels if you haven’t already.
- By clicking on the audio clip, a small handle will appear in the upper right corner of the track in the timeline.
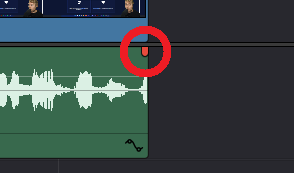
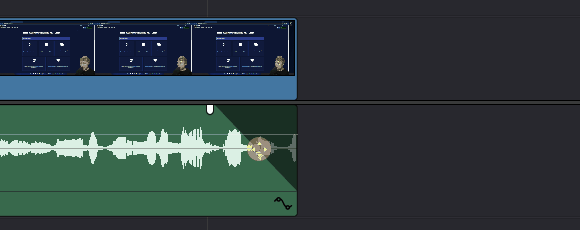
- Grab this handle and drag it to the left, as far as you want the fade out to be. You will notice that a timer appears when dragging the handle, giving you the exact length of the transition.
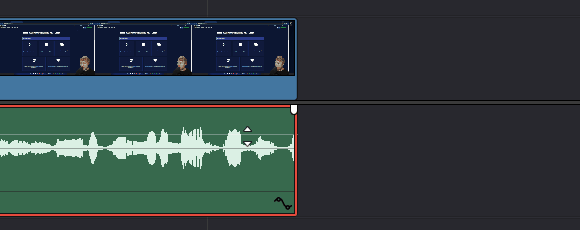
- Lastly, there is a small circle in the middle of the fade. By dragging it up and down, you can adjust the fade curve. Do you want it to begin quickly and fade out slowly, or maybe the reverse?
Fading in audio works precisely the same way on the left side of the track.
These fade handles give you many options for fading in and out audio in Resolve. And for most transitions, it’s all you need. But if you want even more control and more delicate settings, you can use keyframes and curves.
We will look into more of that below.
Method 2: Keyframes (For More Control)
When expanding an audio track in DaVinci Resolve, you will notice a line that runs through the whole file. Dragging this line up or down adjusts the volume of the clip.
But with keyframes, it is possible to change the curve of this line to create a fade-out or fade-in transition, even in the middle of the audio clip.
- To create a keyframe on this line, press ‘Alt+left-click‘ when your mouse hovers over where you want to add it. Once added, you can drag them left or right, up and down adjust their position. You can add as many as you want!
- By adding two or more keyframes, you can start adjusting the curvature of the line.
- To fade out the audio with keyframes, go to the end of the clip, and add two keyframes. Drag one keyframe to the end of the clip and then down to create the fade. Effectively, we just did the same things as with method one, but with keyframes.
Keyframes allow you to adjust the finer detail of the transition. You can set a keyframe to the exact audio gain you want, this is not always possible with audio handles in the first method above.
Method 3: Crossfade (Honorable Mention)
You can also fade out audio in DaVinci Resolve using an effect called ‘Crossfade.’ This is more of an honorable mention since the other methods give you more control and options than this one. Still, we thought it was worth bringing up.
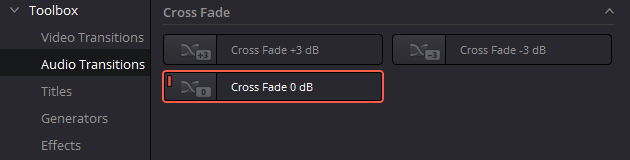
- To apply the effect go to ‘Effects Library’ > ‘Toolbox’ > ‘Audio Transitions.’ The effect will come with different volume levels. The default one is 0 dB for a simple fade.
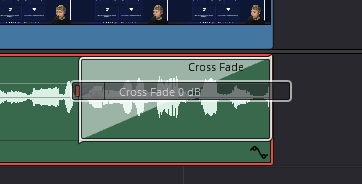
- Drag and drop the effect onto your audio clip. It will appear like a box, showing you the fade angle. You can adjust its position within the sound clip and its length by dragging on its sides.
For further customization, go to the ‘Inspector tab’ > ‘Transition.’ There, you will find the following settings for the effect:
- Transition type
- Duration
- Alignment
- Volume in dB
How to Create Good Audio Fade Transitions
Above was a tutorial on how to achieve a basic audio fade out in Resolve. But why not go a step further and improve the quality of the audio overall.
Get Rid of Noise
To make the audio sound better and the transitions more seamless, it’s good to remove noise from the audio clip.
When you hear noise through the sound clip, and then it ends before a new track begins, it’s pretty noticeable. Noise reduction will combat this.
The amount of noise in your audio clips depends mainly on what devices you used for recording and where you captured the audio. Fortunately, it’s actually super easy to remove unwanted noise in Resolve with the ‘Noise Reduction’ tool.
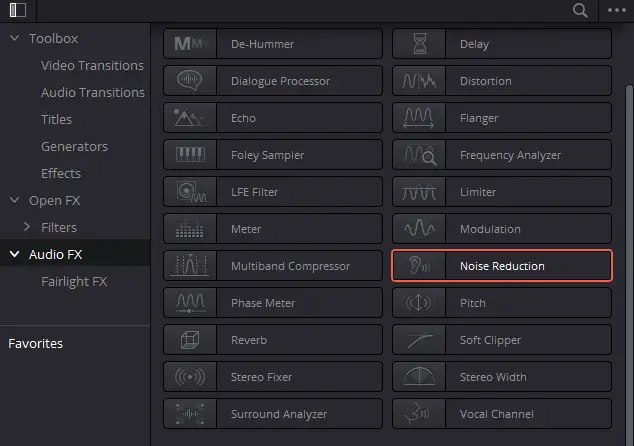
You will find the effect in the ‘Effects Library’ > ‘Toolbox’ > ‘Audio FX.’ To apply it, just drag and drop it onto your audio clip.
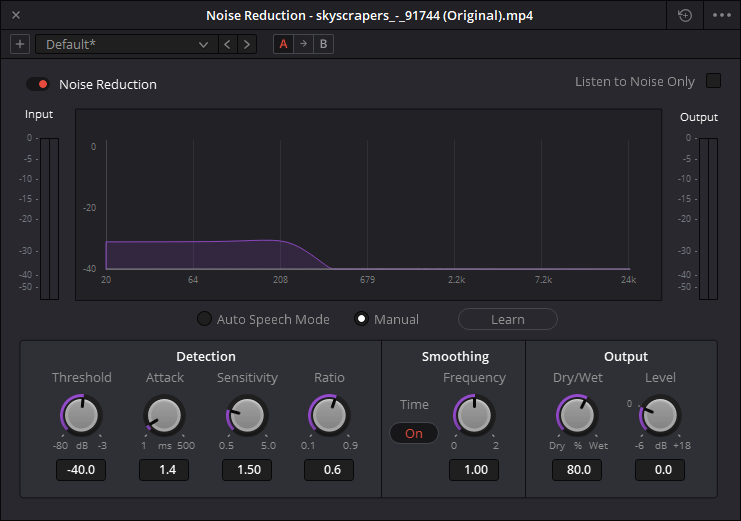
Once you apply the effect, a settings panel will appear where you can adjust the threshold of the noise and target specific frequencies. It often requires you to play around with the settings for a while before finding the right combination.
Add an Ambiance Sound
If you cannot remove noise entirely from your clips or the transitions are very noticeable, adding a background ambiance track will make everything sound better. It ties all the clips together. This applies when you don’t have music over that clip.
You can find all kinds of ambiance sounds online. The are room-tone ambiance tracks for quiet rooms, city ambiance, and nature. You name it! Just make sure they are royalty-free before you use them.
If you can’t find the right ambiance sound available, just take a quiet part of a sound clip ‘room tone’ you already have and loop it to create a continuous track you can put over the whole timeline.
In Conclusion
Hope you found this tutorial helpful! You should now know how to fade out audio in DaVinci Resolve properly.
To create smoother transitions, use the tips we showed you above; Remove unwanted noise and apply an ambiance sound clip over the whole timeline.
For more editing tips and tutorials, check out our other articles here.