
In modern-day streaming, there is a multitude of plug-ins, extensions, and unique add-ons you can add to your content to increase interactivity with your viewers.
Nightbot is one of the most popular moderation bots that can help you manage all of these features and much, much more, not only in your streams but in your Discord community also.
Read on to find out exactly how this works and how to add Nightbot on your Discord server.
What Is A Bot In Discord Chat?
On Discord, bots are helpful artificial intelligence that can automate a variety of activities on your server. This involves greeting new members, eliminating trolls, and managing the general conversation. Some allow users to play games with each other on your server, and others will play music upon request. They are essentially non-user accounts that you invite to your server to perform particular automated actions.
What Is Nightbot?
Nightbot is a moderation extension that helps creators manage their streams and servers by automatically executing processes. Some of the most popular Nightbot features are the ones that post automatic messages upon video uploads or instantly ban users who comment using blocked words. It allows creators to moderate their community even when they themselves are not at their computer.
One of the unique features of Nightbot is that it is cross-application, meaning the same bot works across both Twitch and Discord, carrying over the same rules, rewards, and commands.
Add Nightbot To Discord: Tutorial
First, if you don’t have a Discord account yet, you can easily make one at discord.com.
To create a server, you need to press the plus sign button on the left sidebar inside of Discord. A pop-up will appear that will let you create a new discord server.
This tutorial will focus primarily on adding Nightbot to your Discord server, but there are other bots out there and tools. Discord recommends for streaming; They can be found in their own recommended stream kit section.
1. Sign Up To Nightbot
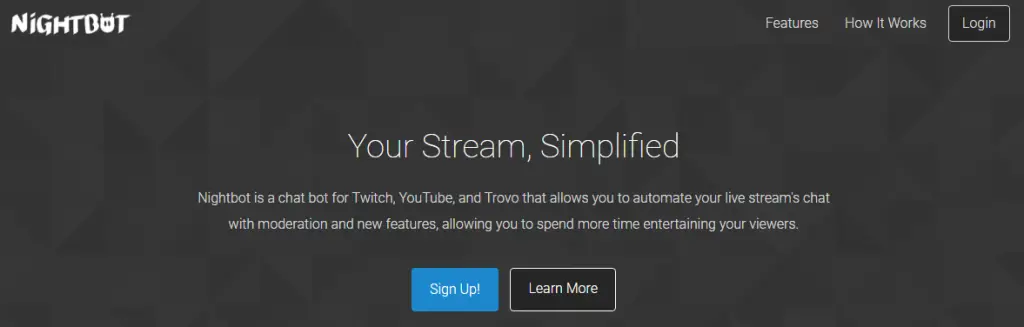
Your first step to adding Nightbot to your Discord server is signing up to Nightbot. Head over to Nightbot.tv and click ‘sign up.
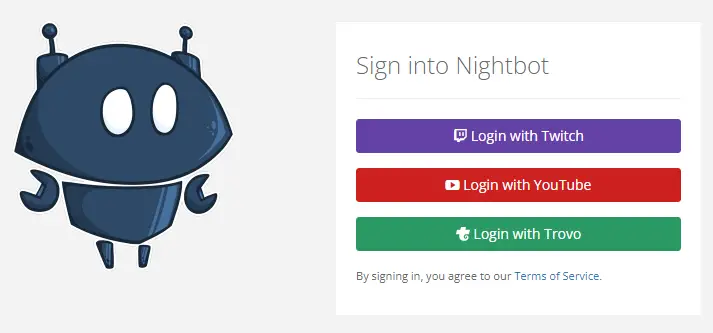
Choose the platform on which you stream and log in using your standard log-in credentials for that platform.
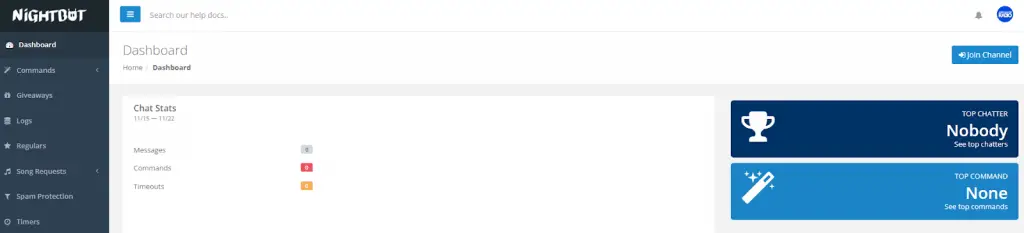
Nightbot is now linked to your streaming platform of choice. Be sure to click ‘Join Channel’ in the top right-hand corner of the dashboard in order to link it to your streaming platform if you haven’t done so already.
The dashboard is your Nightbot hub, where you will control all of your automated commands and actions. Be sure to take a look around and get familiar with this interface before inviting the bot into your Discord server!
2. How to Invite Nightbot To Your Discord Server
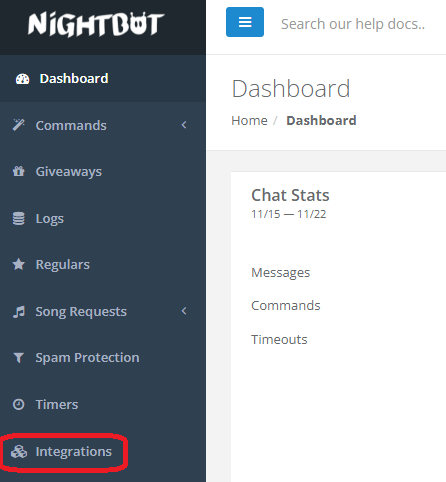
Actually, inviting Nightbot to your chosen server is relatively simple. From the dashboard homepage, click on the ‘Integrations’ tab in the menu on the left-hand side.
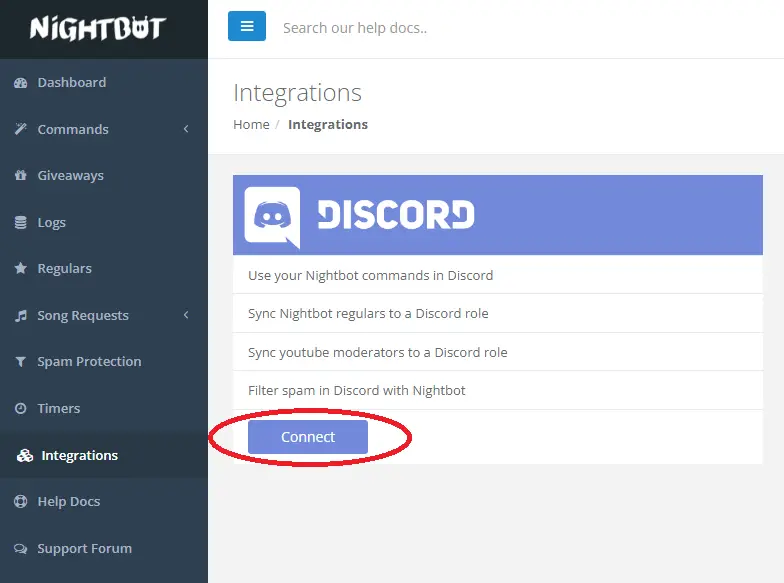
Next, click on the ‘connect’ button in the Discord sub-menu.
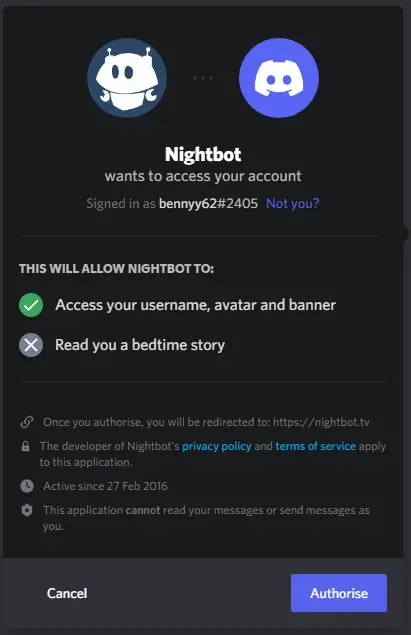
A pop-up window will appear asking you to log into your Discord account and authorize this action. Log in using your account details and click ‘Authorise.’
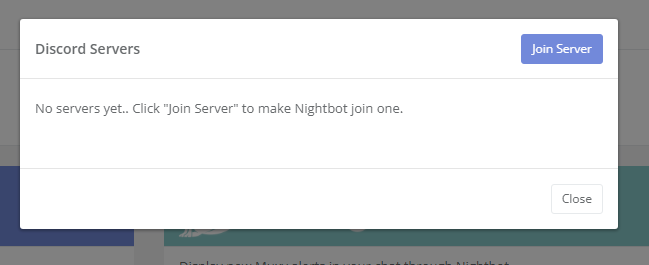
Once authorized, a pop-up will appear, prompting you to make Nightbot join one of your servers. Click ‘Join Server.’
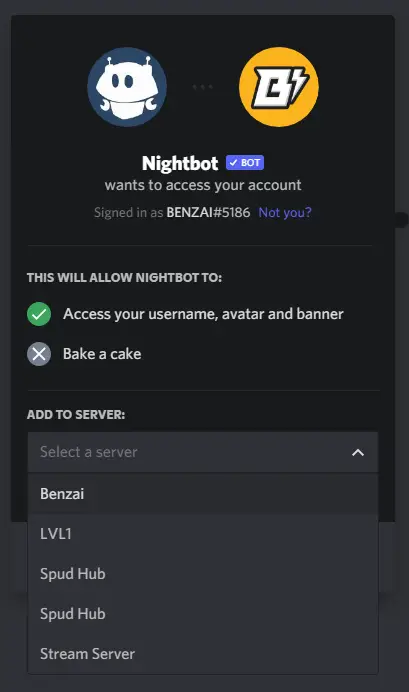
Yet another pop-up will appear asking you to pick a server to add Nightbot to. If you own multiple Discord servers, be sure to choose the one you want Nightbot to be present in.
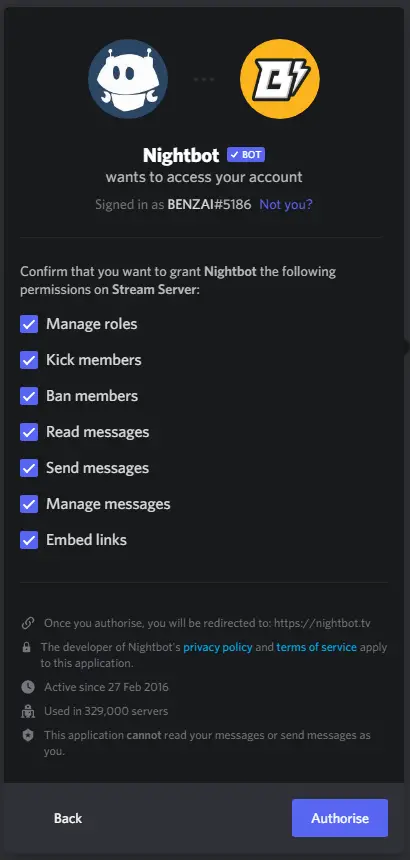
Make sure all of the privileges are selected on the next screen. This will give Nightbot the proper permissions in your server to be able to run smoothly. Click ‘Authorise.’
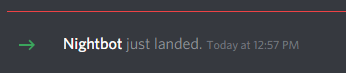
Nightbot is now in your Discord server. However, it doesn’t really have the correct permissions before it is assigned a role. Read on for how to set up your Discord Nightbot correctly.
3. How to Set Up A Bot Role
To allow your Discord bots to function correctly, it’s best to create a ‘Bots’ role that will enable them to do all the things they need to do by default.
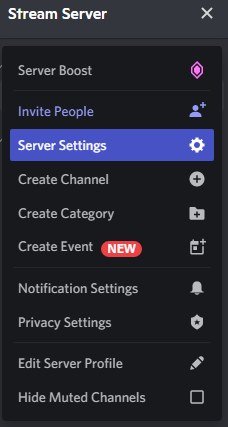
Go to your Server Settings.

Go to the ‘Roles’ tab and click ‘Create Role.’
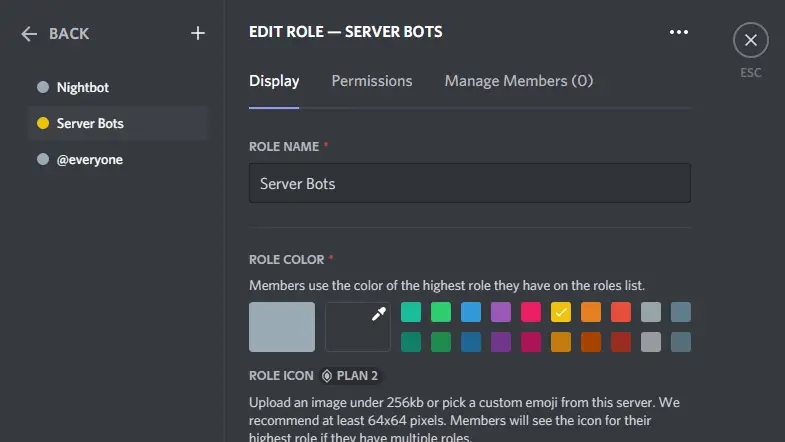
Change the name of your new role to ‘Server Bots’ and select a role color that will make them stand out from other roles in your server.
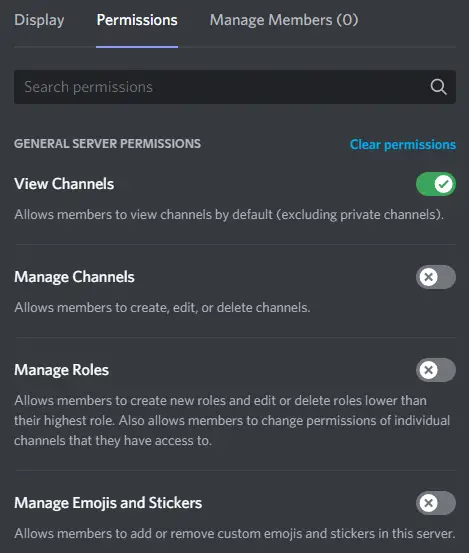
Click the ‘Permissions’ tab, and you will be met with a long list of processes that you can allow or disallow your bot from doing in your server. We would recommend turning on these particular settings for your bots to work well:
- View Channels
- Manage Channels
- Manage Roles
- Create Invite
- Kick Members
- Ban Members
- Send Messages
- Embed Links
- Use External Emoji
- Use External Stickers
- Mention
- Manage Messages
- Manage Events
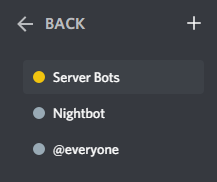
Finally, click and drag the ‘Server Bots’ role to the top of your roles list. This will give it priority over any other roles that you have created in your server. If it is below another role, it will not be able to kick, ban or delete their messages.
Why Nightbot?
There are quite a few moderation bot tools available to streamers these days, including Streamlabs, Streamelements, and Moobot, to name a few. Still, Nightbot is currently the red hot favorite with creators, thanks to its user-friendly interface and ease of management.
Simply sign up online and manage all of its features from the Nightbot.tv dashboard. It’s simple, effective, and provides you with a reliable means of moderation when you’re AFK!
In Conclusion
So there you have it! If you followed the steps correctly above, you should have successfully integrated Nightbot into your discord server. Remember to set up bot roles permissions and make use of all the other wonderful features Nightbot provides. We wish you good luck with your streaming!