
With over 10 million streamers on Twitch alone at the start of 2021 it’s important to make yourself stand out from the crowd. Whether it’s providing an original concept or making your stream ‘pop’ with high end graphics, having a unique selling point is key to streaming success.
Attractive overlays which also have a purpose can be incredibly useful and aesthetically pleasing to both new and returning viewers and are now a staple of successful streamers.
Do you feel like your streams are missing a little bit of personality and graphic pizazz? Carry on reading to find the best free and paid overlays for streaming available right now. And as an extra, we also show you how to create your own.
What are Overlays?
In streaming, overlays are graphics that you place on your stream to highlight certain parts of the preview for your viewers. They can also be used to maintain continuity in terms of color schemes and highlight advertising areas.
Typically they come in image file formats such as PNG for still images and WEBM or GIF for moving images. These file types also allow for transparency and make the overlays look sleek on top of your main content.
Some overlays are used to bring attention to certain stream features, whereas others are used to simply boost the visual experience for the viewer.
Why are Overlays Important?
In a world where streams can have thousands of text sources, widgets and chat boxes in them, it’s important to manage your available space efficiently. Having a cluttered and messy stream will almost certainly turn away new and existing viewers.
That being said you also don’t want to overdo it with overlays as it can become too overbearing for your viewers. Try to keep a minimalist feel while at the same time providing ample information and interactive widgets to your viewers!
Different Types of Overlays for Streaming
General Border

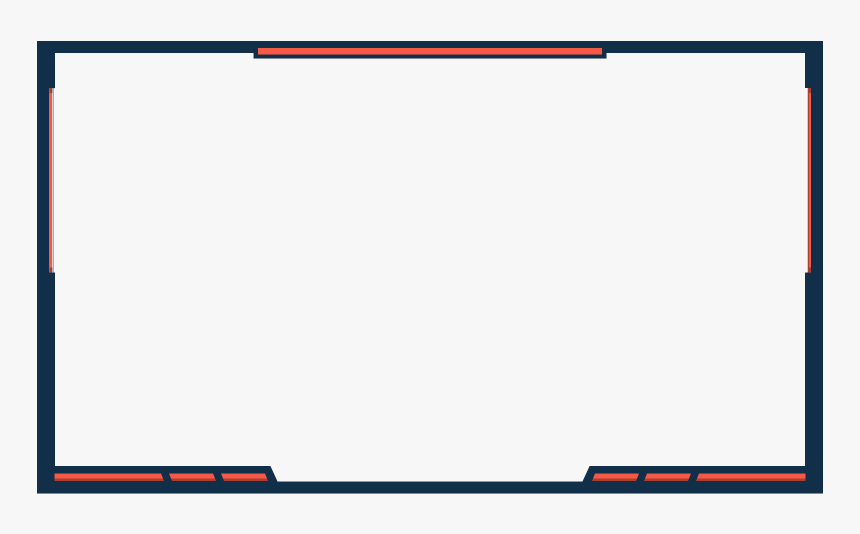
Some streamers choose to have a full border overlay on their streams, encompassing the entire preview area. These are incredibly popular for retro streamers who’s game does not quite fit the full screen resolution.
These overlays are also used in ‘just chatting’ and ‘irl’ streams when there is not necessarily one main focus. The outer border also allows for more space for advertising, streamlabels and other useful information for your viewers.
Webcam Frames
When you add a video capture source to your stream, usually in the form of a webcam, it will create a rectangular image on your stream preview. This is absolutely fine in itself but looks incredibly bland and boring.
Most creators opt to add a webcam frame to their video capture source to draw attention to that area and make it look a little nicer. Most frames will come in a PNG or WEBM format and will be placed above the video capture source in Streamlabs.
Streamlabels Frames

A Streamlabels frame is an overlay which is typically positioned at the top or bottom of your stream and has dedicated sections for your channel specific information. Usually creators use this space to highlight donations, followers and subscribers.
The frame will come as a PNG or WEBM file depending on whether or not it has animation and should be placed out of the way of your main streaming content.
Chatbox Frames
Similarly to the webcam frame a chatbox frame is usually a decorated rectangular border which is placed over your chat box widget. It will have a transparent center for your viewers to be able to read chat but a solid outline with perhaps a small bit of animation.
These frames help direct your viewer’s gaze towards active chat on screen.
Best Free Overlays for Streaming
Creators can spend hours online looking for free overlay packs and often get nowhere. There are sites that promise free packs but in fact only want your email information so they can go phishing! Here are a few trusted sites:
Nerd Or Die
Known as one of the best sites for streaming resources on the internet, Nerd Or Die not only has a good selection of free packs but also some very handy tutorials and guides on how to stream in general!
Twitchoverlay.com
Exactly what it says on the tin! Twitchoverlay has a larger directory of free resources but is slightly less impressive than those on our other two suggestions. Nevertheless, it’s certainly worth a browse to find a few hidden gems!
Streamdesignz.com
This is another great site for not only overlays but also stinger transitions, countdown timers and more. Stream Designz is run by Anthony, otherwise also known as “LAS Curry” who also makes helpful tutorials and guides for streamers. Get your overlays from here if you want to support a smaller but great creator.
Own3d.tv
Own3d has an incredibly limited amount of free resources for download but the packs that they do have are very impressive. Go over and take a look at what well put together and smartly designed overlays are supposed to look like!
Best Paid Overlays for Streaming
All Of The Above!
Each of the above suggestions also supply paid options which are far superior to their free counterparts. Unfortunately, there are just not a huge amount of free overlay resources online at this time which are worth a download.
With a small investment comes smoother animation styles, better color scheme management and consistency in design.
Streamlabs Prime

Streamlabs is known for being a well put together and reliable streaming software but did you know it also has a HUGE library of impressive overlay packs?
This library is only available to Streamlabs Prime members but is well worth the monthly cost. At $20 a month not only do you get access to this library but also multiple additional stream features, your very own Streamlabs website page and all of the widgets in the SLOBS app.
How to Create Your Own Overlays
Short of finding someone online to create a custom overlay for you and paying a handsome sum for the project, you might want to consider designing your own overlays. Here are a few pieces of software that can help you get started:
GIMP
GIMP has accomplished what no other image editing program has: it has created a free and viable alternative to Adobe Photoshop.
Many of the capabilities Photoshop has are available in GIMP, albeit in a much smaller package. It’s a lot easier on your CPU and uses a lot less memory.
Despite having a lesser feature set than Photoshop, 90% of users will find all they need to create vivid, high-quality overlays.
Photoshop
There is no better option for image production and editing. Photoshop has capabilities that aren’t found in any other rival application. Adobe’s flagship software can handle it all, from developing a logo from scratch to altering pre-existing pictures.
The downside to this is that there is absolutely no way Adobe would provide this for free! At the time of writing Photoshop is a stunning $20 per month … a pretty hefty monthly payment. You can combine it with other Adobe software and get a better deal but it’s still expensive.
After Effects
Streamers with overlays or camera frames with dynamic borders almost certainly created them or had them created in Adobe After Effects. Keyframe animation can be used inside AE to create stingers, transitions, and a variety of other eye-catching effects for your stream.
Similar to Photoshop, it is available on a fairly expensive monthly subscription but unlike Photoshop it does not have any capable free alternatives. We think this is worth the monthly hit.
There is a large learning curve but once you get to grips with After Effects it will change your streaming possibilities for the better!
How to Install New Overlays in OBS Studio or SLOBS
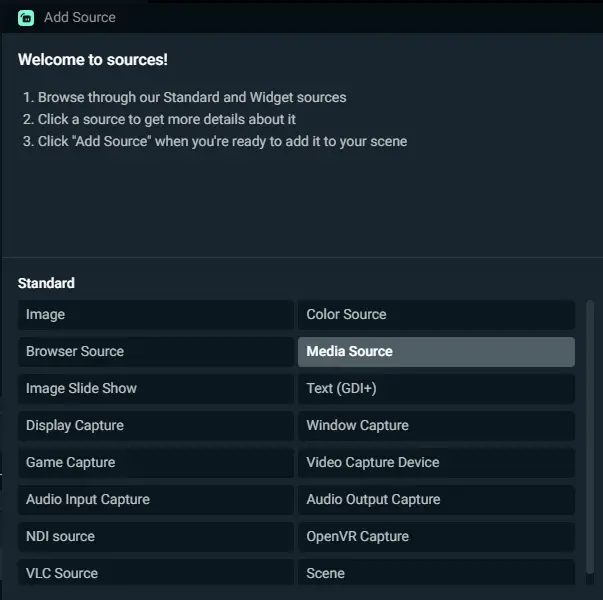
Installing overlays is relatively simple. Your overlay will always come as an image file, be it a PNG, GIF or WEBM. The process of adding these as overlays is the same for each format.
Go to add a new source in SLOBS or OBS Studio. Click add media source and select add new source. Click the browse button and find the file you want to use for your overlay. Once done, you will see the overlay appear in your stream preview.
It’s important to note that if your overlay is animated, you will need to ensure the ‘loop’ option is ticked in the source options otherwise it will play once and just disappear!

Overlays are named as such because they ‘lay over’ the top of your pre-existing sources. When you add them into your source list, make sure they are positioned above the source that you want them to cover. For example in the above image, the webcam overlay is positioned above the webcam source in the sources list.
We also recommend that you check out our article on how to add animated overlays in OBS if that is something that interest you.
In Conclusion
The times when streamers would cram as many overlays onto their streams in order to impress their viewers are long gone. In fact, the meta now is to have as few on-screen elements as possible; minimalism is king.
The best overlays for streaming are necessary and fit the theme of your channel and they will most definitely boost the performance of your channel!