OBS studio is full of incredible features that help you bring your streams to life. OBS has a wide selection of sources you can choose from, whether you want overlays, integrated widgets, or text effects on screen. Knowing how to add a countdown timer in OBS is a little more complicated, as it’s not included in the original build.
There are a few ways you can place a timer into your OBS streams, each of which has its own advantages. If you’re familiar with OBS source types, it can take just a few seconds to get set up. Follow the simple guide below, and you’ll have a fully functional timer in your streams in no time at all.
What Is A Countdown Timer In OBS?
If you own a mobile phone or computer, you likely already know what a countdown timer is. It’s a pre-set widget that counts down from a specific time all the way down to 0. Unlike a standard timer that counts up from 0, a countdown timer does exactly what it says on the tine … it counts down instead!
Why Use A Countdown Timer In OBS Studio?
Countdown timers are used in hundreds of different ways in OBS Studio and online streams. Creators often use them to count down to specific events or deadlines. A few common examples include:
- Stream starting timers – A high percentage of streamers have a starting timer at the beginning of their streams. It shows viewers how long they need to wait before the stream gets going.
- Sports timers – You might use a sports timer for keeping track of quarter and half lengths in a sports match. Many watch along-style channels that use a sports countdown timer.
- Competition timers – A countdown to when the competition ends in your video or on your stream.
- Event start timers – Counting down to the beginning of an event, such as an in-game season change or tournament.
They are predominantly a means of communicating to your viewers how much time is left until a certain event, without them having to ask in your comments section.
Add A Countdown Timer As A Browser Source
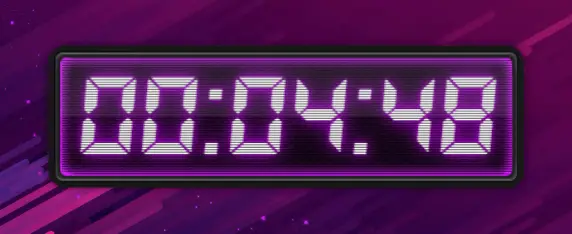
One of the easiest ways to add a countdown timer in OBS is to use a browser-based timer widget. You can then add the widget as a browser source in your preview area.
These countdown timers are pre-programmed online and can only be managed inside your internet browser. You will set the timer before adding a browser source, and any changes you want to make will need to be made before you add it as a source in OBS.
Choose A Browser-Based Timer
Browser sources import web pages into your OBS Studio preview area. Anything you can open on a web page can be opened inside OBS, including pre-made countdown timers.
There are a few reliable widget hosts you can choose from if you want to add your countdown timer as a browser source. The two below are our favorite picks but offer slightly different features.
StreamDPS


StreamDPS is an online widget directory that hosts both free and paid widgets. Their countdown timers are mostly free to use and fully customizable. Depending on which widget you choose, they can be transparent or have a bright design.
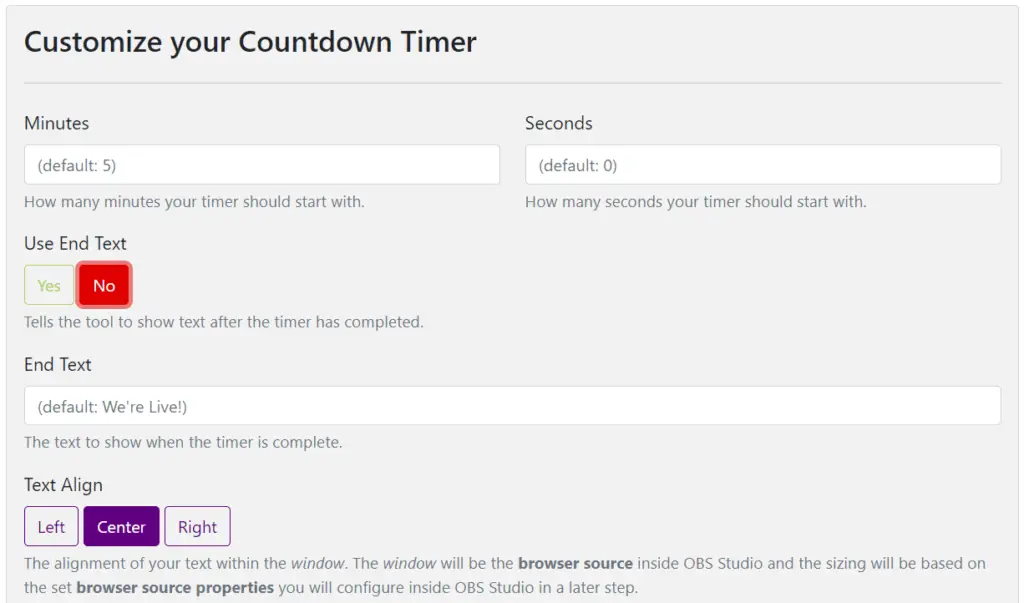
Simply click on the countdown timer you want and change the many settings that appear. You can change everything about the timer, including its color, font, size, and exact time.
When you’re done, click the green apply button and copy the URL it shows. You’ll need this in the next step.
StreamerEDU


This is a very similar site to StreamDPS but has a few more animation options in the countdown settings menu. You can include end text when your countdown is finished and even have your timer transition out of your scene.
After changing the settings to suit your needs, click get my countdown timer. A new tab will open. Copy the URL from that new tab and hold onto it.
The timers from StreamerEDU look a little crisper than those from StreamDPS. They also seem to be a little more reliable but lack DPS’s designs.
Add It To OBS Studio As A Browser Source
If you followed one of the steps above from either StreamDPS or StreamerEDU, you’d now have a URL link copied to your clipboard. Adding this widget to OBS is simple:

- Click the plus symbol in the sources dock to add a new source to your scene.
- Click the browser in the dropdown menu that appears. This will add a new browser source and open its settings.
- Type the name you want for your new browser source (we’d recommend something like a countdown timer) and click OK.
- In the URL line of the settings, paste in the URL you copied from the online widget page. Leave the other settings as default values. Once copied in, click OK. Your countdown timer will now appear in the center of your stream preview area.
Add A Countdown Timer As A Text GDI Source
If browser sources aren’t your favorite, you can always add a countdown timer as a Text GDI source. Text GDI sources work by reading local text files, which are adaptive and regularly change.

One way to do this is by downloading an additional software called Countdown Timer / Stream Timer. This software is featured on OBSProject.com and is completely safe to use. Use the link above to download the .RAR file and extract it to install the software.
The Stream Timer application controls a local text file on your computer and changes the values of the text every second according to your timer settings. OBS can read this in real-time and show a reliable timer from the ever-changing text. It sounds complicated, but it is quite easy to configure!
Using Countdown Timer / Stream Timer

- Once you have Countdown Timer installed, open it. It should look a little like the image on the right.
- Now you need to change the values to match what you require. In this case, we want to set the timer to 5 hours, 4 minutes, and 10 seconds, so we’ll change the values to those numbers.
- The timer is now prepared and ready to run, but first, you need to add it to OBS. Go to OBS Studio and add a new Text GDI source to your sources list.

- In the Text GDI source settings, click read from the file. You will now need to find the location of the timer’s text file. It will be located in the folder you downloaded when you downloaded the timer application. By default, it will be named Timer.txt.

- Once you select that file, click ok. Redirect to the Timer application outside of OBS and click start. You will see that the timer in OBS Studio has started to count down.
As with browser source countdown timers, Text GDI timers need to be managed outside OBS Studio. In this case, use the Timer software to manage all of your countdown values and other timer features.
Add A Countdown Timer As A Window Capture

The simplest way to add a countdown timer to your stream is to use a window capture source. The setup for this timer is quick and painless, but the resulting timer is basic and non-transparent. If you need a very quick solution, this method is for you.
- Go to Google Timer in a new browser window and select your timer values.
- In OBS Studio, add a new window capture source.
- Select the Google Search window in the drop-down menu in the window capture source settings.
- Hold the alt key and drag the red bounding squares in to crop the window capture so you can only see the countdown.
- Start the countdown from inside your internet browser.

In Conclusion
Adding a countdown timer to your OBS stream is a great time-saver. Not only does it help you measure time while streaming, but it also saves you having to tell your viewers how much time remains until an event.
The three main ways of adding a countdown timer to OBS all have their advantages. Window capture is quick and easy, browser sources have great designs, and text GDI sources are managed by external applications that are easy to work with. Choose which one works best for you and your streams, and have fun overlaying your new countdown timer!
For more OBS Studio help and advice, be sure to check out our top tips and tricks for OBS!
