
Mixing audio can be an expensive business. You need to buy all of the individual cables, converters, microphones, and even a sizeable bulky mixing desk to be able to control all of those individual inputs. But what if we told you you could do all of this for free?
Check out the article below to learn how to use Voicemeeter Banana for streaming, audio management, and individual control of every audio input on your device!
What Is Voicemeeter?
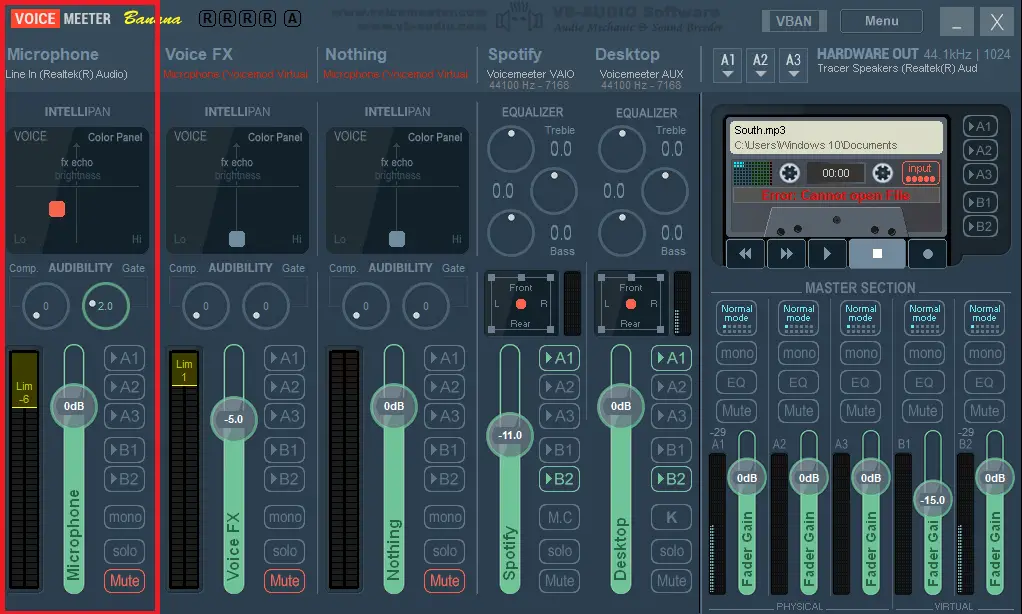
Voicemeeter is an audio mixer application equipped with virtual audio cable compatibility, which allows you to control each application’s audio input individually on your streams. It basically acts as a virtual mixer and controls all incoming and outgoing audio. Instead of your system grouping all of your audio into one output, Voicemeeter will help you individualize all of your PC’s sounds!

On top of acting as a mixer, Voicemeeter also has in-built effects, recording, and compression software to make your audio sound as bright and attractive as possible.
Why Should You Use Voicemeeter When Streaming?
If you’re streaming using OBS Studio or Streamlabs, chances are you’re using ‘Desktop Audio’ to capture all of your system’s sounds. This works just fine until you need to adjust the volume of one individual audio source, such as Spotify or Media Player, when you open that individual software and change the volume from inside. Voicemeeter will act as a central control panel for all of your software’s audio and can also be programmed with hotkeys to create volume and effects shortcuts. This is why it is a great idea to use Voicemeeter Banana for streaming.
What Version Of Voicemeeter Should I Use?
Voicemeeter offers three main versions of its software; Voicemeeter, Voicemeeter Banana, and Voicemeeter Potato.
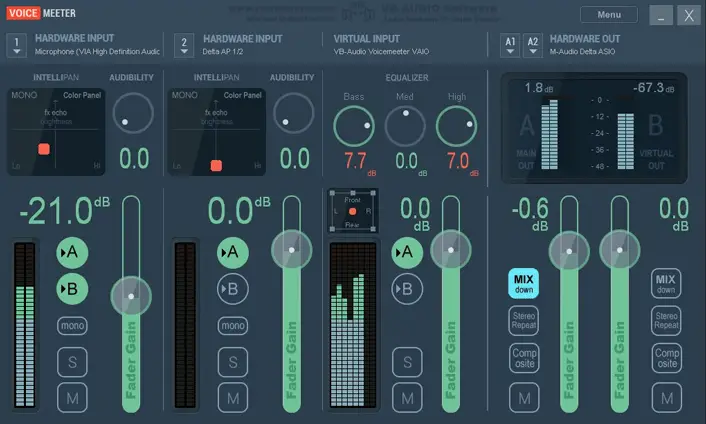
The basic Voicemeeter software provides two hardware inputs and only one virtual input. For many streamers, this is not enough to properly manage their audio, but it’s a great starting point to learn how the software works and handles.
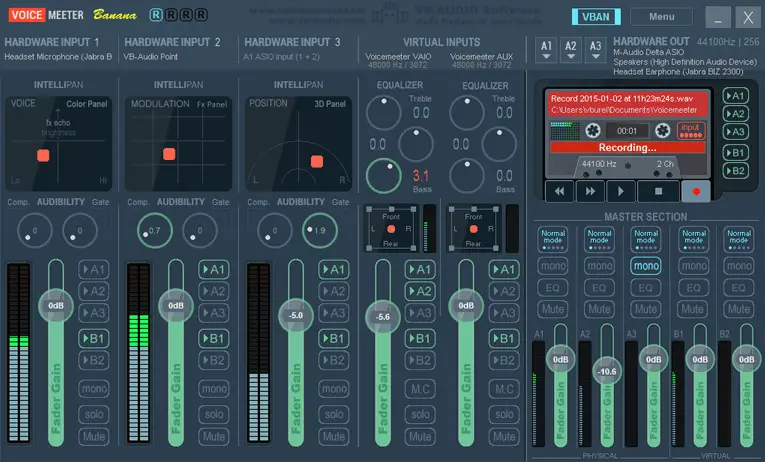
Voicemeeter Banana is the preferred choice of most content creators, providing three hardware inputs and two virtual inputs. This size mixing desk is usually enough for creators to be able to segregate their audio sources correctly. Banana also offers a small library of effects and mixing software.
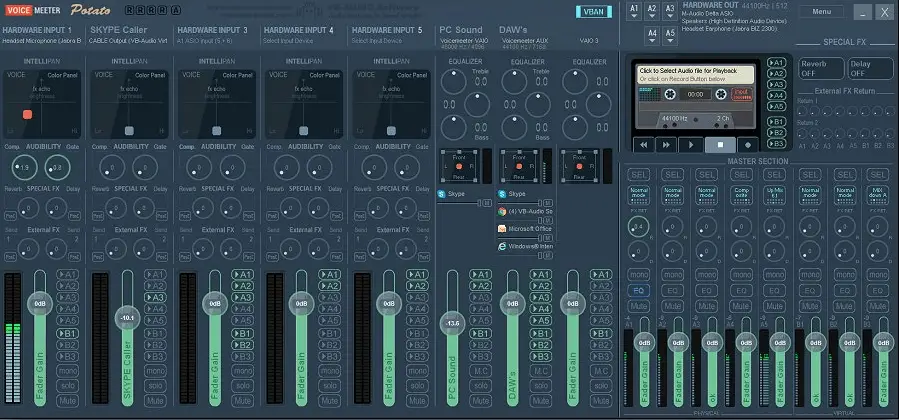
The largest version of the Voicemeeter family is Voicemeeter Potato. Reserved for Voicemeeter veterans, Potato contains five hardware inputs and three virtual outputs. It also has a more extensive library of available effects and playback options. For most people, this is slightly too complicated and convoluted; however, if you feel comfortable with Voicemeeter Banana, this could be the perfect step up.
How To Download Voicemeeter
For the sake of this article, we’re going to be showing you how to best use Voicemeeter Banana for streaming, seeing as it’s the most popular version of the software! Here’s how to get the software downloaded on a PC:
- Go to the Voicemeeter Banana page and locate the download section towards the bottom left of the page.
- Install the EXE file for Windows. You can download and extract a ZIP file, but the EXE file will install the software directly to your system without any other complicated steps. Extracting a ZIP file would require decompression software such as WinZip or 7Zip.
TOP TIP: Voicemeeter is ONLY available for Windows at this time.
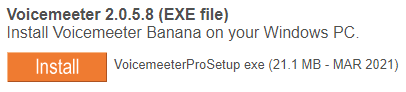
- Open the downloaded EXE file and click install. This will begin the installation process.
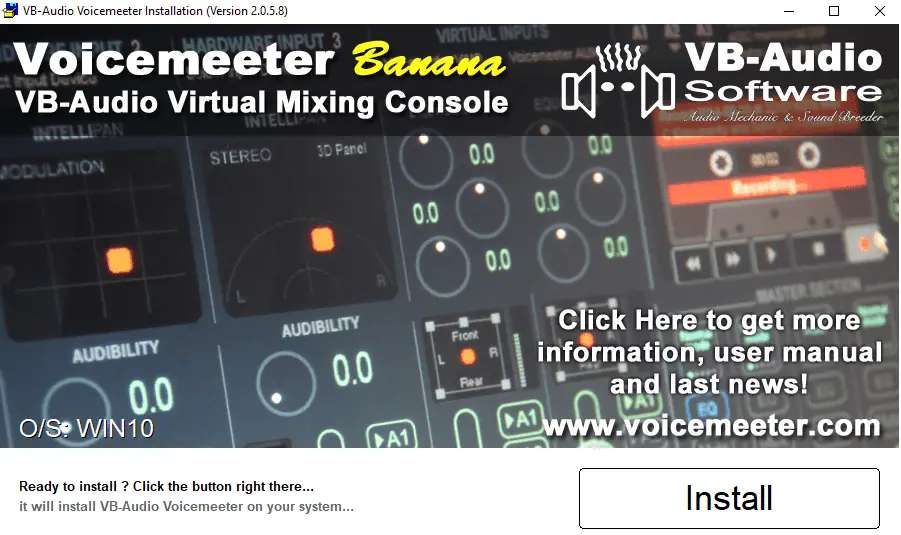
- Once installed, you will need to reboot your PC to finalize the installation of the software and drivers.
How To Set Up Desktop Audio On Voicemeeter
Essentially, installing Voicemeeter is installing a new audio driver to your system and can throw up very particular complications. It’s essential to set it up carefully and correctly to avoid problems that could make the software unusable.
Here are a few quick steps to make sure everything runs smoothly after installation.
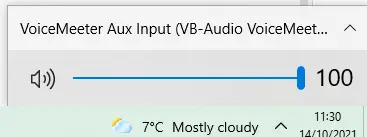
- Make sure your system is rerouting all audio through Voicemeeter. Click the hidden icons arrow in your windows toolbar in the bottom right of your screen and click the
icon to bring up your sound settings. Make sure VoiceMeeter Aux Input (VB-Audio Voicemeeter AUX VAIO) is selected.
- Play some audio on your system and open up VoiceMeeter. You should now see the ‘Desktop’ virtual input monitoring your audio and should be able to see the blue and green monitoring line going up and down.

- Next, you’ll want to be able to hear that system audio in your headset or speakers. In the top right-hand corner of the VoiceMeeter application, you’ll see the ‘Hardware Out’ option.
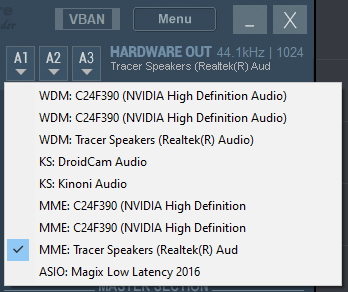
Click on A1 and find your primary output device (usually the name of your headset or speakers). MME, WDM, and KS stand for the different audio drivers installed on your system. For the sake of this task, MME (Microsoft Multimedia Environment) is usually the most stable and has the most clarity.

You will now be able to hear your desktop audio through your chosen A1 output device.
How To Set Up Your Microphone On Voicemeeter
Compared to desktop audio, setting up your microphone on Voicemeeter is relatively easy. For this setup, we’ll be looking at the first Hardware Input column in the application.
- Click the Hardware Input title at the top of the column (where our screenshot says Microphone).
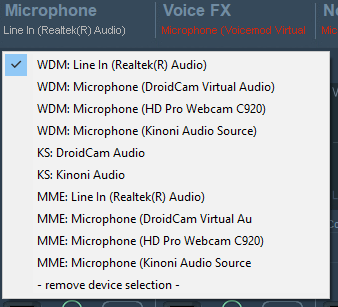
- Select your Microphone from the hardware list, and your microphone will begin monitoring in Voicemeeter.
Any other microphones or input devices you have plugged into your PC can be set up in the same way on the other two hardware input columns.
Voicemeeter OBS Studio and Streamlabs Setup
If you want to learn how to use Voicemeeter Banana or any other version for streaming, you also need to understand how to set it up in OBS.
To be able to receive your Voicemeeter audio inside OBS Studio, there are a few steps you’ll need to follow:
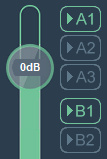
- Every audio input you want to hear inside OBS from Voicemeeter will need to be applied to the B1 virtual output channel first. This sounds complicated but is actually pretty easy; if you want your microphone and desktop audio to be transmitted to OBS studio, simply click the B1 button in the respective input columns.
- Open up OBS Studio (as always, run as administrator for best compatibility).
- Add a new audio input capture source by clicking the + icon in your sources dock.
- Under the capture source settings, select VB-Audio Voicemeeter VAIO and click OK. You will now be able to see your

Now, every single source in Voicemeeter with the B1 output selected will be received in OBS Studio.
TOP TIP: Set up for Streamlabs OBS is identical. Just add yourself a new audio input capture source and select the same source under step 4 above.

How To Control Specific Application Volumes In Voicemeeter
Now you’ve got the basics set up. You’ll probably want to be able to control individual applications from inside Voicemeeter. To set this up, you’ll need to make a few changes to your Windows audio settings.
- Click the hidden icons arrow in your windows toolbar in the bottom right of your screen and rich click the
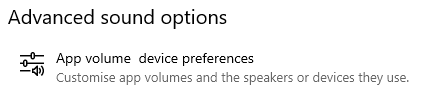
- In the sound settings menu, click ‘App Volume Device Preferences’.
You’ll see a list of open software on your device. If the software you want to redirect sound for isn’t listed, make sure it’s open and running in administrator mode.
- Find the software you want to control from inside Voicemeeter and set the Output to VoiceMeeter Input.

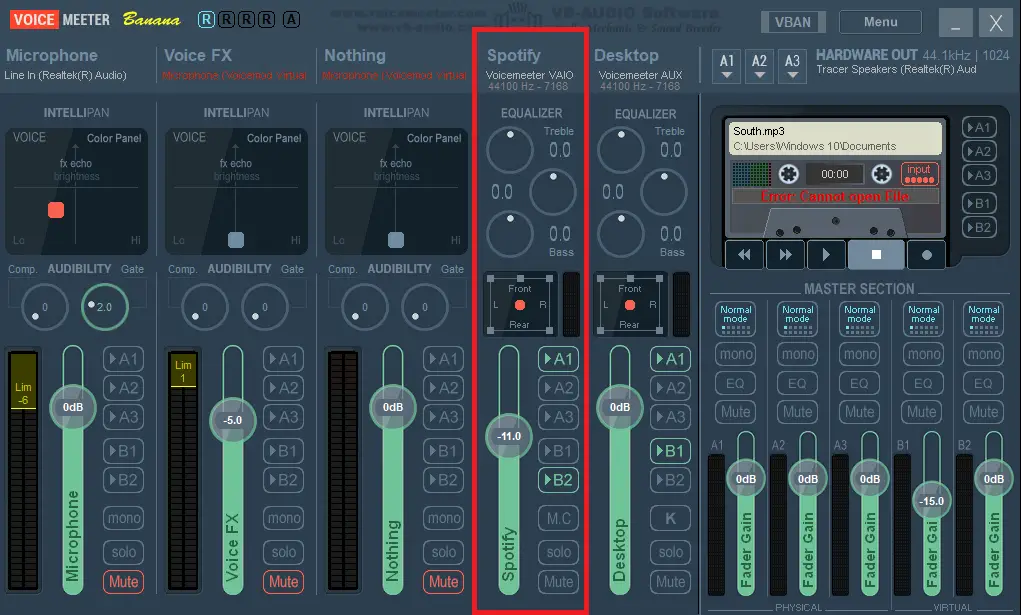
- Your Discord audio will now appear and be monitored in the first virtual input column as seen below. This particular example is titled Spotify but you can change the column title as you wish. As with the other outputs, be sure to click A1 on to hear it in your headset and B1 or B2 on to receive it inside your streaming software.
In Conclusion
So now you know how to use Voicemeeter Banana for streaming. The complexity of Voicemeeter Banana is well worth the incredible features that come with a carefully installed build. Follow the guide above step by step, and you’ll have yourself a virtual mixing desk capable of controlling every single audio source on your system!
Remember: For more hardware inputs or virtual outputs, you can always upgrade to the larger version of Voicemeeter Banana, Potato, for free!
If you’re still considering purchasing a physical mixer or processor for your input hardware, check out our ‘Top 6 Audio Mixers’ list right here!