
Wind noise in your audio track can feel devastating. Even so, many times, it is salvageable.
This article will show three methods to remove wind noise using Premiere, including Audacity and Adobe Audition.
- Method 1: Removing wind noise using the HighPass filter in Premiere
- Method 2: Using Premiere with Adobe Audition or Audacity.
- Method 3: Using a 3-rd party plugin in Premiere like iZotope RX.
Preemptive Method: Using a Windscreen
Not all audio can be saved in post if wind noise is extreme. And if a track can be salvaged, it will cost you significant time and resources to fix it.
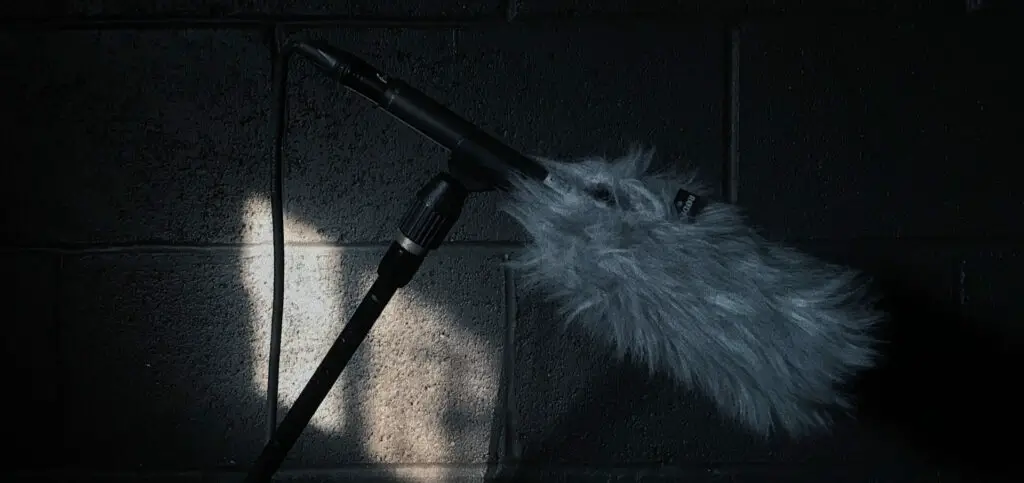
That is why you should always use a windscreen on your mic when outside, otherwise called a “deadcat.” It is the best way to protect your audio from unfixable wind noise. Windscreens also don’t go for that much, which makes them a relatively small investment.
But even when using a deadcat, some wind noises can get through, like quieter rumbling and humming. This tutorial works just as well in that situation!
Method 1: Using the High Pass Filter In Premiere Pro (Easiest)
The first method targets a consistent rumbling and humming ambiance from the wind when you are outside. It will be the one that works in most situations.
- First, open your project in Premiere.
- Go to ‘Audio Effects’ > ‘Filter and EQ’ and find the ‘HighPass’ effect.
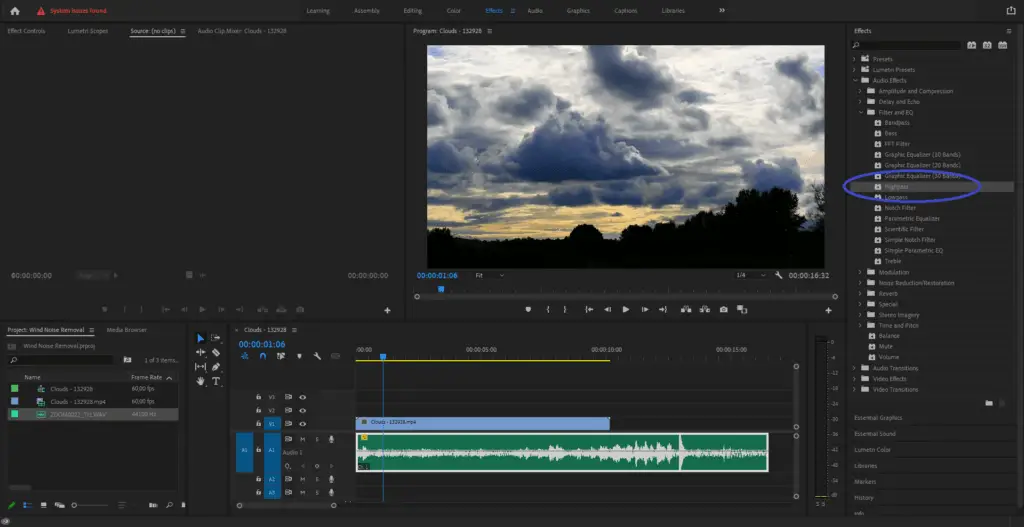
- Drag and drop it onto your audio clip. The HighPass filter removes any sound below a certain frequency. This is precisely what we need to remove that low rumbling noise from the wind.
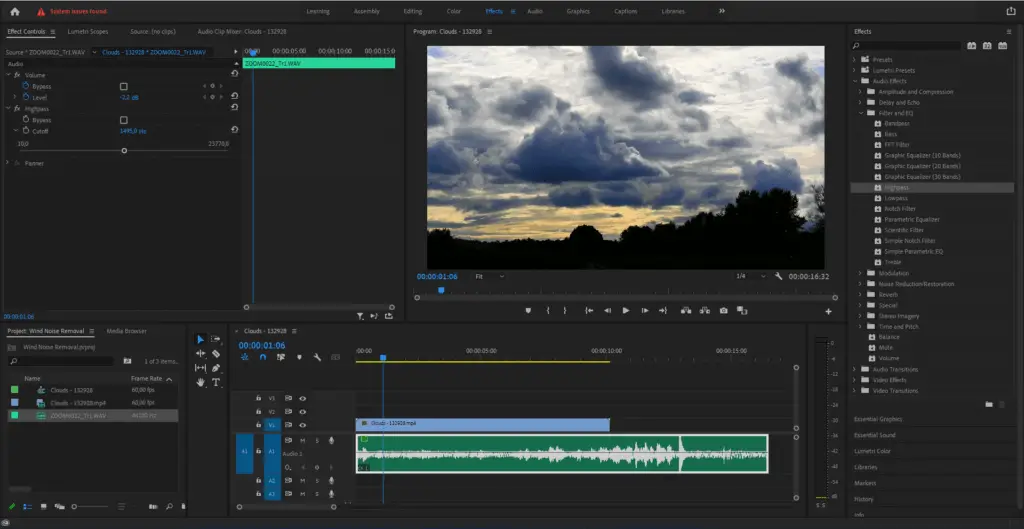
- Leaving the effects settings as is will probably not sound right, so we need to change the ‘Cutoff’ value of the effect. We recommend you start with 50Hz. Human voices will not fall within that spectrum, so it’s safe.
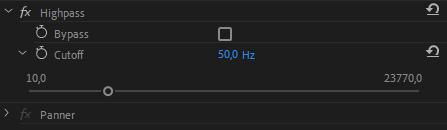
- If you feel you need more, raise the Cutoff value slightly until you find something that works! If you go up to 200Hz, human voices risk sounding distorted, so the ideal value should be below that.
If you don’t have any voiceover in the clip, you might be able to go above 200Hz. If it still sounds right, it works!
Hopefully, the wind noise is entirely gone or at least minimized. But there is more we can do with our second method!
Method 2: Audobe Audition or Audacity Method
In the tutorial below, we showed you how to quickly remove wind noise within Premiere. But for better results, we recommend you use Adobe Audition or Audacity (free counterpart).
Removing Wind Noise In Adobe Audition
If you have Adobe Audition installed, moving over the audio there from Premiere is extremely easy.
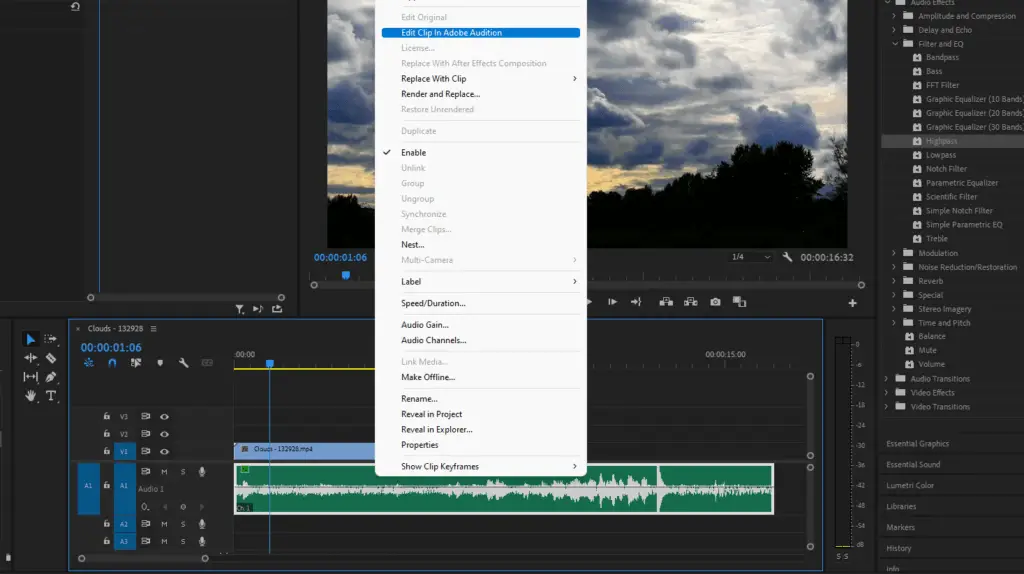
- Just open your Premiere project and right-click on the audio clip you want to fix. Then select ‘Edit Clip in Audition.’ This will render the audio clip in the Premiere timeline and open an Audition file.
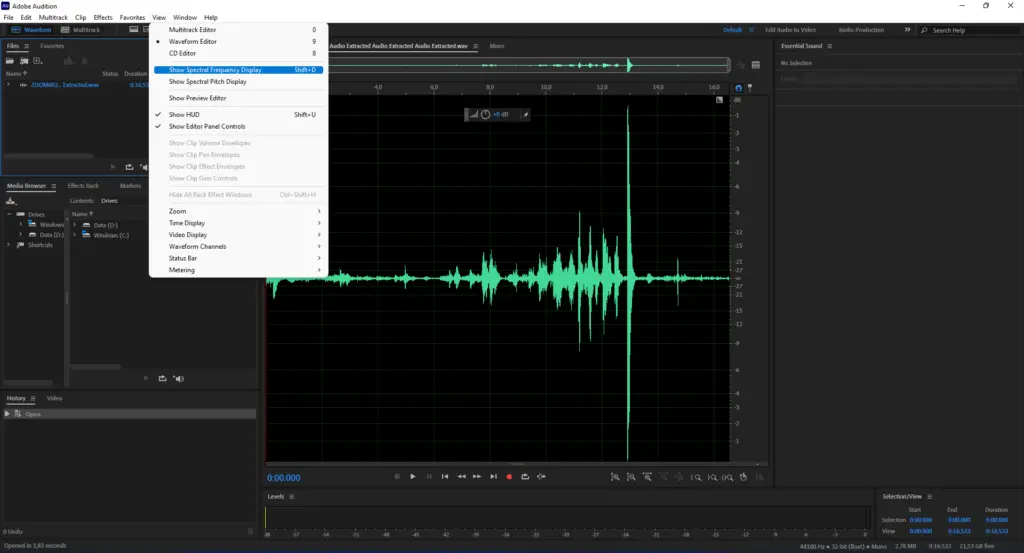
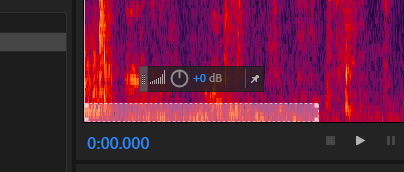
- Once in Audition, you can open the ‘Spectral Frequency Display’ or press Shift + D. Now, you can see the wind noise within the graph in the timeline.
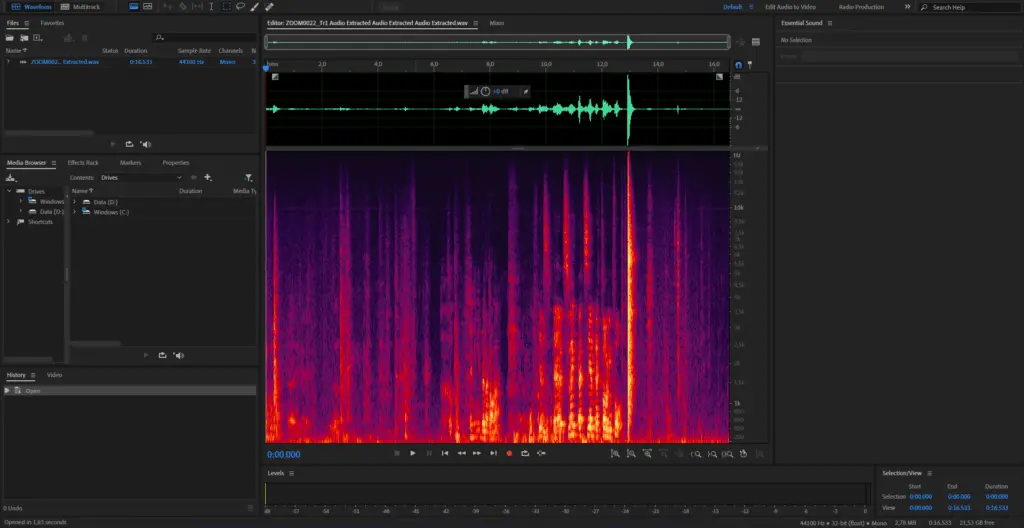
- See the red at the bottom of the spectrum of your track that runs throughout the whole clip? (Even in the “quiet” parts). That is the wind noise. You are now able to select just those frequencies in the clip by drawing rectangle. Playing the clip now will allow you to only hear wind noise. Try it for yourself.
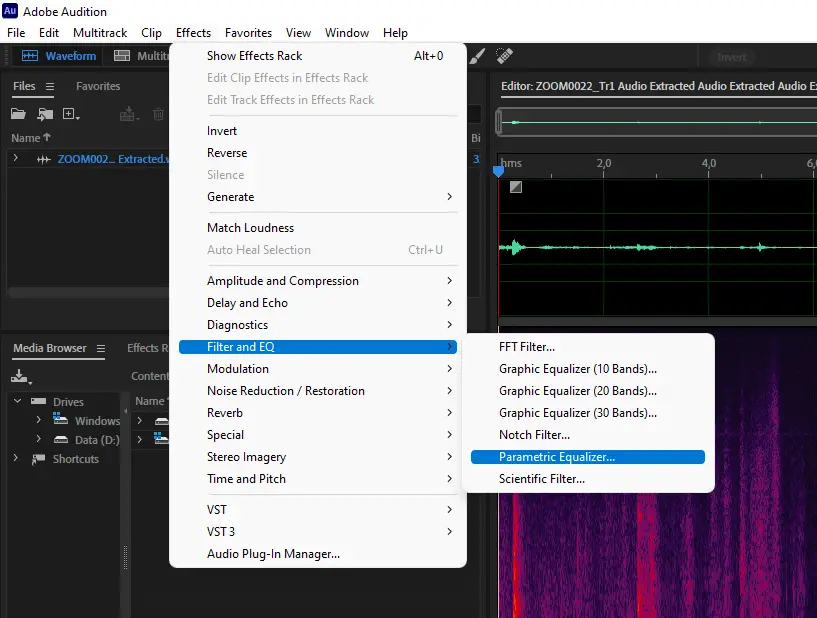
- So how do we remove it? To your left, open the Effects menu and add ‘Parametric Equalizer.’
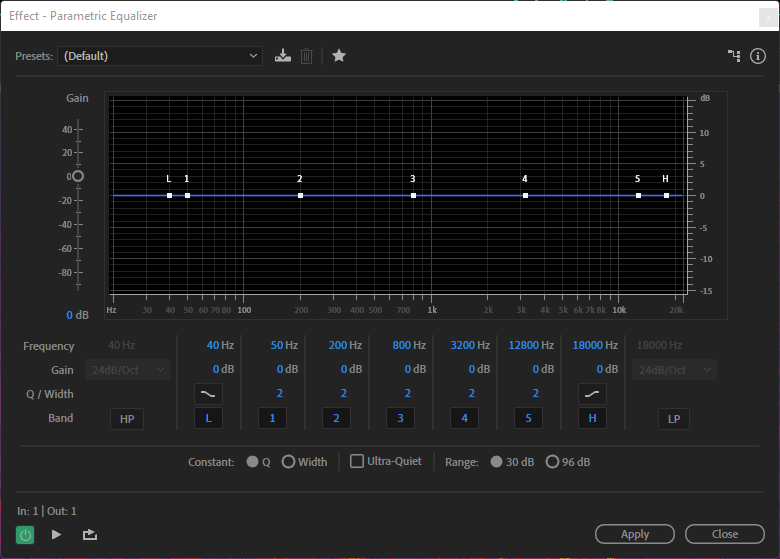
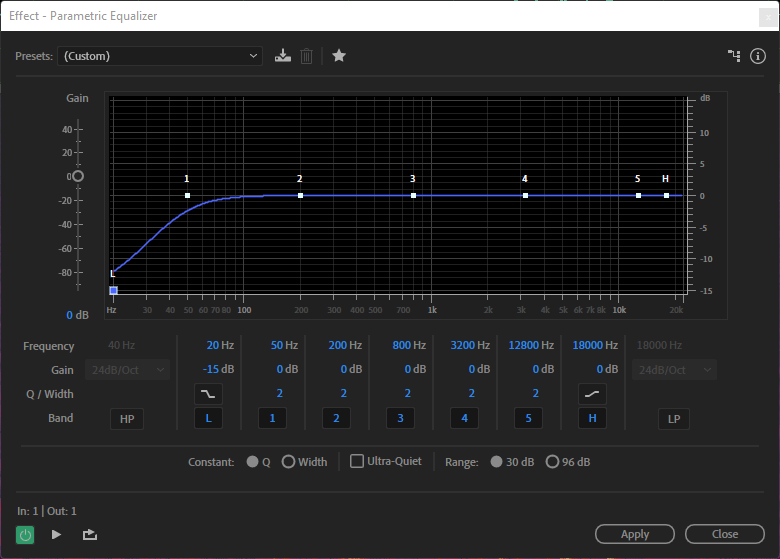
- Next, open the effect controls and make sure the preset is set to default. The lower frequencies where the wind is is in the graph’s left. You can take out this whole section of frequencies by moving the points.
- Now, press Control + S, and the audio will be exported and replaced in the Premiere timeline. It’s super simple!
By using this tool and listening for the isolated windnoise, you are able to achieve a much more detailed noise removal than in Premiere alone.
But not everyone has Audition, so let’s look at how we can achieve something similar with an entirely free, open-source software called Audacity.
Removing Wind Noise In Audacity
- First, download and install Audacity if you haven’t already.
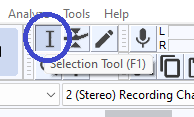
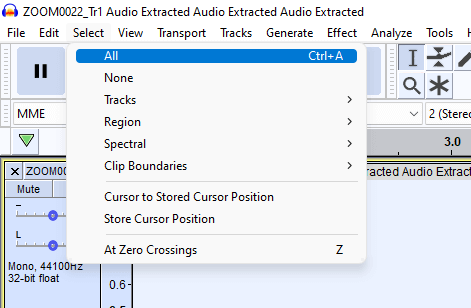
- Open the audio clip in Audacity and choose the ‘selection tool,’ which looks like this:
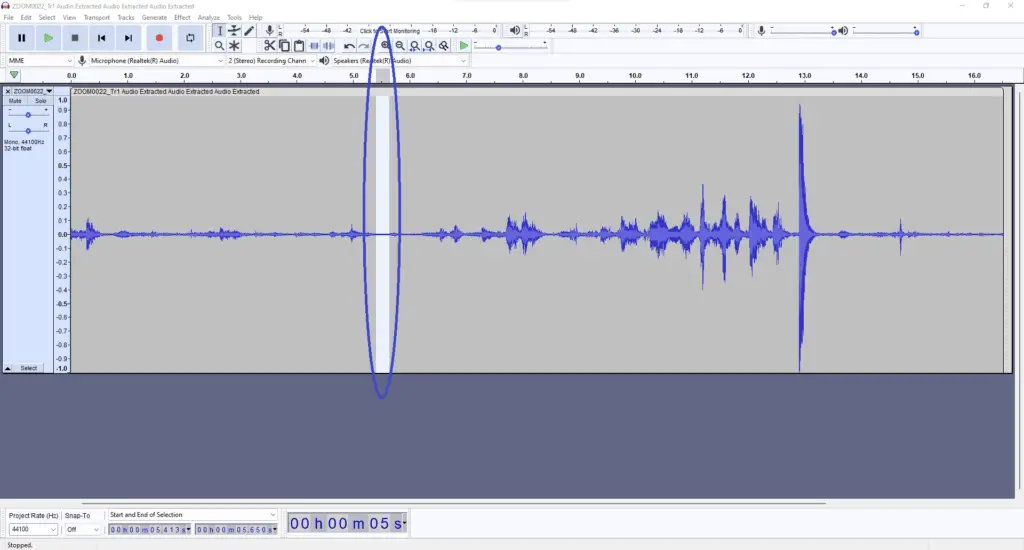
- Now, select part of your clip with only wind noise.
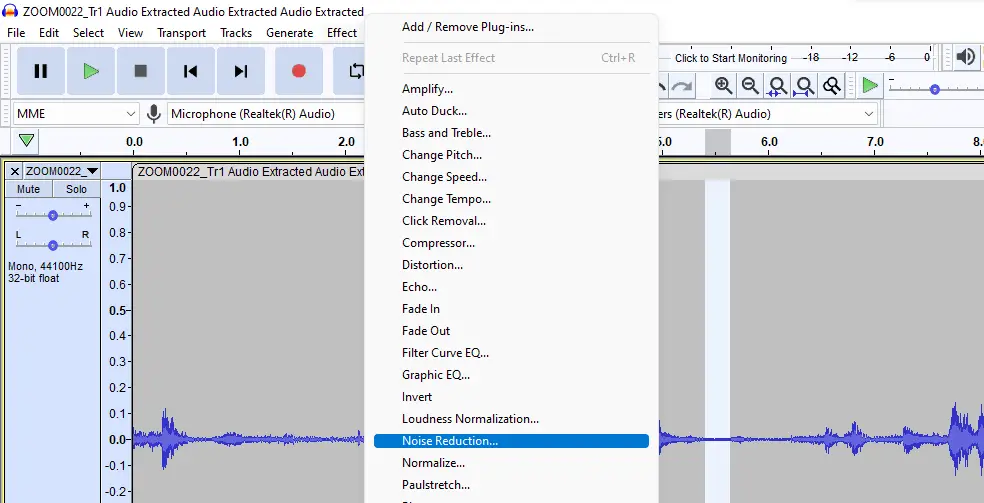
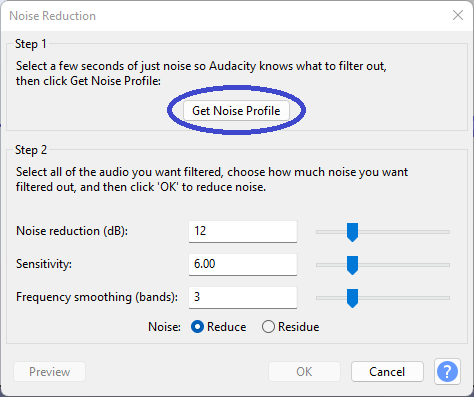
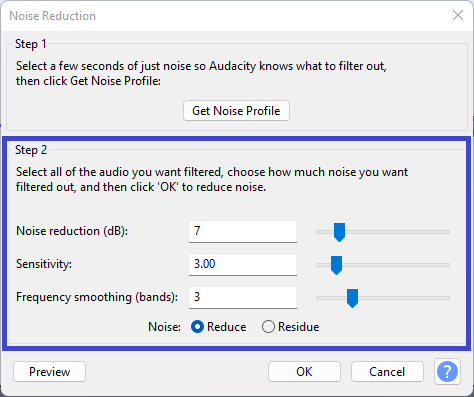
- Then, go to ‘Effect’ > ‘Noise Reduction,’ and select ‘Get Noise Profile’ in the tab.
- After you have done this, select you whole audio. Then go again to ‘Effect’ > ‘Noise Reduction,’ and this time press ‘Ok.’ You have now cleaned up the wind based on the noise profile you selected earlier. Also, you can try the ‘Sensitivity’ and ‘Frequency Smoothing’ controls in the Noise Reduction tab for best results.
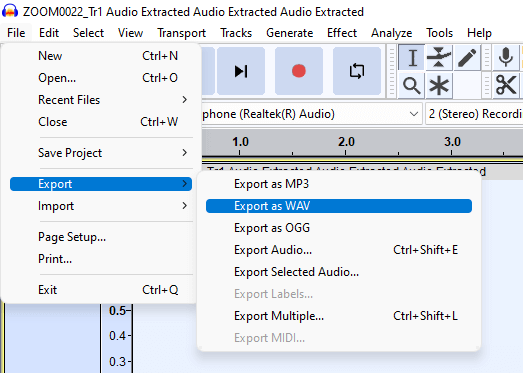
- When you are done, export the clip in an uncompressed format like WAV and bring it back into Premiere.
Combining the High Pass filter in Premiere and this method also works well.
If your audio still needs further improvement, you only have three choices. A costly noise reduction tool, doing a reshoot or ADR. The second option is often the best.
If you still believe you can save the audio in post, keep reading about noise reduction plugins in our third method.
Method 3: Using a Wind Noise Reduction Plugin or Tool

If you still can’t get the audio to an acceptable level, you can try wind reduction plugins. The best one out right now is iZotope RX 10. This is a professional noise reduction tool that costs quite a penny.
Using AI, they can target wind noise and rumble intelligently with minimal interference to vocals through their De-Wind tool. So if you have the money to spend, you can learn more here.
You apply the effect to your clip in Premiere and then use their controls to fine-tune the wind removal for the best results.
But at that price point, it is probably more worth it to ADR or a reshoot of that scene.
In Conclusion
Removing wind noise can be pretty tricky. But the best thing you can do is prevent that noise from ever reaching your mic in the first place.
Therefore, invest in a windsock. These are a must to use in windy environments.
If lower rumbling and humming still come through in the recording, it is usually easy to remove that kind of wind noise within Premiere Pro or Audition.
We hope this article was helpful and feel free to check out our other Premiere tutorials.