
Once you have recorded a podcast episode, it is time to edit. Audacity has always been the go-to podcast editor for windows users. If you know nothing about audio mixing beforehand, it can be intimidating seeing the software for the first time. But it is not as hard as it looks. With the right tutorial, you will learn exactly how to edit a Podcast in Audacity.
If you did not know, Audacity is a free, open-source software for Windows, macOS, and Linux. With a simple and clean layout, Audacity still manages to offer many advanced features and high-resolution audio recording almost only found in paid software.
Because of its compatibility and many features, Audacity has become a very popular recording and editing software among podcasters.
In this tutorial, we will show you how to set up, record, and edit a podcast in Audacity. If you follow the steps below, you will end up with an engaging and professional-sounding podcast to captivate your audience.
If you want some more help on starting a podcast, check out our guide on the Best Podcast Formats 2020.
Download and Install Audacity
Audacity can be downloaded right from their site here: https://www.audacityteam.org/download/

Select the operating system you are running on, and you will get two download options. You can download Audacity as a zip file or as an installer. We recommend downloading the installer; it is the simplest way to set up the software.
The Editing Environment
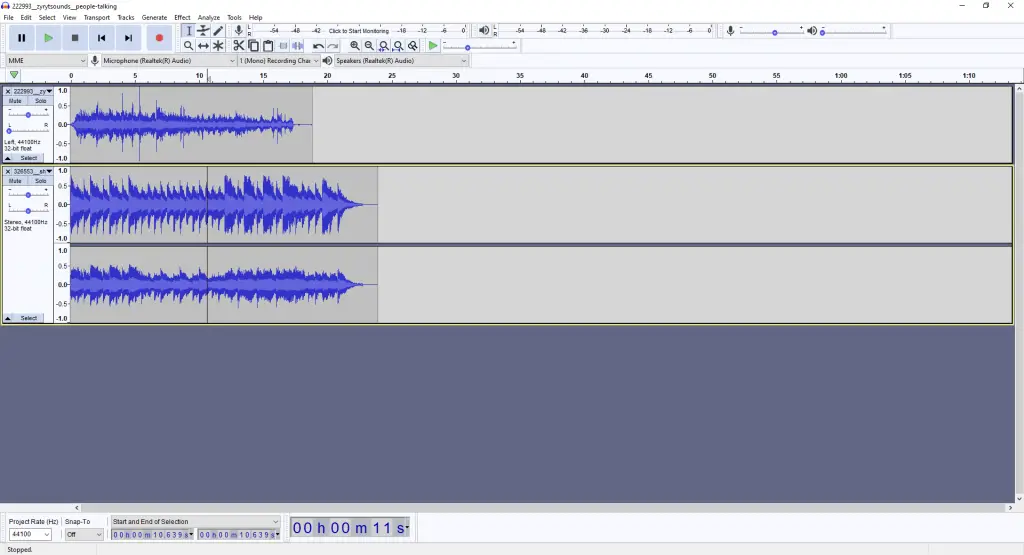
When you first open Audacity, you might be intimidated by all the buttons and toolbars. It is actually easier than it looks. We will show you everything you need to know to edit a Podcast in Audacity.

For recording and editing a Podcast in Audacity, you will need to be aware of the Recording Controls, Editing Tools, Devices Toolbar and Audio Monitoring.
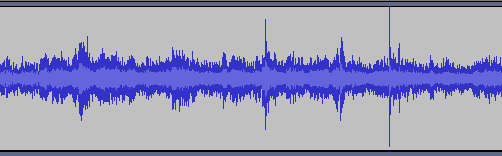
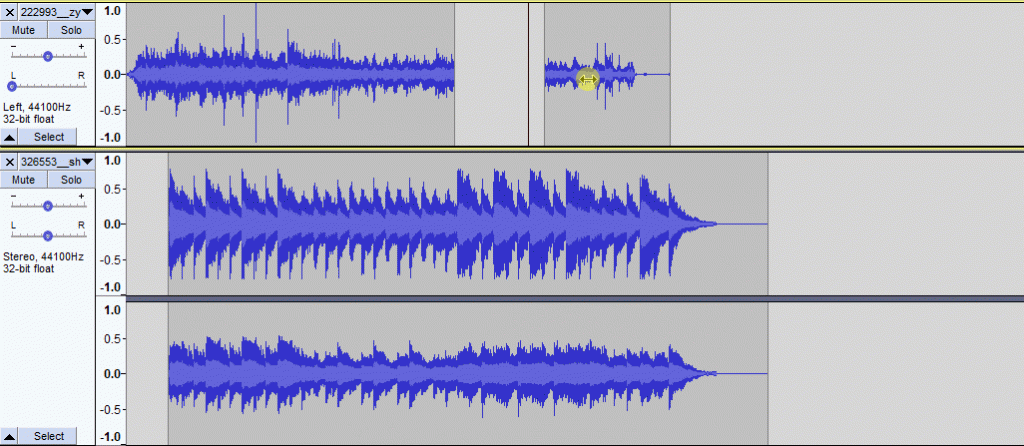
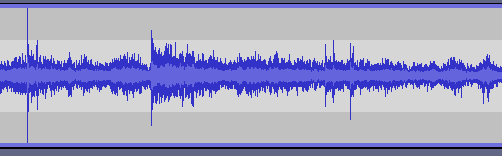
When recording or importing audio, it will appear as waveforms on tracks that you can cut and edit.
Setting Up Your Devices
First, you need to set up your microphone, headphones, and devices. You can do this through the Device’s Toolbar.

Audio Host:
Select MME as the audio host if you are on Windows. It is the default option and most compatible with other audio devices. If you are on a Mac, your only option is Core Audio.
Recording Device:
Select the USB microphone or interface/mixer you are using.
If your microphone does not show up in the devices toolbar, check that the mic is recognized in the sound settings on your computer.
Recording Channels:
If you are only recording your own voice in the podcast, select the mono channel.
If you are recording two microphones, select the stereo channel. This will create two channels on a single file. You can then split the file into two separate recordings.
When you have more than two microphones connected to a mixer/interface, select the device the audio is coming from and then choose between 3-x on the recording channels. Select as many microphones you are recording.
Playback Device:
For the Playback Device, select what device you want Audacity to playback the recording on.
If you are recording live, choose your headphones, to avoid spills or echoes in the recording. If you are editing, it does not really matter.
Test your devices
Before you start recording, always check your audio levels. This is done through the monitoring bar above. Simply press Click to Start Monitoring to check if your audio is within your ideal levels.
How to Record a Zoom or Skype Call
Both Zoom and Skype can be great for recording interviews with people for a podcast. Recording and importing to Audacity is straightforward to do.
Zoom
In zoom, you have the option to record directly within the software. Zoom records the call and exports an mp4 file that you can later import to Audacity. The audio quality will not be amazing, but it is good enough for a podcast.
You can choose to export mp4 audio, mp4 video, and multiple track recording for each speaker. Zoom is really the ideal way to record a podcast remotely.
Skype
Skype only recently added a recording feature. The problem is that it combines all the tracks for each speaker in the same audio file.
Instead, we recommend the free software: MP3 Skype Recorder (for Windows). It records and exports the call in mp3 format.
How to Add Music to Your Podcast
To add music to your podcast, simply go to file → import → audio.
Ideally, you want to import the music track in WAV to preserve all the quality. Most tracks from royalty-free music providers can be downloaded in WAV. But you could also use mp3 or mp4 if you don’t have any other option. Use the fade-in and fade-out effects to transition the audio within the edit.
Recording and Editing in Audacity
You will find the audio controls in the top left corner of the screen. Each button is for Pause, Play, Stop, Back, Forward, and Record.

Recording in Audacity is as simple as clicking on the red button(or press R on keyboard). Once you start recording, you will see waveforms forming. You will also be able to monitor volume levels in the level meter.
Dont Over-edit
In most cases, you will only need some basic editing for a podcast. Most likely, you might want to trim some parts at the beginning and end of each episode. You might also want to remove some parts in the middle if you are taking a break or going to the bathroom.
Actually, you could argue that the more you edit, the more you are losing that down-to-earth feel of a podcast. Don’t overdo editing, keep some of the “umms” and “amms,” the mistakes, and silent parts in the episode. Overediting can lead to the hosts and guests sounding robotic and boring.
How to Edit a Podcast Episode in Audacity
First, go through all the tracks and adjust the gain so that you can hear the voices of the people talking clearly and to avoid loud music in the background. You want to find a balance between the tracks so that nothing stands out as overpowering.
Simply use the “+….-“ tool next to each track to adjust the gain.
Mixing Tools

Now you want to start cutting and editing things. In the tools menu, you will find a range of mixing tools to edit your podcast. We will cover each here:
Zoom Tool
This tool lets you zoom in or out of an audio track to get a better look when editing. Zooming in can help you see all the detail in the audio of a certain part, and help you remove clipping or other unwanted noise in your podcast.
Selection Tool
With the Selection Tool, you can highlight any part of an audio track on your screen. You can cut the highlighted segment, move it, or create a new track.
Time Shift
When you want to move clips, you use the time shift tool. You select the tool and drag the audio clip into the position you want.
Envelope Tool
You can change the volume of any track by adjusting the gain. But maybe you want to adjust the volume within a track, having some parts louder or quieter than others. This is where the handy Envelope tool comes in.
When you select the envelope tool, you will see a thick border at the top and bottom of the waveform. You add points within the track to transition the audio to a certain volume smoothly.
This way, you can create fades between segments of your podcast or silence some parts.
Draw Tool
The Draw Tool enables you to remove unwanted noise from an audio track when zoomed in by smoothing out the contour of the audio samples.
Silence Tool
This is a tool not found in the tool menu, but it can be very useful. If you want to silence a certain part of a podcast, you can use the silence tool instead of cutting the track. Simply got to Edit, Remove Audio, Silence Audio.
Tip: When you edit a podcast in Audacity, speed up the playback to 1.70x-1.80x. This will save you a lot of time.
How to use Effects in Audacity
There is an array of effects you can use on audio clips to polish your podcast further. They can be very helpful when you edit a podcast in audacity. To apply effects to an Audio Track, simply go to the Effects menu and select the item you want.
For a podcast episode, there are certain effects that are more useful than others.
Compress, Amplify, Normalize
Use these effects to improve audio quality in your podcast.
Compress – The compress effect is used to reduce the audio’s dynamic range (distance between the dips and peaks). This is useful if you want to amplify the audio without clipping.
For podcasters, this can be a great tool. It makes sounds of voices loud and clear for listeners, even in noisy environments like a car or at a restaurant.
Amplify – Use the amplify effect if a certain part of the audio peaks or dips. When the track falls outside your ideal levels, you can use this effect on that specific section. Apply a positive number to offset a dip or a negative number to decrease a peak. A tip here is to only adjust the number with small increments.
Normalize – Use normalize to maximize the gain of the audio without clipping.
The fade-in and fade-out effects
The fade-in and fade-out effects create smooth transitions between segments like intros, sponsor ads, and music.
Exporting a Podcast in Audacity
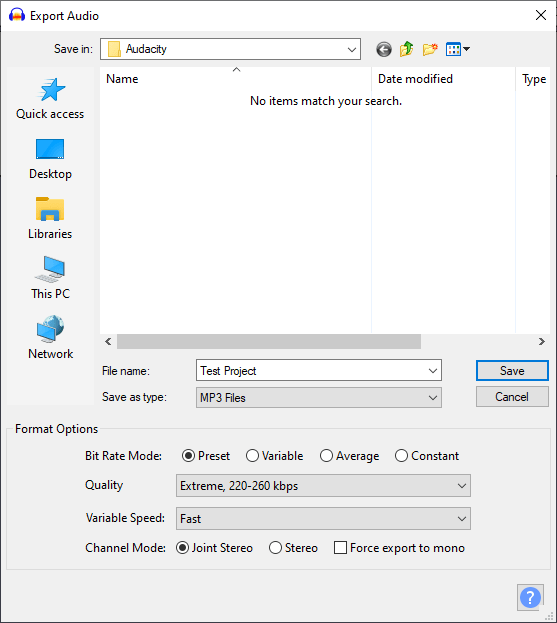
When you are done editing your podcast episode, it is time to export it. Go to File → Export → Audio.
What File Should I Export My Podcast In?
If you want the highest quality in the file, you select to export in WAV. This format is entirely uncompressed. Yet, most podcasts are listened to in mp3. Mp3 is a compressed file that does not take as much space; it is easier to stream and listen to.
You can also choose to upload the podcast file in WAV and let the podcast host compress it to mp3. Only some podcast hosts allow you to do that so check with them first.
Having said that, you should never edit in mp3 format, as you will lose quality, only export in mp3 format once your episode is finished.
Mp4 – Mp4 is expected to replace mp3 format in the near future. It is a compressed format that is smaller in size, yet better quality than mp3. Many podcast platforms now support mp4, check with yours to see if this is a supported format.
When you have selected the file you want to export in, choose extreme 220-260 kbps as the quality file.
After you press save, you will get a window where you can fill in metadata. Metadata is general info about your podcast show to your viewers; For example, the name, description, and hosts of the episode. You fill it out or choose to leave it empty. Most podcasts host handle the metadata for you.
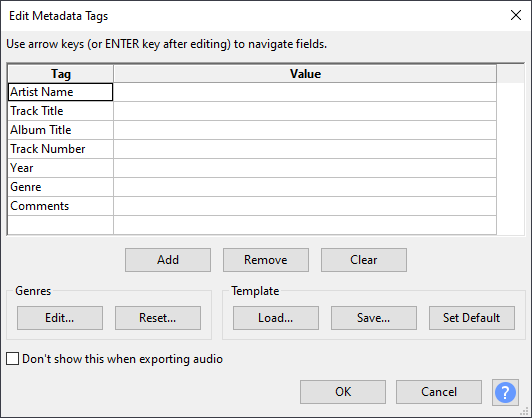
Tip: If you have used a music track in the podcast, Audacity might automatically use metadata from that file that you want to remove.
Keyboard Shortcuts
The best way to streamline the editing process in Audacity is by learning keyboard shortcuts. It will significantly speed up the mixing process. There are many shortcuts to learn, but you only need to know a few to get most of the results.
Below are the most useful shortcuts. As you advance in Audacity, make sure to start using a few.
| Command | Key |
|---|---|
| Undo | Ctrl+Z |
| Redo | Ctrl+Y |
| Cut | Ctrl+X |
| Delete | Ctrl+K |
| Copy | Ctrl+C |
| Paste | Ctrl+V |
| Duplicate | Ctrl+D |
| Play/Stop | Space |
| Loop Play | Shift+Space |
| Pause | P |
| Record | R |
| Record New Track | Shift+R |
In Conclusion
By now, you should know all the basics of how to edit a podcast in Audacity. If you need to find a guide on something specific in Audacity, check out their wiki: https://manual.audacityteam.org/index.html. This is a great place to look up words, tools, and manuals.