
Audio not working in Premiere Pro is annoying and disrupts your editing flow. After you unplug or change an audio device or a software update, this can happen. Sometimes it happens after you have made no changes whatsoever; Premiere works in mysterious ways…
If audio is not working as it should in Premiere Pro, don’t worry; We will show you how to get it fixed in no time with this simple troubleshooting guide below!
This article is divided into fixes for three common audio issues in Premiere:
- Audio Not Playing in Premiere Pro
- Premiere Pro Not Importing Audio to Sequence
- Audio Not Playing on Timeline
How to Fix Audio Not Playing in Premiere Pro
Before diving into the fixes, make sure the volume is turned up. This is pretty obvious, but Premiere has many volume controls, so it’s easy to make mistakes.
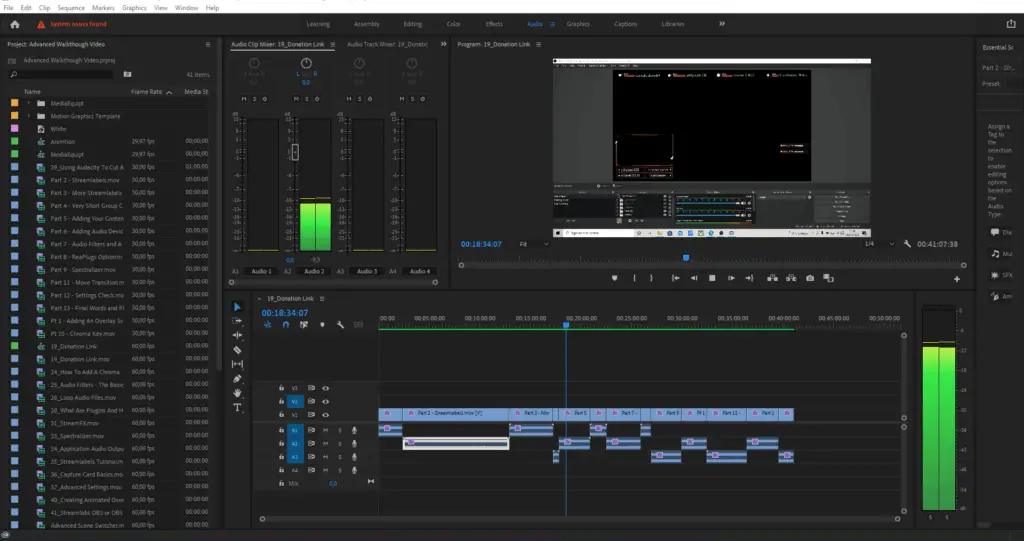
Check your computer’s master volume. And then, in Premiere, see if the audio volume meter is moving while playing a clip. It’s a green vertical bar usually on the lower right corner of your Premiere.
If you still can’t hear any audio while the volume meter is flickering (and your computer’s audio is working), you need to update some settings. Follow along below:
Method 1: Update Audio Hardware Preferences
The first and by far the most common fix is to update your audio hardware preferences. This setting lets Premiere know which audio output device you want it to use. To do this, follow this quick tutorial:
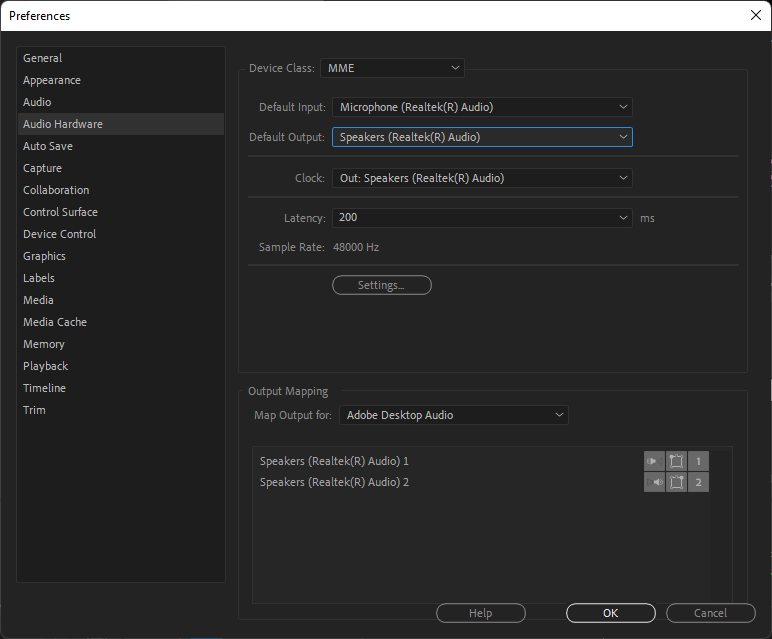
- If you are on a PC, go to ‘Edit’ and then ‘Preferences.’ (On macOS, the ‘Preferences’ option is under the ‘Premiere Pro CC’ menu.)

- In the Submenu, select ‘Audio Hardware.’
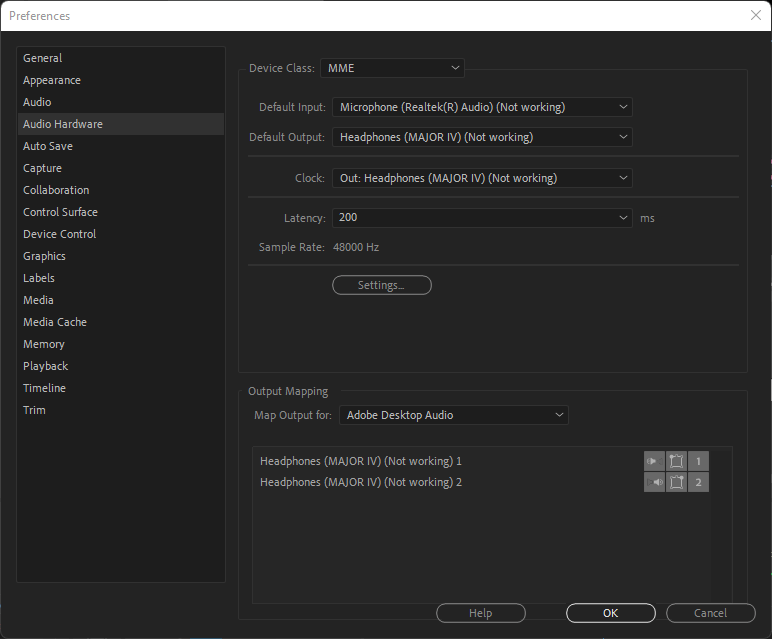
- A settings tab will appear. Make sure your ‘Device Class’ option is set to ‘MME..’ Then change the ‘Default Output Device’ to something else you think might work. Usually, Premiere will tell you which output device is not working through a parenthesis at the end of the name.
If you cannot find the audio to the device you wish to use, click instead on ‘Settings,’ and your computer’s sound setting panel will appear. Make sure that the audio playback device you want to use is enabled.
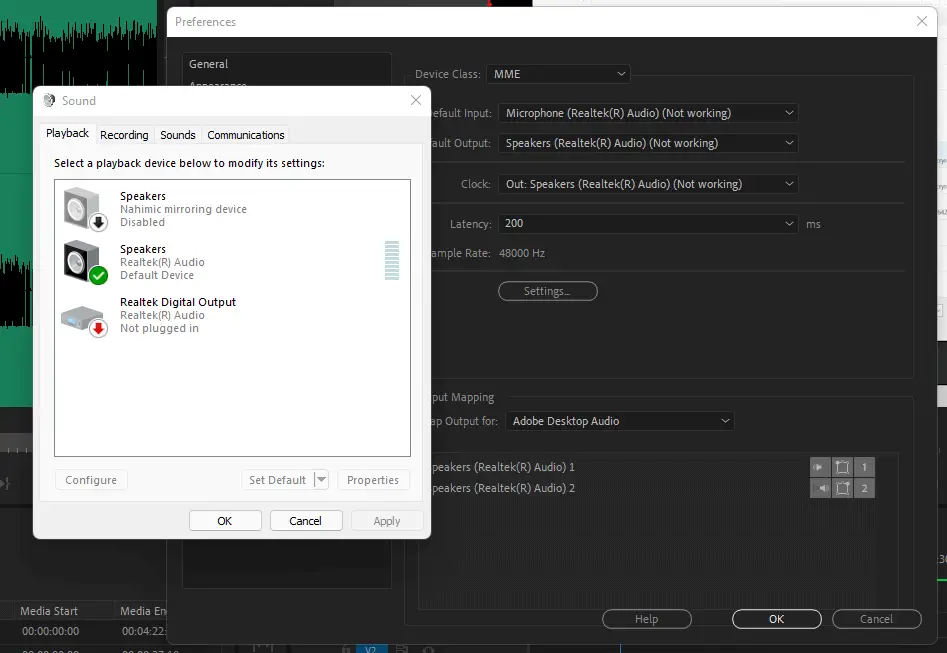
This issue often happens when you change or unplug speakers or headphones from your device. It is a quick and easy fix which is good to know.
If your audio is still now working in Premiere, continue with these troubleshooting instructions below:
Method 2: Update Playback Device Preferences
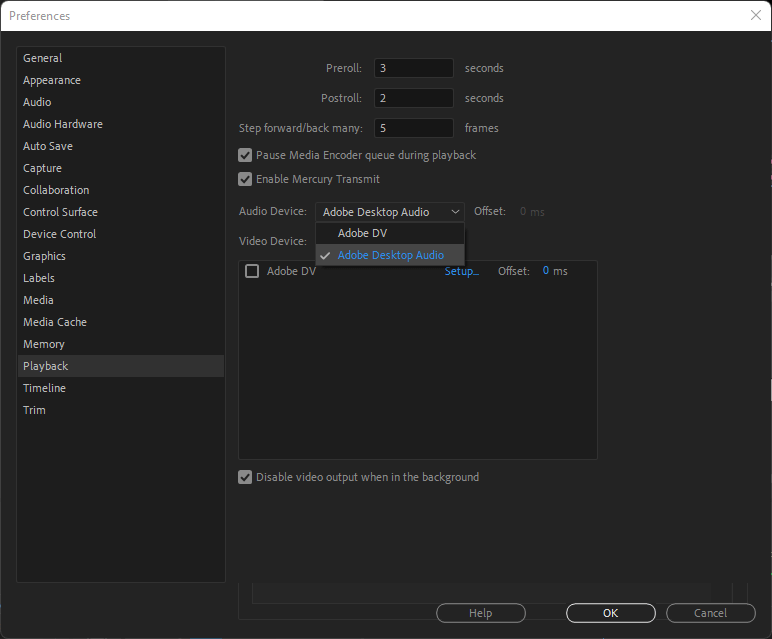
If your audio is still not working in Premiere Pro make sure you have the correct playback device settings.
- As with the step above, go to ‘Preferences.’ If you are on a PC, go to ‘Edit’ and then ‘Preferences.’ On macOS, the ‘Preferences’ menu is under the ‘Premiere Pro CC’ menu.
- This time, click on ‘Playback,’ and a tab will appear.
- Under ‘Audio Devices’, make sure it is set to ‘Adobe Desktop Audio’ in the drop-down menu. If it shows anything else, that might be the issue.
Method 3: Update Audio Drivers
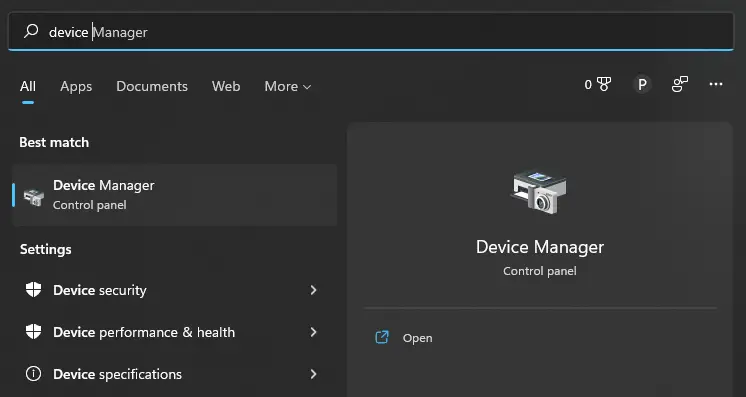
Lastly, if you are still not hearing any audio in Premiere, it might be a problem with your computer’s audio drivers. This can be fixed by updating them.
- To do this, first, go to your computer’s ‘Device Manager.’ The easiest option is to search for it in the menu.
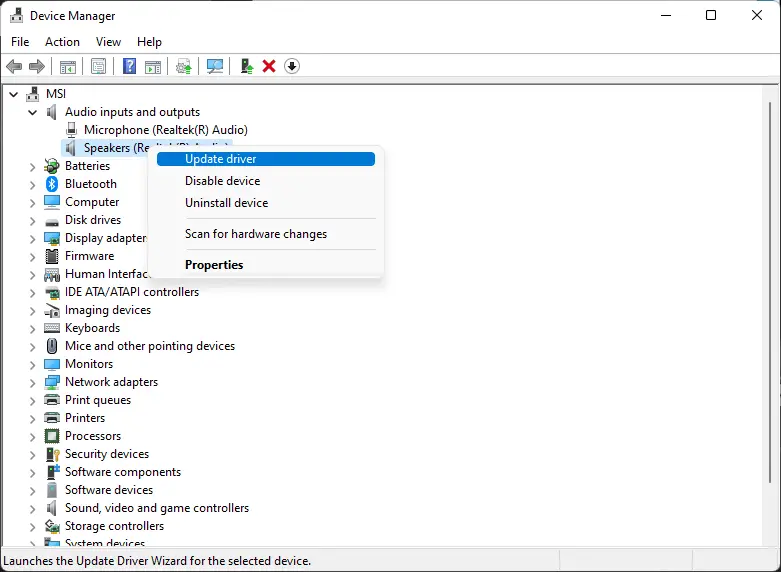
- There click on ‘Audio inputs and outputs,’ and the section should expand, showing the audio devices currently connected to your PC.
- Right-click on the audio output device you wish to use and select ‘Update driver.’
- A window will appear. Press ‘Search automatically for drivers.’ If any updates are available, they will now be automatically downloaded and installed.
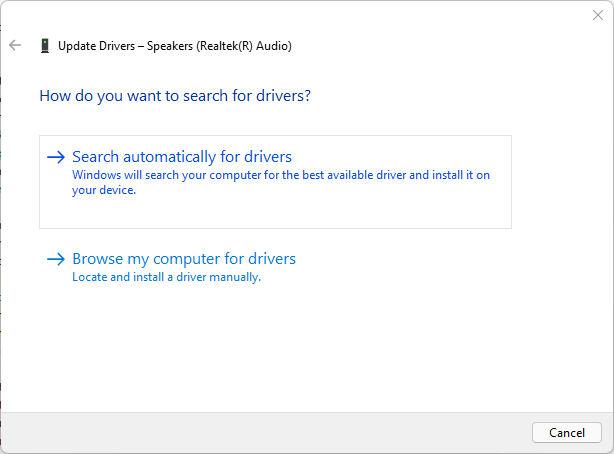
- Save your Premiere project, restart the system and see if the audio works now.
Sometimes you have to download and install drivers for your computer manually. That can usually be done through your audio devices manufacturer’s website. Read more about updating drivers here.
Method 4: Move Files form Harddrive
Lastly, the issue might be how Premiere is reading the media files. If you are still experiencing audio issues and are editing from a hard drive, there is a chance your Premiere sound is messed up due to codec-based issues. In that case, try copying your files to another hard drive.
Then, in your Premiere Project, link all the files again and see if the audio is working.
How to Fix Premiere Pro Not Importing Audio to Sequence
This is such a common problem in Premiere. Yet the fix is super simple!
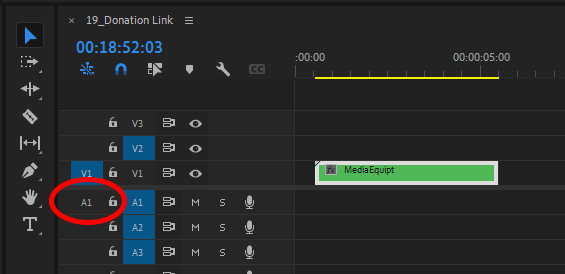
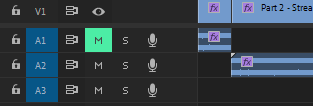
If you try dragging a clip onto your timeline but your audio clip does not appear, it is because the ‘A1’ source patching toggle is not selected. You will find the source patching toggle at the left of each track on the timeline. Once it is enabled, it turns blue. If you keep it disabled, Premiere thinks you don’t care about the audio of the clips you are importing and won’t include it.
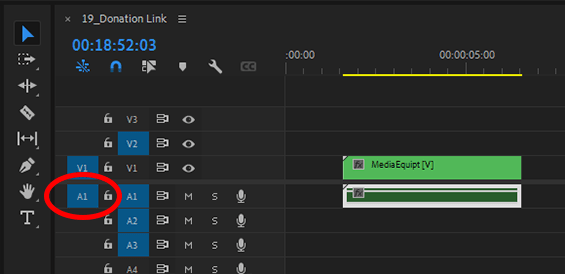
We also recommend you enable the ‘A1’ toggle to the right; this tells Premiere you want to target editing the audio and the video clips in the timeline.
How to Fix Audio Not Playing on Timeline
If the sound is missing from some clips where there should be audio and the master volume is fine, try our fixes below:
Method 1: Check for Muted/Soloed Clips
If some clips or a whole track does not have audio, check that you have not hit ‘solo’ on an audio track. In that case, you will only sound clips on that track and not others.
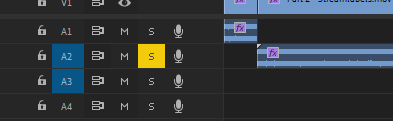
You can also enable mute on an audio track, causing you not to hear any audio from those clips at all.
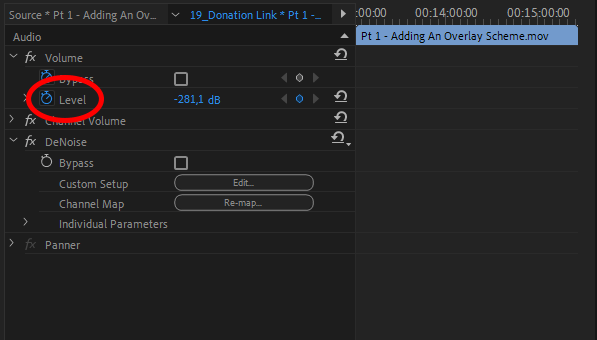
Method 2: Check Gain for Clips
You might have accidentally added a ‘gain level’ effect on the clip, effectively muting it. Go to the effects panel of a clip and check that the ‘level’ control is set to ‘0dB.’
Method 3: Restart Adobe or Move to New Project
Lastly, try restarting Premiere if you are still experiencing issues with the audio not playing in the timeline (and the levels bar is not flickering). You can also copy all of the timeline and files to a new project in case there is something wrong with the one you are currently working on.
In Conclusion
Hopefully, you resolved your audio issues and know how to fix them quickly next time.
We recommend that you do the troubleshooting steps in the order above so you don’t spend more time than you need to for an otherwise quick fix.
For more Premiere Pro tutorials and fixes from MediaEquipt, read more here.