
Streaming today is more popular than ever before. So it is only natural then, that many people are looking to improve their streaming setups and deliver the best possible content they can. A Dual PC Setup is a great way to do just that.
A Dual PC Setup can help you rise above the competition and deliver amazing streams with mouth-watering frame rates.
But how does a 2 PC setup work exactly? Why is it better, and how do you set it up? In this ultimate guide, we will answer all of your questions and show you precisely how to set up 2 PC Streaming step by step.
Single vs. Dual PC Streaming Setup
A Single PC Setup is when you record and stream on the same computer. This setup is by far the easiest, but the streaming can affect gameplay and the quality of the recording because it is so CPU intensive.
If, for example, you are streaming game-related content, you might experience some performance issues depending on the game. Some games don’t play as well while broadcasting on the same PC; unless you are using a costly multi-core system, your stream will suffer.
To solve this problem, you can use a Dual PC Setup for streaming. A dual PC Setup deals with performance issues by using two computers, spreading the resource load between them.
One computer is rendering and recording the game while the second computer encodes and streams the content.
So, to sum up, here are the pros and cons of the different setups. Consider what works best for you:
Pros & Cons with Single PC Streaming Setup
Pros
- Very easy to set up
- Inexpensive
Cons
- Higher chance of overheating
- Laggy gameplay (for some games/also depends on the PC)
- Frame rate hit
Pros & Cons with Dual PC Streaming Setup
Pros
- Able to stream with better video quality
- Less video game lag
- You don’t have to worry about overheating
- Use alt-tab without disrupting gameplay
Cons
- Considerably more expensive
- Complicated Setup
- More noise (more fans)
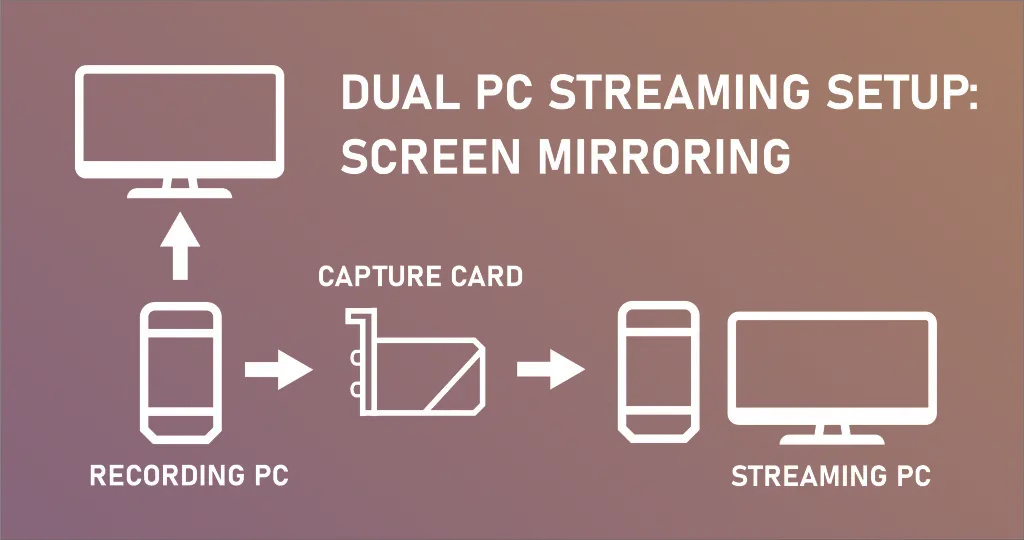
Dual PC Streaming Setup With a Capture Card
The most common way to set up a Dual PC stream is through mirroring the gaming monitor. You simply duplicate the display of your gaming PC, connecting it to the streaming PC’s capture card.
Your streaming PC is going to see your capture card as another monitor. This way, the streaming PC will get the video signal that is exactly like what you see on the screen on your recording computer.
You will need:
Two PCs – For a proper Dual PC Streaming Setup, you will need one GPU focused computer for the recording/gaming and one CPU focused PC to do the streaming/encoding.
Software – You will need streaming software to record and send the video audio live. The most common choice is the free, open-source software called OBS (or Open Broadcaster Studio). There is also Streamlabs OBS, a version more targeted toward gaming streamers.
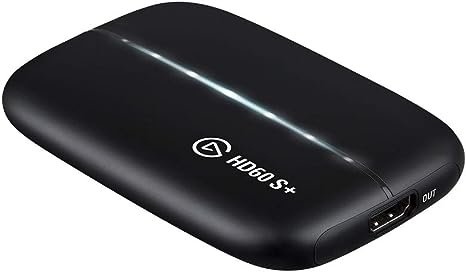
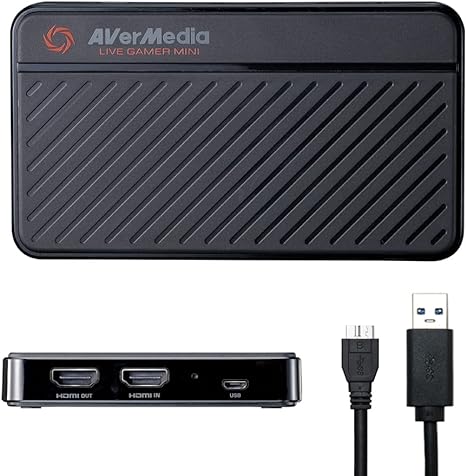
Capture Card – A capture card receives live video and audio from your screen on your recording computer and sends it to the streaming PC. There are two types of capture cards:
Internal Capture Cards – If you are using a desktop as the streaming PC, you can install an internal capture card. You simply connect the recording PC directly to the HDMI input.
External Capture Cards – External capture cards connect to the streaming rig through USB. Then you simply use an HDMI to connect it to the recording PC.
For this setup to work correctly, the capture card has to run on the same resolution as your monitor. If it is a different resolution, it won’t show your content correctly.
The best capture cards to choose from are from Elgato and AVerMedia.
HDMI 2.0(or higher) Cables
To connect the capture card and monitors, you simply use HDMI cables.
The Recording PC
If you are using the PC to record gameplay, you should focus on the Graphics Card. It is the GPU that renders the game on your screen. Generally speaking, your gaming PC should have a better GPU than your streaming computer.
The streaming PC
While one PC is rendering what you see on screen, the second computer’s task is to encode and stream the video and audio data. The core of the streaming computer should, therefore, be the CPU.
Generally, you want to use the CPU intensive x264 encoder for the best quality. This means that the CPU should be the centerpiece of a streaming PC.
Ideally, you will want a CPU with at least 6-8 cores with great raw-power and high clock speeds. Also, look for a CPU with overclocking capabilities.
A processor from Intel or AMD will do the job. Just make sure to check motherboard compatibility, upgrade paths, and more.
How to Setup Dual PC Streaming
1 – First, make sure to have the Streaming Software installed on your Streaming PC.
2 – Plug the HDMI cable from the Recording PC into the IN connection of your capture card. Connect the Capture Card to your streaming PC through USB.
(If you are using an internal capture card, install it on your streaming PC and connect it directly through HDMI.)
3 – On your Recording PC, go to Display Settings and check that the capture card is a Duplicated Display.
4 – In OBS Studio on your streaming PC, add the capture card as a source.
5 – Plug-in the Microphone and Webcam to your streaming PC, and you are all set.
You now have set up a Dual PC Stream with a Capture card.
(The Preview Method)
You might not have a capture card running the same resolution as your monitor. If this is the case, you could try a different method.
The preview method is when you are running OBS on both your recording and streaming PCs. You simply set up a preview in OBS on the recording PC. There you can change the resolutions to whatever you want, then send it to the streaming PC.
This method has some downside to it, though. Running OBS on your recording PC will take up a lot of resources. You should expect some lag, frame rate drops, and other performance issues.
Dual PC Streaming Without a Capture Card
It is possible to set up dual PC Streaming without a capture card. The reason you would want to do this could be to keep the setup as inexpensive as possible. Traditional capture cards can cost several hundred dollars, so there would be a significant advantage.
You do this by broadcasting the video from your recording PC to the streaming PC using the available network bandwidth. Utilizing your local area network, or LAN, it does not use any of the internet speed.
You will need to install two tools for this on each computer:
NDI Tools: https://ndi.tv/tools/
NDI OBS Studio Plugin: https://obsproject.com/forum/resources/obs-ndi-newtek-ndi%E2%84%A2-integration-into-obs-studio.528/
Remember, this will only work as long as the two PCs are connected to the same home network and running OBS at the same time.
How to set up the Recording PC
1 – Open OBS Studio on your Recording PC
2 Go to Tools and select NDI Output Settings
3 Check the Main Output box and name the source appropriately (ex. recording PC/Gaming PC)
4 Once you press Ok, the configuration is complete, and you can move on to the streaming PC.
How to set up the Streaming PC
1 Open OBS Studio on your Streaming PC and configure it for streaming.
2 You will be able to add the NDI Source, select the Recording PC you set up earlier.
The con with this method is that you are going to lose some image quality. Also, expect some delay between the recording PC and the streaming PC.
Dual PC streaming Audio Setup
Arguably, the most complicated part of the Dual PC Setup is the audio. It can be frustrating to fit it all together. You will need to process the audio through a mixer to be able to connect everything properly. You can do this digitally or through hardware.
Digital Mixer
Instead of a hardware mixer, you could use a software called VoiceMeeter Banana for audio processing. It is entirely free, and a popular option among streamers.
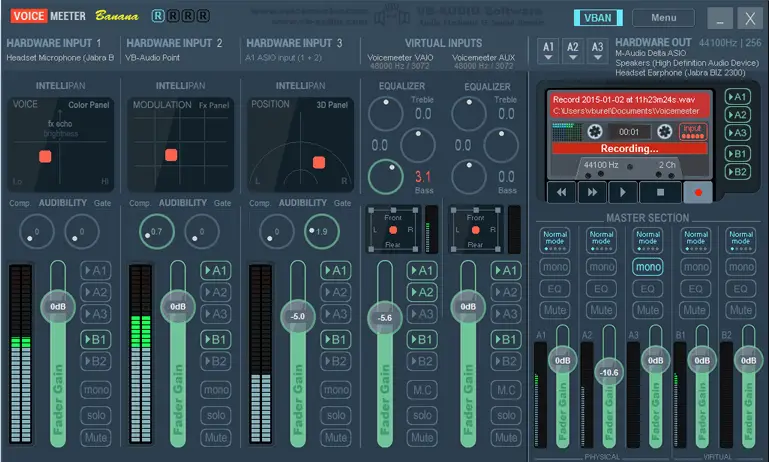
The main advantage with a digital mixer is that you save money, but also eliminate possible noise that can arrive from audio hardware.
It might look complicated when you first open the software, but it is simpler than it seems.
The key are the 3 hardware inputs and the 3 hardware outputs.
Simple Setup
Input 1 – Microphone
Output 1 – Set to your Streaming PC
Output 2 – Set to your Headphones
Output 3 – Set to your Capture Card
Tip: Make sure your Default Device for Playback is set to Voicemeeter Input.
There are more you can do with but beyond the scope of this guide.
Hardware Mixer
A hardware mixer gives you more control and more outputs. It allows you to do more complex setups, but they are more expensive.
GoXLR
An affordable option is a GoXLR mixer. Built for streaming, it allows you to properly connect all the audio to and from your recording pc, streaming pc, and headphones.
For beginners, we recommend something like GoXLR Mini. At about 300 dollars, it is affordable for most streamers. With it, you can easily connect all the components of a dual PC setup.
The standard GoXLR is a lot more expensive but comes with some added features.
Additional Resources: More about how to set up audio is beyond the scope of this tutorial, but we have found a very helpful video from Alpha Gaming that can show you how to set up Audio for 2 PC Streaming in-depth:
In Conclusion
When it comes to 2 PC Streaming, there are many solutions and tricks you can use. You just have to be creative and resourceful with what you have.
Consider your budget, what equipment you already have lying around, and what you need to deliver the best content possible. It is important to start with what you have. Remember that you can always upgrade later.
We hope you enjoyed our guide to How to Setup Dual PC Streaming if you liked this article and what more, check out our other articles on streaming like How to Become a Twitch Streamer – The Ultimate Guide, and The 10 Best Cameras for Live Streaming in 2024.