
There is a right and a wrong way to set the aspect ratio for a video in Premiere Pro.
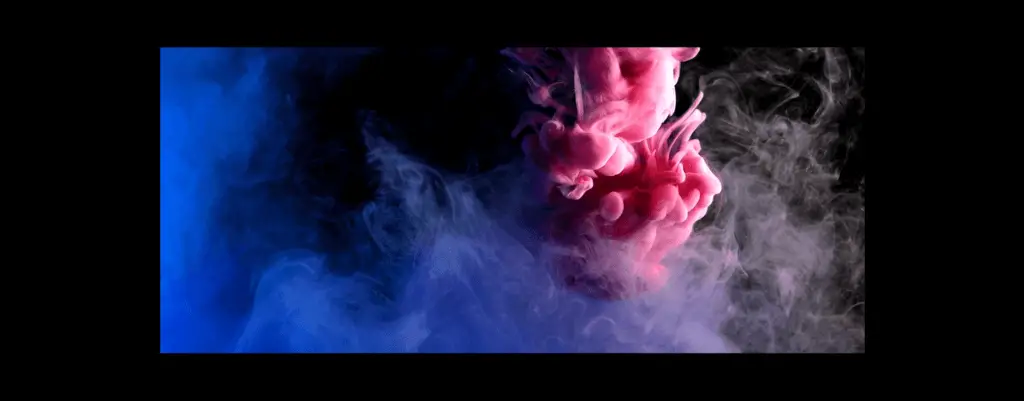
When many want a cinematic look, they add a png image of black bars to the video. But doing it that way will make the bars appear “muddy” when played on lower resolutions, and you can have additional issues with pillar boxing.
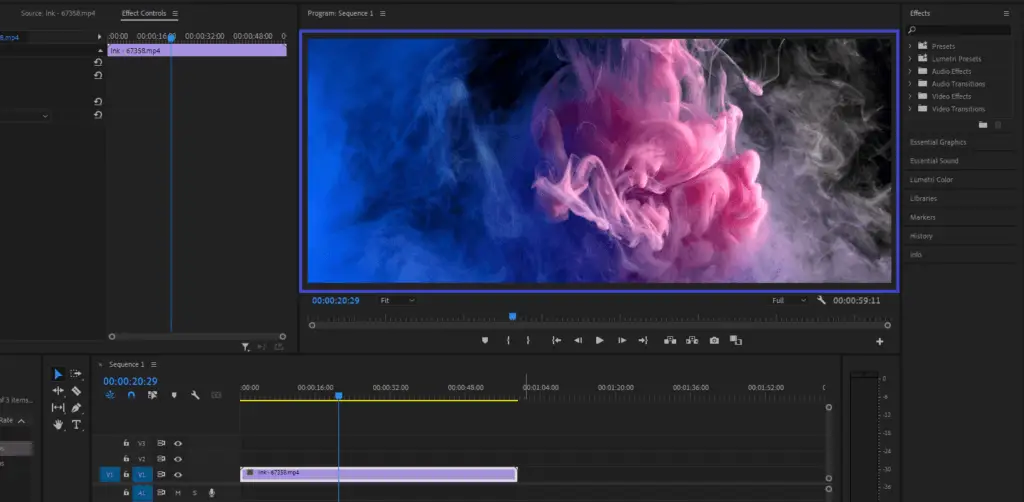
Instead, you always want to set the aspect ratio in the Premiere Pro sequence settings. This article will show you just how to do that.
What is An Aspect Ratio
Before we begin with the tutorial, it can be good to define what an aspect ratio is exactly.
In simple terms, you can think of an aspect ratio as the shape of a video or image. Some videos are wider, while others are taller. An aspect ratio is, therefore, the relationship between the width and height of a video, image, or clip.
When dropping an unedited clip in a Premiere project, the timeline will adopt its aspect ratio. Most likely, that aspect ratio will be 16:9, as that is the default format most cameras record in. 16:9 is also the aspect ratio most commonly used for TV and computer screens, making it ideal for YouTube videos and the web.
But for a more cinematic look, you should look into a 1.85:1 or 21:9 aspect ratio that gets you those “black bars” you see in films.
How Not to Set Aspect Ratio in Premiere: Adding Black Bar Images
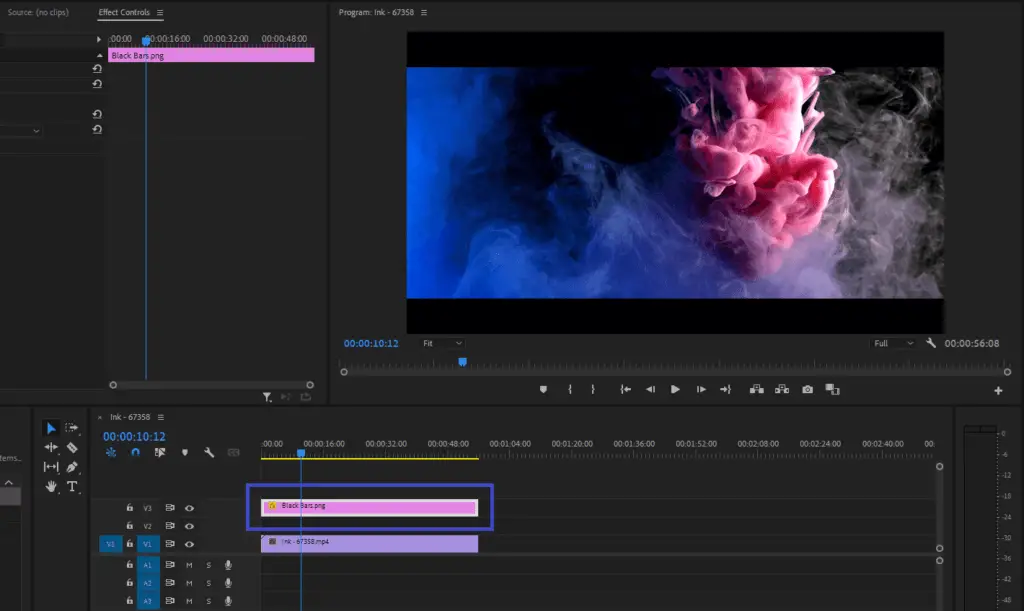
The most common mistake is adding black bars to the video through a png image over the clips in the timeline.
But adding an image over your video can be problematic, mainly for three reasons:
1) When your video is played on YouTube, Vimeo, or any other platform, the black bars will look “muddy” on lower resolutions. This is because they are actually part of the video and get distorted when compressed.
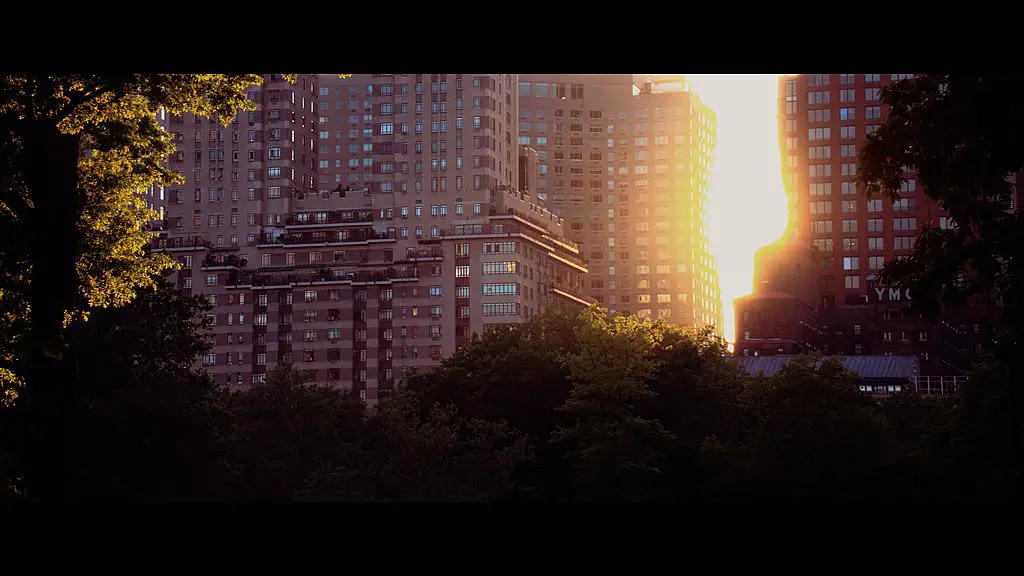
2) The black bars in the video might work fine on a 16:9 monitor, but what happens when they are played on other devices with different aspect ratios? The video will get additional bars on each side, unnecessarily enframing your film. It can end up looking like this:
3) The last reason is that it simply takes more processing power and rendering time to compose these black bars in Premiere Pro. The image is part of the video and comprises pixels that must be encoded. It’s totally unnecessary if your think about it.
To achieve the black bars, others instead crop each clip in Premiere using the effects panel. This is also a bad idea since moving your clip up and down will create weird transitions you definitely don’t want in your video.
Changing Aspect Ratio In Sequence Settings
So we have gone through what not to do. Let us now look at the right way to change the aspect ratio in Premiere.
This method is the cleanest, and you won’t have any of the problems we listed above doing it this way.
You see, each time you create a sequence in Premiere, you get a bunch of settings to choose from. If you just drop a clip in the timeline, you might not be aware of this, as Premiere will set all the settings for you.
But you can find this menu under ‘Sequence Settings.’ This is how you do it:
- Open the project file in Premiere.
- Right-click on your sequence in the project folder. Then, select ‘sequence settings‘ in the menu.
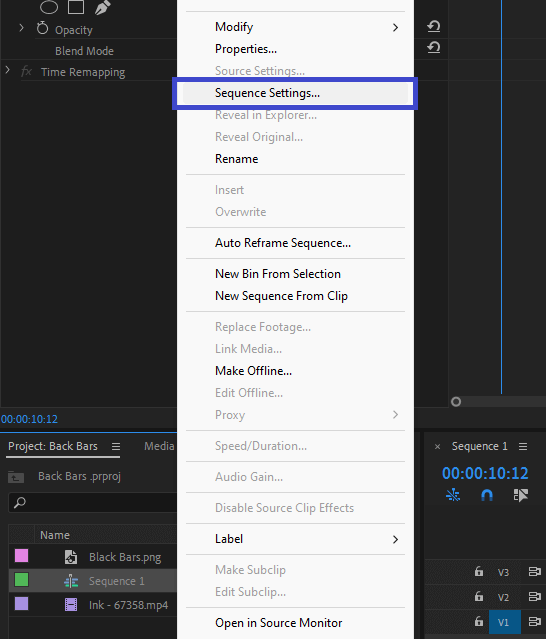
- A tab will appear with a bunch of options. But in editing mode, select ‘custom.‘
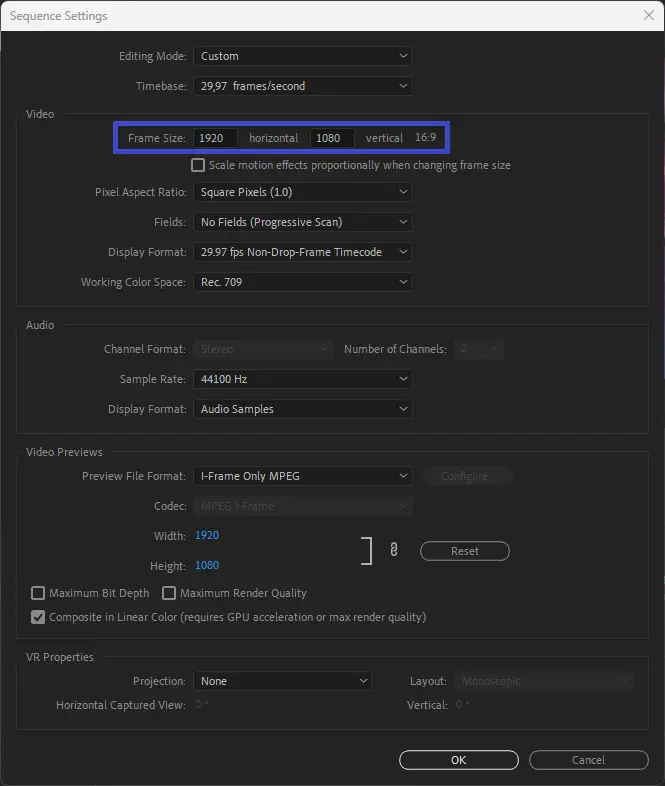
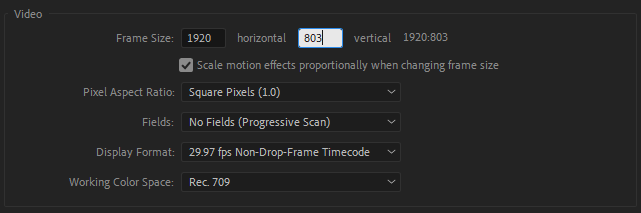
- Now, add the resolution values of the aspect ratio you choose.
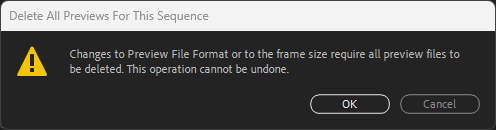
- Once you have added the desired resolution, press ‘OK.’ If you already have a clip in the timeline, Premiere will warn you that all current preview files will be deleted and that you have to do a new render after changing the aspect ratio.
- Opening your sequence in Premiere, you will see that the player has matched the aspect ratio you plugged in.
What you will want to do now is to reframe the footage appropriately to match the new aspect ratio composition. This can quickly be done using the transform tools.
Also note that if you have changed the resolution of a video, you might have to resize each clip. For example, if you have shot in 4K and wish to edit in 1080p, you will have to scale down the clip to match the new composition.
How to Find The Correct Resolution
So how do you find the correct resolution to add to achieve the aspect ratio you want?
For example, for a UHD video with a 1.85:1 aspect ratio, you will need to input 1920px for the width and 1038px for the height.
You can calculate the correct numbers yourself, but the easiest way is to use a calculator or cheat sheet like this one.
In Conclusion
To ensure your video is experienced properly, you should always edit within the actual aspect ratio rather than adding black bar images.
Now you know how to add those lovely black bars to your video!