
Many streamers want to add Spotify music to their streams on Twitch to make their content feel more alive. When confronting the question of adding Spotify music to your stream, there are two primary factors to consider: how are you going to choose music for your followers, and how are you going to show what music you’re playing on your stream.
Adding Spotify music to a Twitch stream requires using copyright-free material and software called Snip that allows you to have a “now playing” bar during your stream.
If you want to learn more about streaming on Twitch in general, check out this article as well.
Select Music
For some setups, you can use a simple speaker playing Spotify music straight into your desktop microphone. This works best if you have a microphone that is relatively high quality, where the music still sounds really natural when it’s just picked up out of the air by my mic.
Royalty-Free Music
One thing to note about Spotify Music on Twitch is that a fair amount of the music on Spotify is copyrighted, meaning that live streaming can lead to DMCA action. We recommend looking up royalty-free Twitch streaming playlists like this one.
Adding Spotify Music to a Twitch Stream
A way to make your channel feel professional is by showing what music you’re playing in the background as you stream. If you’re using Open Broadcaster Software (OBS) or Streamlabs OBS (SLOBS) for your twitch stream, which is fairly standard, there is no option built into the software that will allow you to show what Spotify music you’re playing as you’re streaming via Twitch.
Because this is the case, we need to get creative. We found that the best way to add a Spotify stream to Twitch is through Snip. Snip is a completely free, open-source software that makes adding Spotify Music to your Twitch stream effortless.
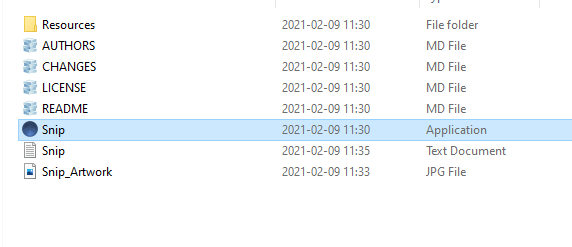
Downloading Snip
Snip is an extremely lightweight software that does the job that its name implies: it snips out the important information from your Spotify music (song title, artist, album, cover art, and year) and allows you to import that information into OBS, SLOBS, or whatever your preferred Twitch streaming software.
You can download Snip here.
Steps to Download Snip:
- Click the link above, and download the .zip file for the latest version of Snip.
- Extract the .zip contents into a familiar folder on your desktop. I recommend naming a specific folder “Snip” and extracting the contents of the .zip into that folder.
- Once you have Snip extracted, click on the icon, and the software will open.
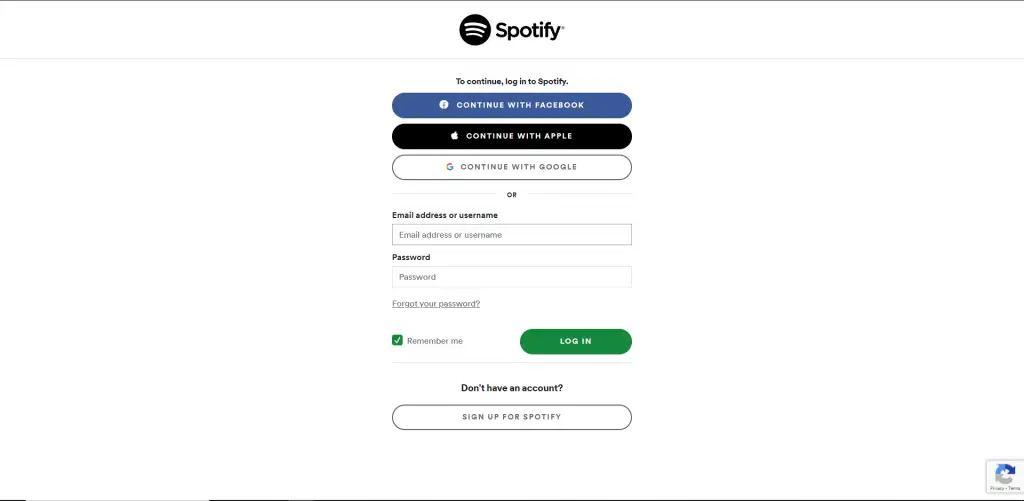
Linking Snip with Spotify
When you double click on the Snip icon, it will immediately take you to a web page asking you to log in to your Spotify. Your login details are required to connect Snip with the Spotify interface (API in tech lingo).
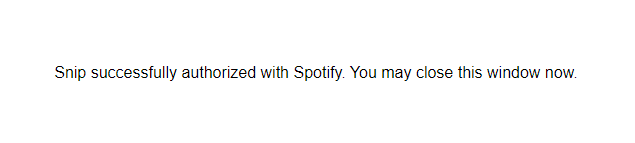
If everything is done correctly, you will see this message:
Adding “Now Playing” to OBS or Streamlabs OBS
Once you’ve linked Snip with your Spotify, a few new files should appear in your Snip folder. These files should be “Snip.txt” and “Snip_artwork.”
Steps to Add “Now Playing” Information Into Streaming Software:
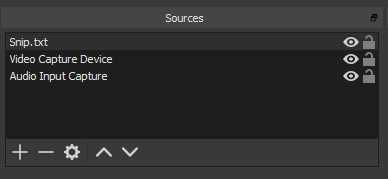
- Locate the file “Snip.txt” in your Snip folder.
- Simply drag the .txt file into your streaming software into the scene in which you want the “now playing” information to appear.
- Once you drag the text file into your software, you should be able to move the information into the area of the screen where you want your Spotify information to appear.
Customizing Font
When you import the “Snip.txt” file into your streaming software, the text will look pretty bland- some standard white Arial font with no frills.
Steps to Customizing “Now Playing” Font:
- In your streaming software, select the text file that shows your Spotify “now playing” information.
- Right-click the text source in the bottom part of your screen and select properties.
- When the window entitled “properties” opens, you will be able to fully customize your “now playing” information with all the fonts you have access to on your computer.
Scrolling “Now Playing” Text
If you want your “now playing” information to be continuously shown on your overlay in a particular area, the best way to ensure this is with a scrolling text option. This way, if your track title is especially long, you won’t cover up important visual information from your viewers.
Steps to Scroll “Now Playing” Text
- Right-click again on the text source for the “Snip.txt” file at the bottom of your screen.
- Click the option titled “filters.”
- When the “filters” window opens, click the plus sign at the bottom left and add a “scroll” filter.
- Click the checkbox titled “limit width” to keep the size of your scroll bar constant regardless of track length.
Displaying Album Artwork on Stream
If you want to display the album artwork on your stream while you’re playing music via Spotify, open the Snip software and right-click the Snip icon on the toolbar. Be sure to click the option “show album artwork.” Beneath this option, you can set the size of the album artwork, choosing between small, medium, and large.
In Conclusion
You want your Twitch stream to feel like a safe haven for your viewers: it should be a respite from the world of responsibility and duty. A good Twitch stream feels like you’re hanging out at your coolest friend’s house, but it also tends to look and sound good. High-quality mics, good music, and a professional look like a “now-playing” scroll bar can push your Twitch stream to the next level.
Remember that when considering how to add Spotify music to a Twitch stream, you need to be extremely careful about the music you choose. If you choose copyrighted music and stream it for a large enough audience, you might get shut down. Review the DMCA guidelines before streaming, work on the look and feel of your channel, and above all, keep streaming!