
Understanding your camera and its features can help you make better videos. To get the most out of any camera, you need to understand its essential features and functions. Our guide dives deep into this subject so you can become an expert with a bit of practice.
Resolution and Compression
Resolution
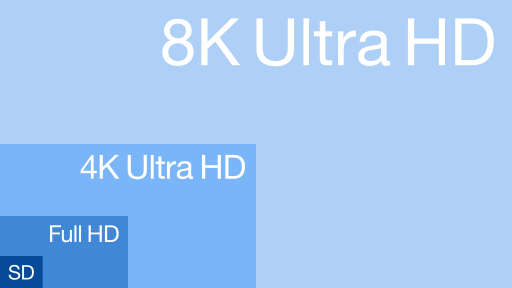
Resolution refers to the sharpness or detail of the image. We measure resolution by the number of pixels in an image. The more pixels, the higher the resolution is.
Compression
Compression is the prosses of shrinking the file size of the image or video. It saves you storage on an SDcard or harddrive. The downside is, though, that compressed video or images lose some of the clarity and quality of an uncompressed image.
Understanding your camera’s resolution and compression setting is crucial when you want good video quality. As a rule of thumb, a larger resolution with low compression produces the best video quality. The downside is that it requires more space in the SDcard or harddrive.
Exporting Settings
You can find your cameras export setting in the main menu. From there, you can adjust the resolution and compression of the video. 1080p resolution is considered a standard with 4k growing in popularity.
Higher-end cameras usually offer RAW export settings. When video exports in RAW format, it is unprocessed. This gives you finer control when tweaking the video later in post-production. Keep in mind though that RAW files are huge at require a lot of space on a drive.
If you have a lot of storage, it is always best to go with the best quality and then compress the finished video for youtube.
Understanding your Viewfinder
A viewfinder displays the image you are about to take on a camera. It gives you a general idea of what scene you want to capture. We often take the viewfinder for granted, but once you understand all its features and uses, you can shoot better videos.
Most modern cameras today have two viewfinders: an optical viewfinder and a digital viewfinder.
Optical Viewfinder
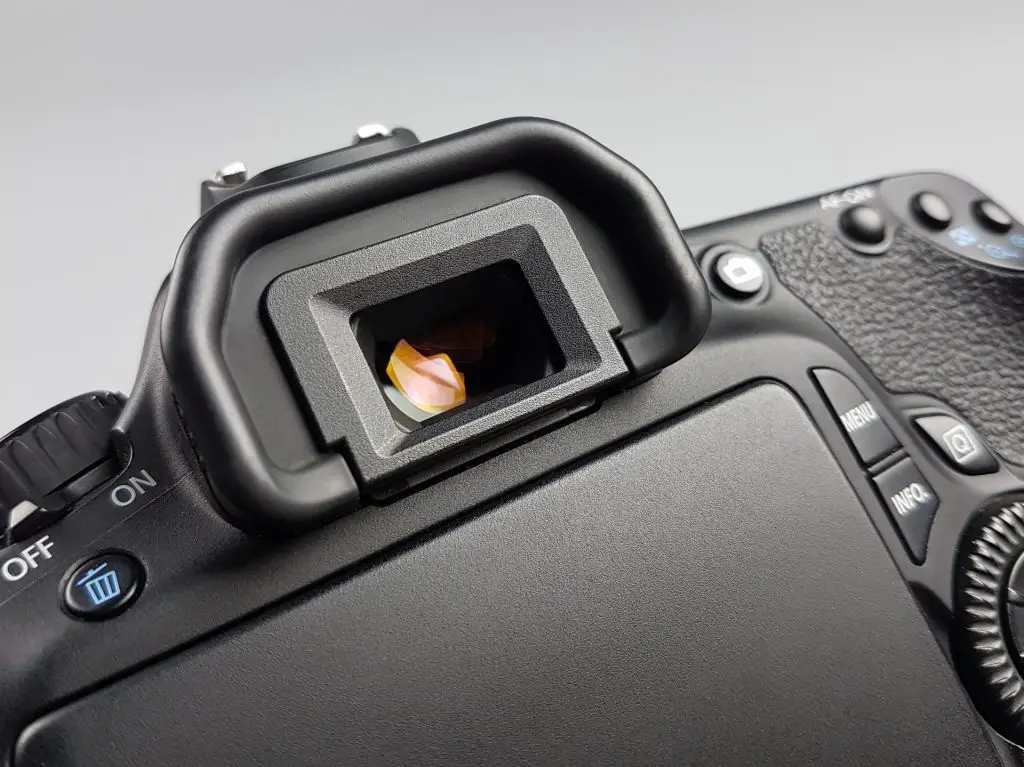
An optical viewfinder (also called OVF) sees what the lens sees. You find them in all DSLR cameras. One con with using the optical viewfinder to frame images is the parallax error. Because the viewfinder is located slightly above the lens, it sees the image from a different angle. If you are looking through the optical viewfinder, the image is slightly distorted, and not the same as the image end up looking.
Digital Viewfinder
Also called an electronic viewfinder or EVF, a digital viewfinder does not show you what the lens sees. Instead, it shows you what the camera sensor sees. This means you are looking at an image once the camera has processed it. What you see through a digital viewfinder is what you get on your final image adjusted for exposure, aperture, and shutter speed. Almost all DSLR’sDSLR’s and camcorders have digital viewfinders.
Framing Grid and composition
Most cameras come with the option to place grid lines onto the viewfinder. Framing grids are a powerful tool that can help you shoot more aesthetically pleasing videos. Framing grids are used to ensure horizons are straight and that subjects are spaced out evenly throughout the frame. It gives structure and order to the image.

3×3 grid – is the most commonly used. Also called the rule of thirds grid, it divides the image into 3×3 blocks. Placing your subjects upon the grid lines or where they intersect should theoretically create a more esthetic image.
4×4 grid – This is called the square grid. It divides the image into 4×4 blocks. The 4×4 grid gives you more lines and intersections to work with.
What is Frame Rate?
All video has a specific frame rate. You can think of video as being made up of several images moving rapidly to create the illusion of a moving image. Frame rate is the speed at which those images are shown.
Frame rate is expressed in frames per second or FPS. You can set the frame rate in your camera settings. What frame rate you choose depends on how you want the video to appear.
24 FPS – The most common frame rate used in movies, vlogs, and most videos. This frame rate is most similar to how we see the world.
60 FPS – When recording video with much action, like sports or video games, you want a higher frame rate than 24 FPS. 60 FPS allows you to capture the action more clearly. It can also allow you to slow down a video in post without breaking the illusion of a moving image.
There are more framerates we don’t cover in this guide. But the two above are the most common ones and all you need to know to get started.
The Exposure Triangle
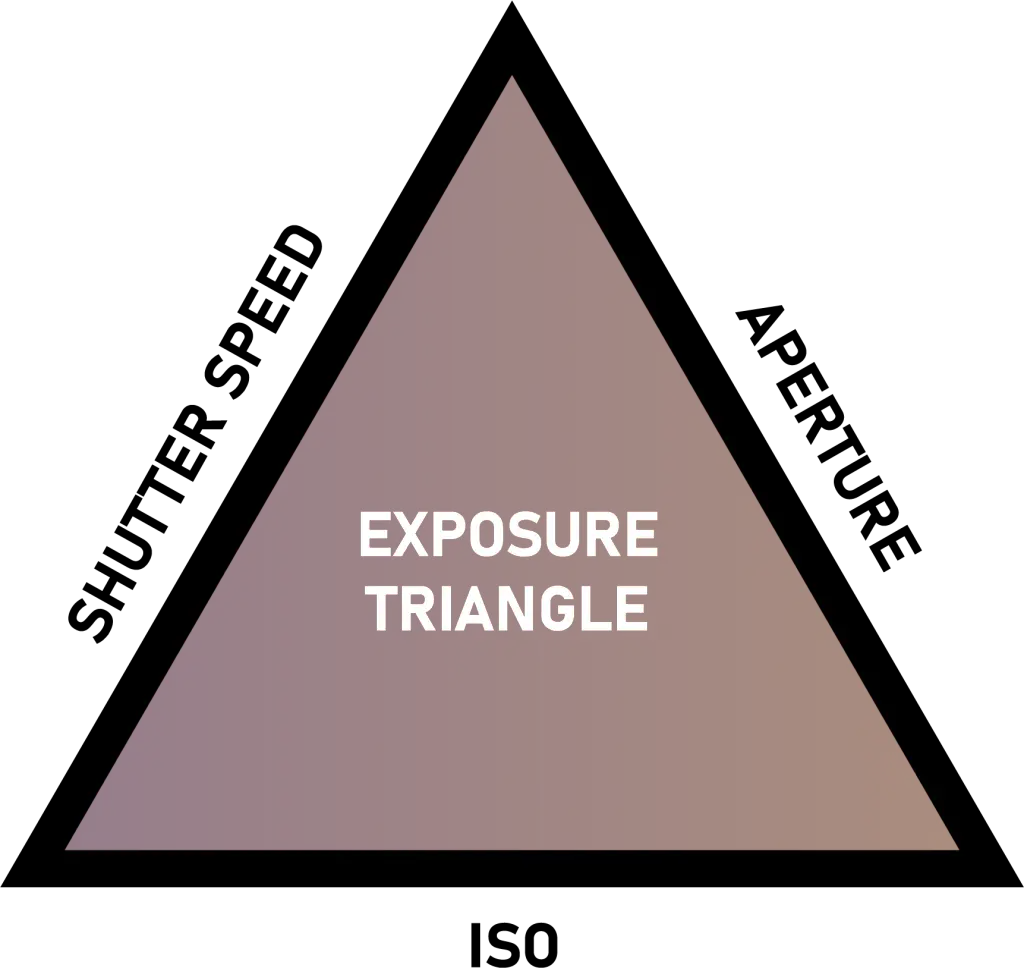
In cinematography and photography, one of the most important fundamentals is the exposure triangle; ISO, Aperture, and Shutter Speed.
All three components control different aspects of an image, but together they also affect exposure; that’s why they are called the exposure triangle.
Understanding these settings helps you record better video and enhances production value for your vlogs. Here, we cover all the components and how they relate to one another.
ISO
ISO lets you adjust how sensitive the camera sensor is to light. This affects the exposure of the image; in other words, how bright or dark an image appears.

ISO is represented by a number. A lower number (ex. 100 – 400) means the camera is less sensitive to light while a higher number (ex. 800 -) is more sensitive to light, making the image appear brighter.
An important thing to note when shooting video in low light conditions is that a higher ISO leads to lower video quality. So when shooting video, you generally never want to compromise quality. Stick with a lower ISO in a well light environment to get the best results.
Aperture
In a camera, the aperture is the amount of light the camera lets in. Aperture controls the depth of field. Put very simply; It controls how blurry or sharp a picture appears.
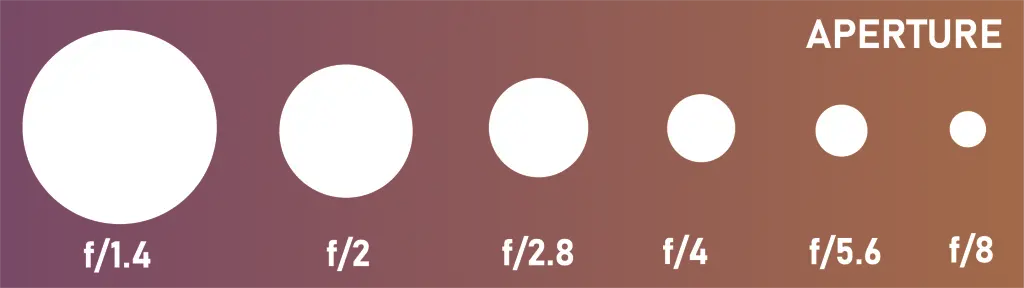
By adjusting your aperture, you can make your subject stand out by blurring the background or have everything appear crystal clear. A “shallow” depth of field is when the subject is clear while the background is entirely out of focus. A “deep” depth of field is when both the foreground and background are in focus and appear sharp.
Aperture is expressed in terms of an f-stop value. A higher f-stop number means that less light passes through the lens.
Aperture also affects the exposure of the image.
Aperture Priority Mode Is when your camera lets you control aperture manually while it takes charge of the shutter speed.
Shutter Speed
Shutter speed lets you adjust motion blur; how blurry an object in motion appears.
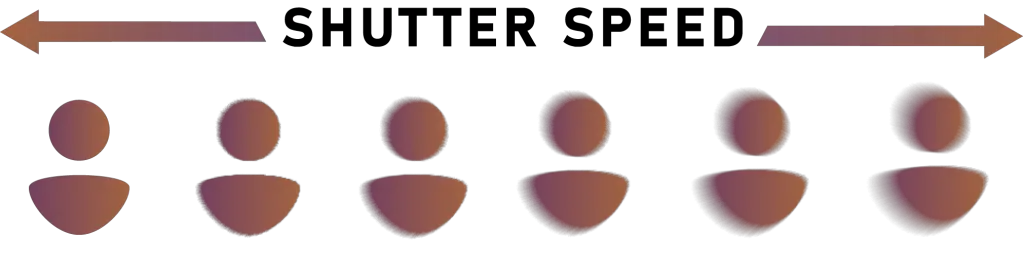
In photography, for example, very short shutter speed is used to freeze moving subjects in sports events. On the other hand, very long shutter speeds blur moving subjects. How you use it depends on how you want your shot to appear.
Shutter speeds are measured in fractions of a second. In videography, you should aim for a shutter speed that is double the frame rate you are shooting at. If you are shooting at 25fps (the most common framerate), your shutter speed should be at 1/50 of a second.
Finally, shutter speed also affects exposure. Using a long shutter speed allows a lot of light to hit the sensor, making the image brighter. Shorter shutter speeds will result in a darker image.
What is White Balance?
Unlike our eyes, that can adjust to changing lighting conditions in an instant; a camera has to be told what it looks at. Because of this, unrealistic color casts can occur in an image.
The process of removing discoloration from an image is called white balance. Most cameras have auto white balance, but it is also possible to adjust it manually.
Most cameras offer automatic white balance. Although very useful, sometimes you need more control. Most DSLR’s have a preset to match different lighting conditions such as tungsten, fluorescent, sunny or cloudy. They are easy and quick to use.
Manual white balance is available in DSLRs and most compact cameras. This setting allows you to set your white balance by pointing the camera at a white wall or paper as a reference. By doing this, you show the camera what white should look like.
In Conclusion
The information above should help you shoot better and more exciting videos as well as getting the most out of your camera. Keep in mind that it doesn’t matter what camera or budget you have; most of these settings can be found on a smartphone, be creative!
If you found this guide useful, and want to improve your videos, we invite you to check out the Lighting for Youtube Videos Guide.