
If you think your videos look like a mess, you might be quick to blame your camera or lens. But before you spend more money on expensive gear, you might want to check if you are lighting your shots correctly. This is not hard to do. Here we cover all the basics for lighting youtube videos, the equipment you need, and a simple lighting technique that can make you look 10x better on camera!
Basics of Lighting for Videos
To be able to light a vlog or video correctly, you first need to understand the basics of cinematography and what tools are available to you.
ISO

HuttyMcphoo / CC BY-SA (http://creativecommons.org/licenses/by-sa/3.0/)
If you are shooting a video in low light conditions, there is a good chance that video quality is terrible, even if the resolution is great. This is due to the amount of light that hits the camera sensor. The less light your camera gets, the more sensitive the sensor needs to be towards the light, causing the image to appear grainy as a side effect. How sensitive the camera is to light is called ISO. The higher the ISO, the more sensitive the camera is, and the grainier the video appears.
An easy thing you can do right away to improve the quality of your video is to make sure the shot is well lit. But why just stop there, in this article you will learn how to make your videos appear like they were shot in a studio.
Soft vs. Hard Light
Soft Light
Soft Lights cast diffuse shadows with smooth edges. These soft shadows make them great for lighting your face, making it appear more flattering and making wrinkles less visible.
Hard Light
These types of lights, as the name suggests, cast hard shadows, giving a more dramatic feel.
Light temperature and White Balance
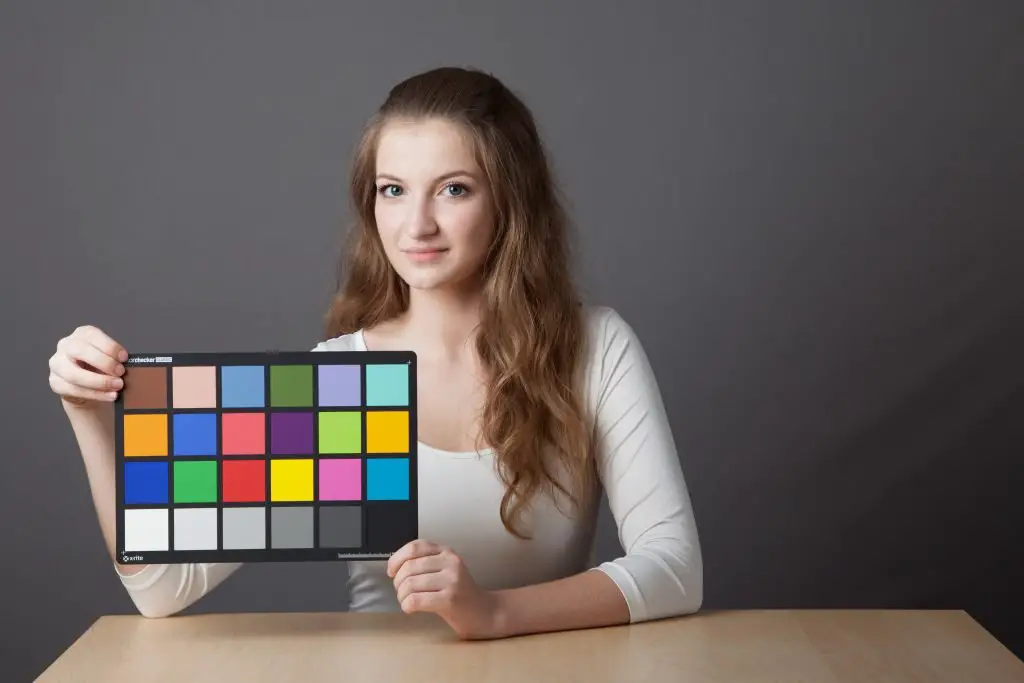
Netural Light
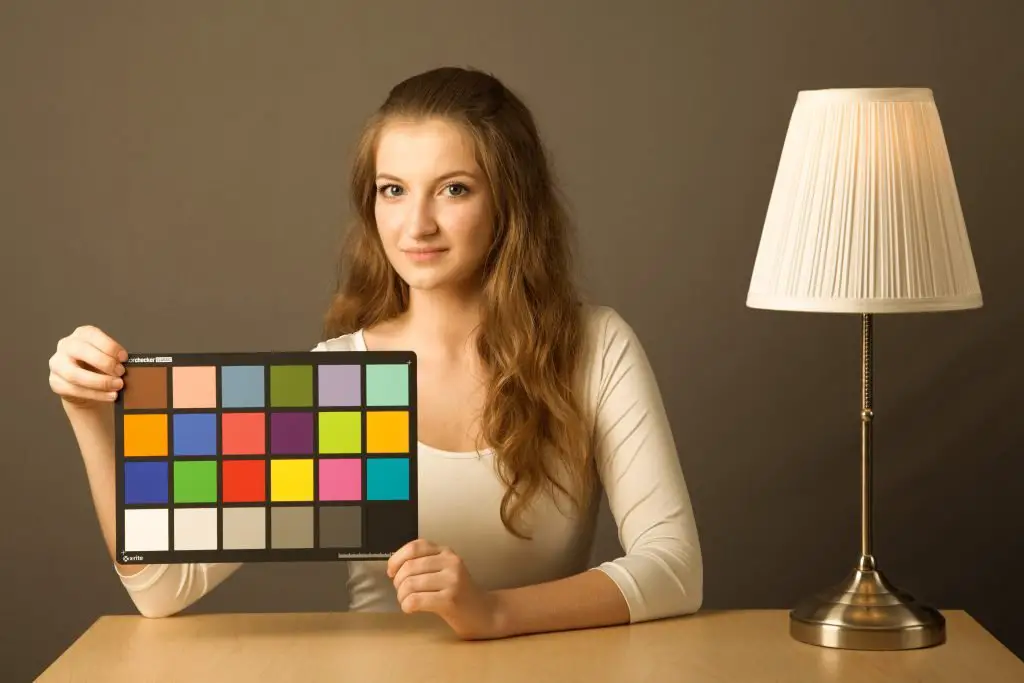
Tungsten Light
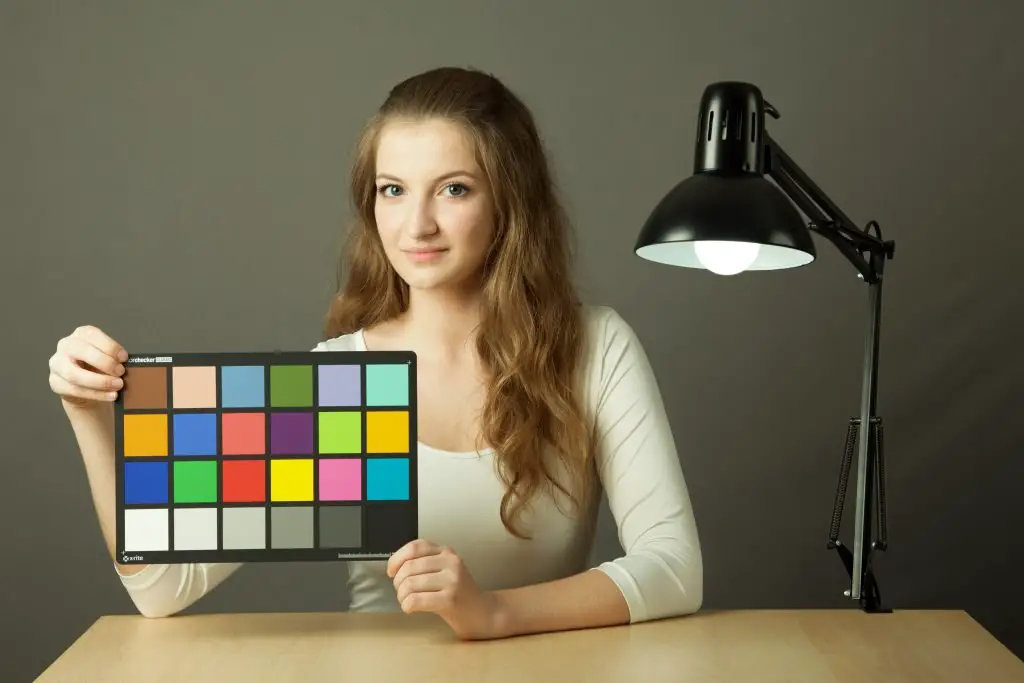
Fluorecent Light
Attribution: Alex1ruff / CC BY-SA (https://creativecommons.org/licenses/by-sa/4.0)
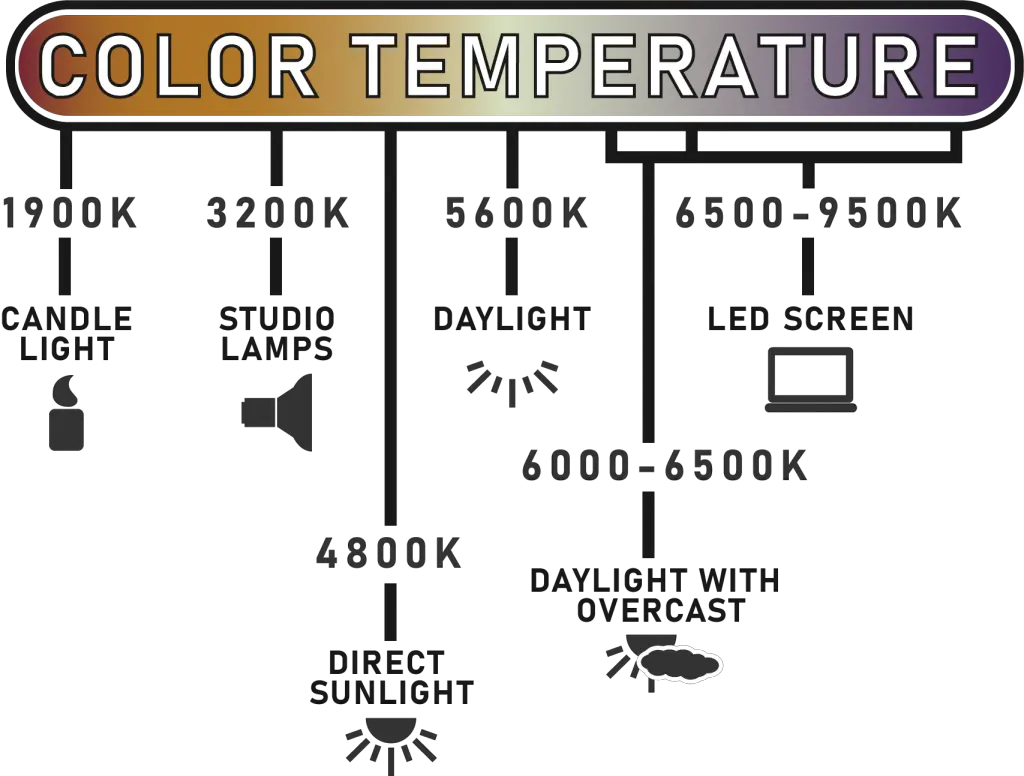
Light can appear cooler or warmer on camera. Cool fluorescent light is what you would find in a garage or doctor’s office. While Warm tungsten light is what you would commonly find in a living room setting. The color of the light depends on the temperature, as shown below:
White Balance:

While our eyes can seamlessly adapt to the changing of light colors, our cameras need to be told what they are looking at to work correctly. White Balance is the process of adjusting the color balance so that white objects appear “white.” If the color balance is off, white objects might get a colored hue on camera, something we don’t usually want.
To make sure your shot is color balanced correctly, there are a few settings on your camera to be aware of:
Auto White Balance (AWB) – Most cameras have automatic white balance. But more complex shots might need custom settings sometimes.
You can also manually choose what the camera is looking at.
| Most common lighting presets: |
| Tungsten preset — measured at 3200K |
| Fluorescent preset — measured at 4300K |
| Daylight preset — measured at 5600K |
When lighting a vlog or a film, the most common light used is a neutral white light (“Daylight” at 5600K).
Tip: Avoid mixing light colors, as it often causes problems, that is unless you want to do it for creative purposes.
Lighting Equipment for Vlogs
Softbox Lights:
A softbox diffuses the light into a more soft, even light. It emulates the kind of light you would get naturally from a window. These lights are great for indoor stationary vlogging, like reviews or unboxings. Softboxes come in all kinds of shapes and sizes, and it might also take some time to set them up correctly.
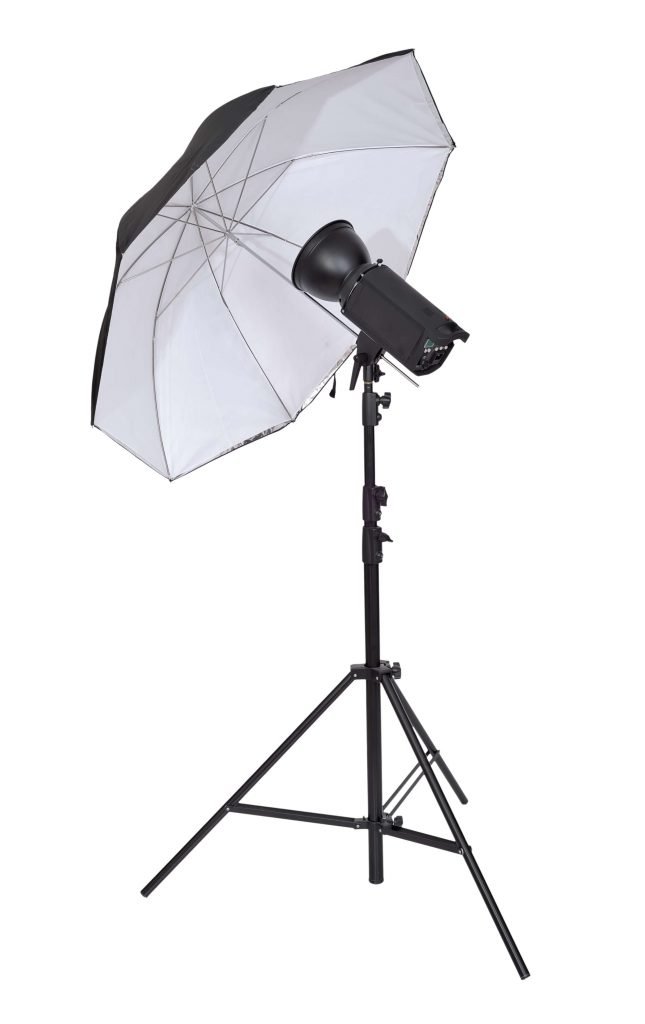
Umbrellas:
Like a softbox, umbrellas also create the soft natural lighting we desire. But unlike softboxes, which provide more directional light, umbrellas create a more spread out and undirectional light. Which looks more natural. They are also cheaper and more portable than most softboxes. Making them easier to use.
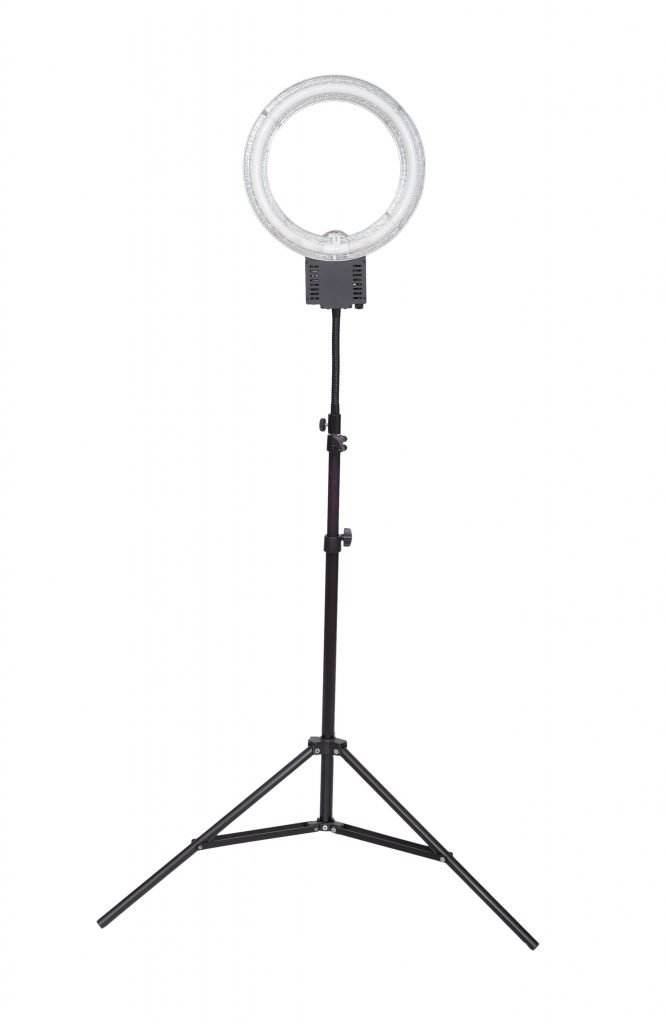
Ring Lights:
Commonly used for beauty and makeup channels, ring lights are great for making your face appear more flattering. They distribute soft light evenly from all sides for both close-up and macro subjects.
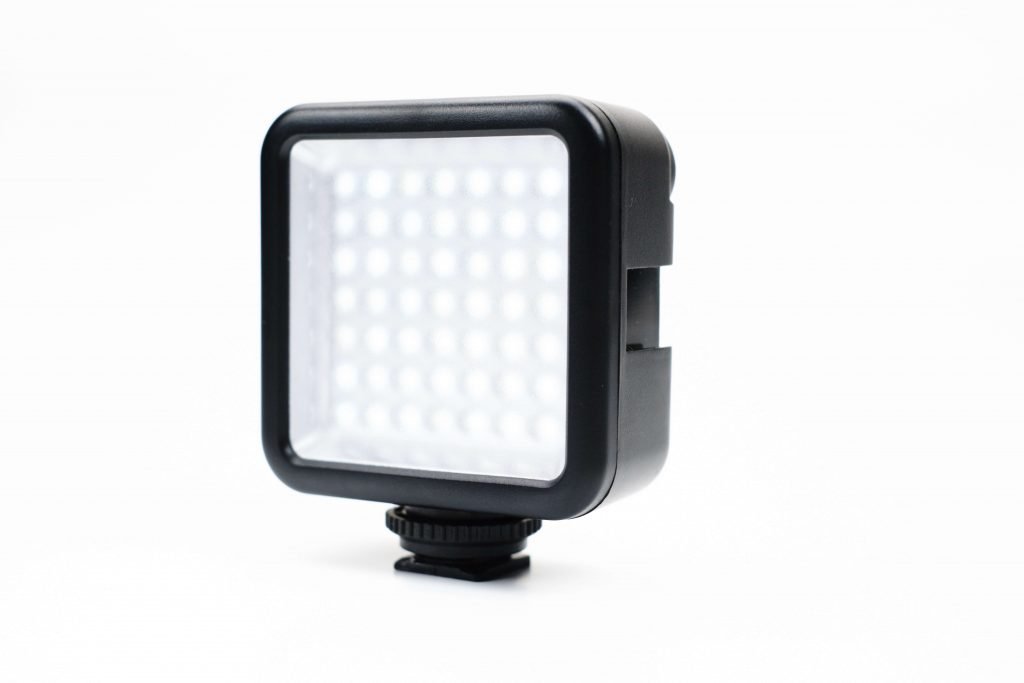
LED Lights (portable):
This light source has become very popular with videographers and vloggers. You can easily mount it on a camera. And since they are battery-powered and portable, they are great for travel vlogging.
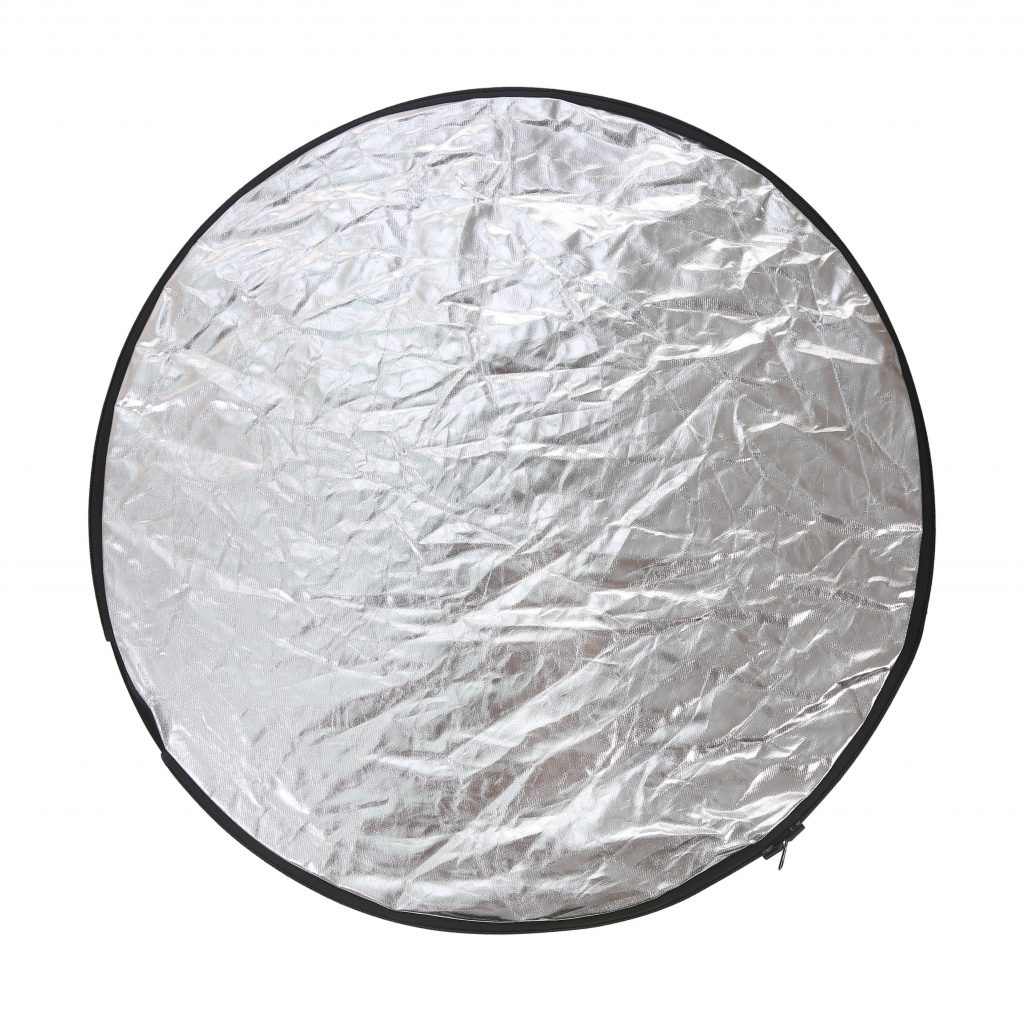
Light Reflector:
A light reflector redirects existing light through reflection. Since light reflectors don’t create light themselves, their primary purpose is to fix shadows. We will go over how they can be used for vlogs and light setups later. A light reflector can be handy when shooting a video outside.
The Best Lighting Setup for Youtube
The most widely used lighting setup for vlogs and youtube videos is something called the three-point lighting setup. It is easy and quick to set up. It can be done without expensive equipment and bumps up the quality of your content significantly.
Three-point lighting Setup
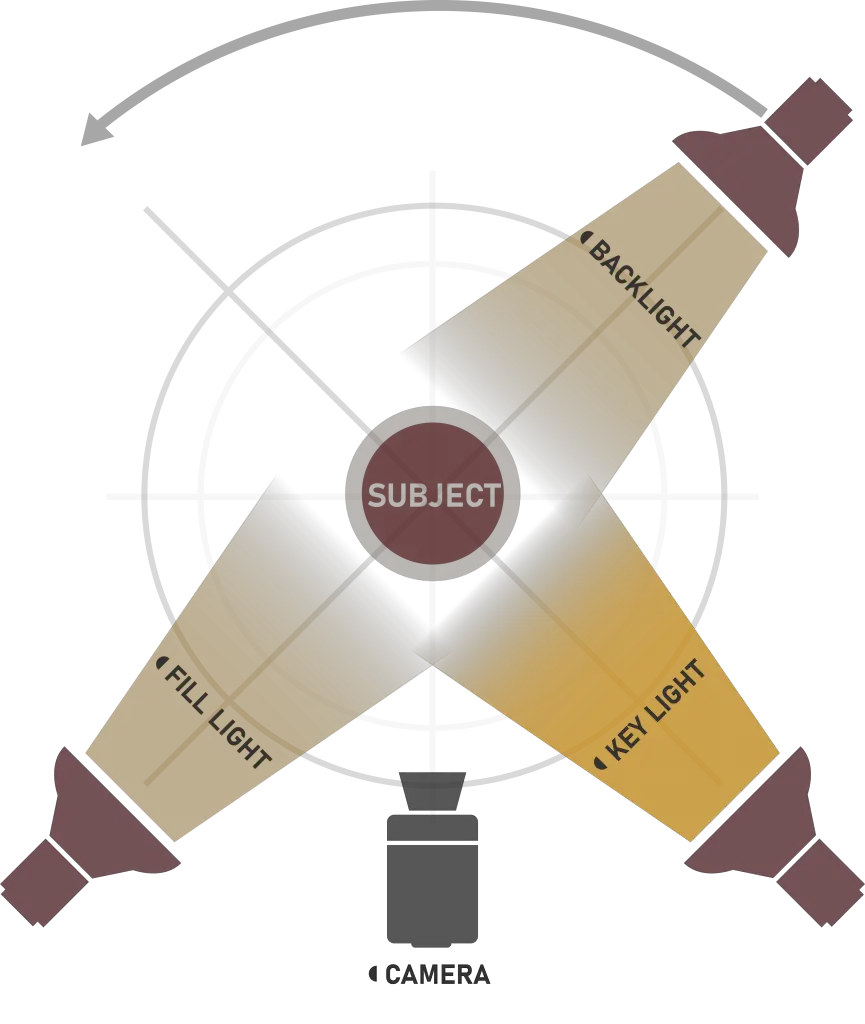
Key Light: The key light is the primary light source on the subject. It should be the brightest of the three lights. It shines directly on the subject, either from the front right or front left.
Tip: Always start with the key light first and work from there as it establishes the initial look and feel of the shot.
Fill Light: The fill light eliminates any shadows produced from the key light. It should be less intense than the key light.
Backlight: The backlight, also known as the rim or hair light, separates the subject from the background. It should make the subject “pop,” making the video appear more cinematic. Place the lamp above and behind the subject, but make sure it to hide it from the shot.
Tip I: Don’t point the backlight at the camera unless you want lens flares on the video.
Tip II: If you happen to wear glasses, you might come across a problem. There can be unwanted glare reflected on the glass. You can fix this by raising the light higher on their stands.
Natural Outdoor Lighting Setup

When used correctly, natural sunlight alone can be all you need to light a shot. Keep in mind, though, that during the day, sunlight changes. During a bright clear day, you might get some hard shadows. On the other hand, you can get a softer, diffused light during an overcast or when the sun is setting. With the use of light reflectors, you can create something similar to a three-point setup using only natural sunlight.
The Golden Hour:
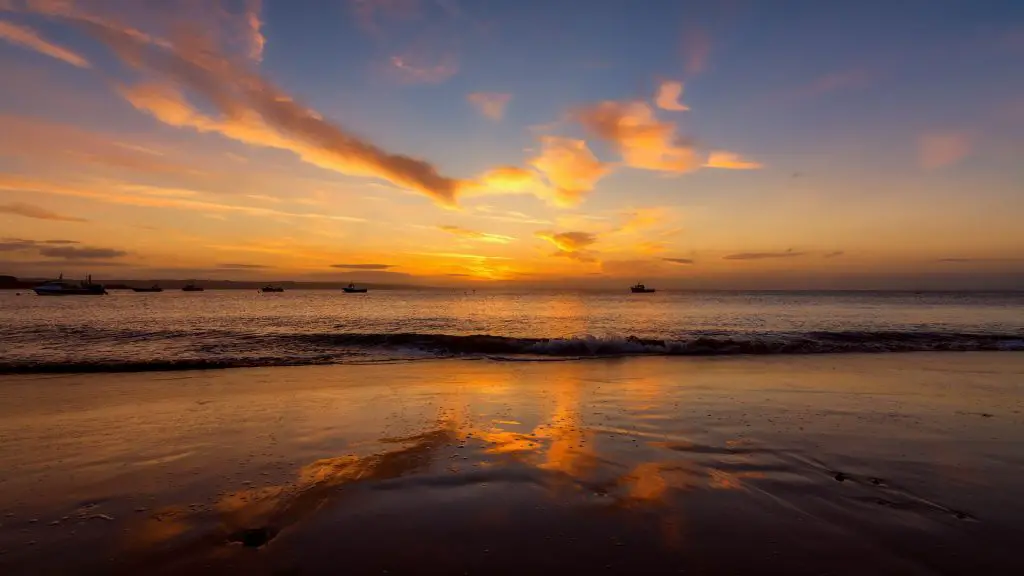
The Golden hour is a short period of the day, either right before sunrise or sunset. During this brief period, the light appears warmer in color. Because of the low angle of the sun, soft light is produced by casting longer shadows. These features of the Golden Hour create some excellent lighting conditions for a video shoot.
DIY Three-Point Lighting Setup
Once you understand the basics of three-point lighting, you don’t need expensive gear to create something that looks good on camera. You can emulate the same effect using a window or lamps found at home. It might take some more work, but we got you covered.
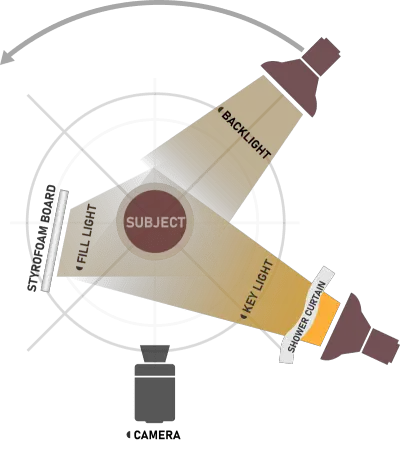
DIY Key Light:
As stated earlier, the key light needs to be the brightest. Many different lamps would work. Take a look around your home to find something that is not too “warm” nor too “cold” in color. Also, the key light works best if it is a soft light to avoid any hard shadows.
Instead of a softbox, you could use a white china ball or a cut-up shower curtain. It dims the light and creates softer, more elegant shadows.
DIY Fill Light:
On the opposite side of the Key Light, you can either use a window or a styrofoam board for the fill light. The styrofoam board makes the key light bounce back on your subject form the opposite side. It might look something like this:
If you have a window, try to take advantage of the natural light you get during the day. It could work well as a fill light.
DIY Backlight:
For the backlight, almost any light can work. Here we don’t have to worry about shadows, so there is no need for a diffuser.
The One Light Setup
If you are on a tight budget or don’t have much room, multiple lights might not be ideal. Instead, you could just use one ring light. Since the light is shaped like a ring, it can light up your face evenly without the use of multiple light sources. The camera is placed in the middle of the ring, so this setup does not require much space.
In Conclusion
To get great results, take what you learned in this article and apply it right away. Through trial and error, you find what works for you and what doesn’t. Think of the setups mentioned here more as guidelines rather than strict rules. There is really not a right or wrong way to light a youtube video.
Also, since you are here, you might also like our Ultimate Guide for Starting a Vlog.